Wyvernfell is a parameter determining how much damage your attacks deal to the Wyvernsoul Gauge of the monster. So how does it work precisely?
Disclaimer, during my testing, it became clear that the progression in the gauge is not linear. The middle of a square is worth more than its extremities, making it obviously basically impossible to get precise numeric values.
Wyvernsoul Gauge
The Wyvernsoul Gauge is located under the monster health bar. Your attacks depletes the gauge and when it’s totally emptied, the monster falls to the ground, getting Toppled. You’re then allowed to choose between performing a Synchronized Rush who will deal a certain amount of damage while filling your Kinship Gauge or leaving the monster Toppled on the ground, guaranteeing you critical hits for the incoming turn.
Some monsters have multiple Wyvernsoul Gauges to get through, most notably Elder Dragons. Breaking a Gauge will put them in the Vulnerable state, pushing them to use more Head-to-Head for a few turns.
Some monsters also use their own Wyvernsoul Gauges in a special way like Arkveld at the beginning of the fight or Deviljho when starved who won’t take any Wyvernsoul damage, recharging their Gauge instead before allowing you to damage it again.
Usually, breaking a part on the opponent results in one unit of Wyvernsoul Gauge lost.
Wyvernfell
Two parameters mainly determine how much Wyvernsoul damage your Monstie do:
- the move Wyvernfell value
- your Monstie own Wyvernfell value
These are pretty easy to understand: the higher the value, the more damage you will deal to the Wyvernsoul Gauge.
Both parameters acts as % multiplied together. For instance, a Monstie with a 84 Wyvernfell stat will deal twice as much Wyvernsoul damage than a Monstie with a 42 stat. And using a 40 Wyvernfell move with this 84 Monstie will deal four times the damage a 10 Wyvernfell move would have deal.
The Monstie base Wyvernfell value is linked to the species and is between 36 and 60, with the Bingo Amount Bonuses sometimes being able to add between 5 to 15 to the value.
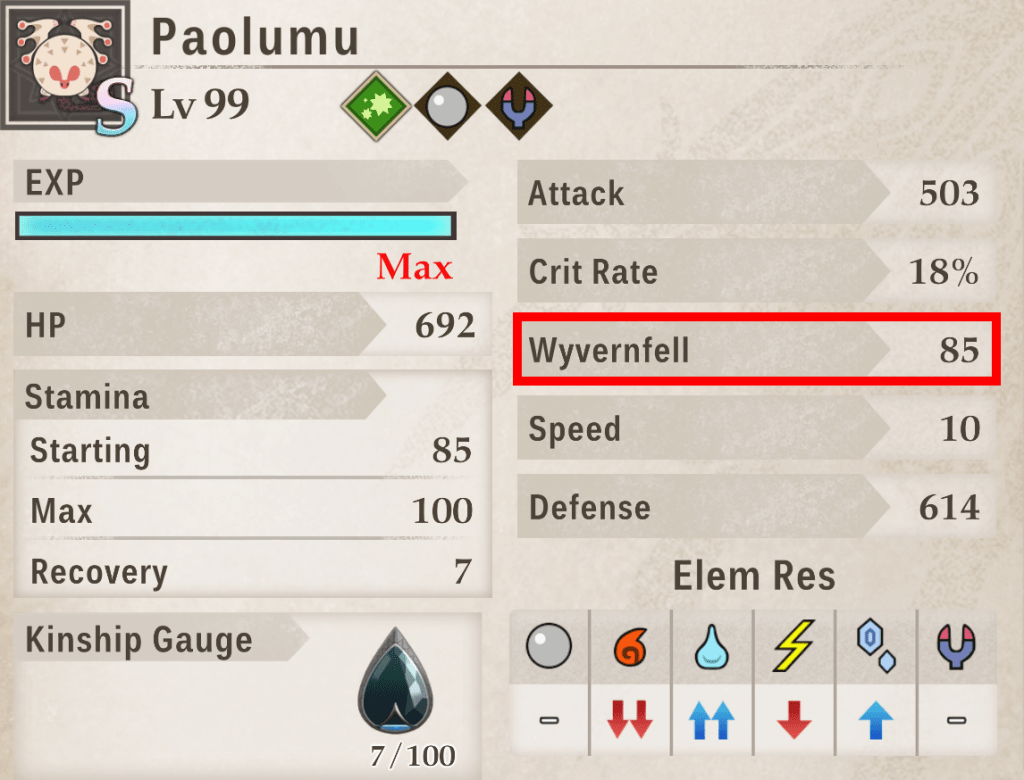
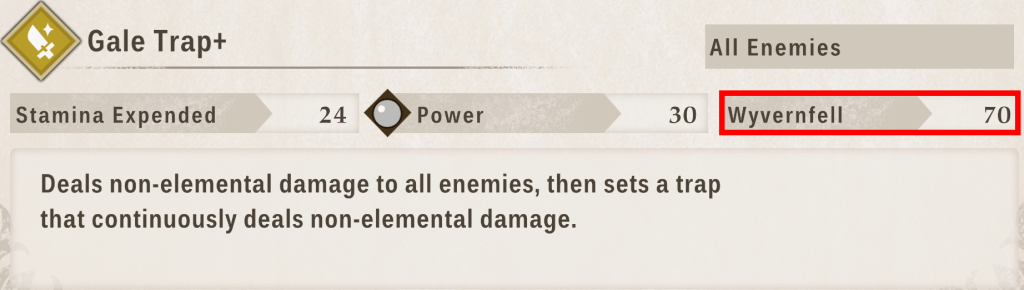
For the moves, only Active Skills deal Wyvernfell damage, regular attacks dealing 0, except for Hammer. The Wyvernfell values go between 10 and 70. The two strongest moves are Gale Trap from Sand Barrioth and Fruit Frenzy from Bishaten. But keep in mind that random multi-hits attacks like Fruit Frenzy will miss some of their hits making this in truth a potential 70, not a guaranteed.
Increasing Wyvernsoul Damage
Active Skills
There’s only 2 buffs/debuffs impacting Wyvernfell damage:
- Wyvernfell Up
- Wyvernsoul Defense Down
Aside from that, nothing except critical hits affects Wyvernfell.
Wyvernfell Up Active Skills
| Skill Name | Element | Buff tier | Duration | Cost | Target | Other effects |
|---|---|---|---|---|---|---|
| Egg Skill: Composure | Neutral | S | 3 turns | 20 | All | Can be stacked, renew the duration and improve the buff when stacked |
| Storm Veil | Water | M | 3 turns | 25 | Self | Water Attack Up M, Thunder Attack Up M, Defense Up M |
| Ice Armor(+) | Ice | M | 3 turns | 25 (20) | Self | Defense Up M, Speed Down L |
| Egg Skill: Icebreaker | Ice | L | 3 turns | 30 | Self | / |
| Blade Rush | Dragon | M | 3 turns | 25 | Self | Dragon Attack Up M |
| Pump Up | Dragon | L | 3 turns | 35 | Self | Attack Up L, Defense Down L |
Wyvernsoul Defense Down Active Skills
| Skill Name | Element | Type | Debuff tier | Duration | Cost | Other effects |
|---|---|---|---|---|---|---|
| Egg Skill: Surface Break | Water | Tech | S | 3 turns | 20 | 70 Power, 30 Wyvernfell |
| Dragon Blast | Dragon | Power | S | 3 turns | 50 | 120 Power, 30 Wyvernfell |
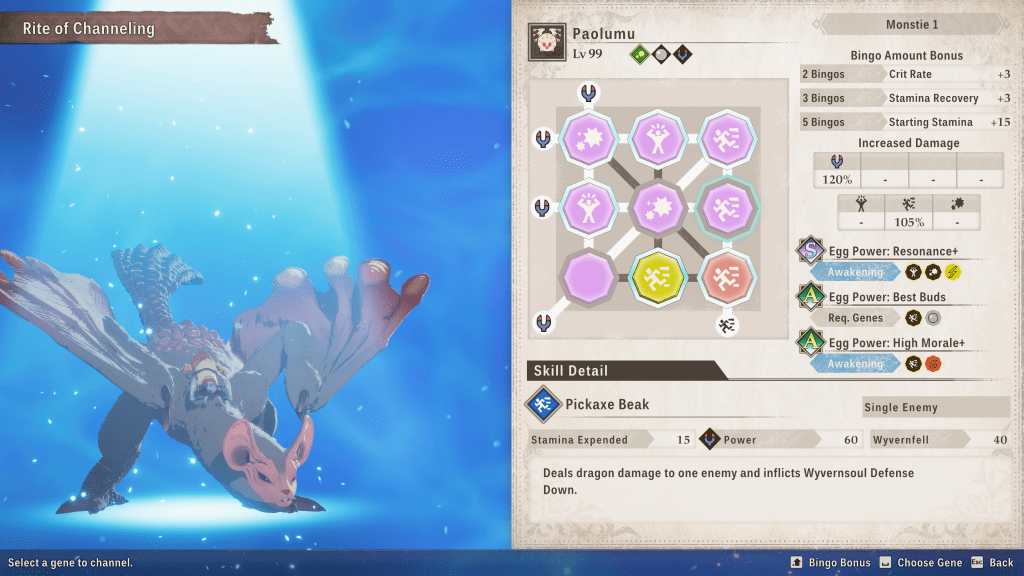
| Pickaxe Beak | Dragon | Speed | S | 3 turns | 15 | 60 Power, 40 Wyvernfell, can be stacked, renew the duration and improve the debuff when stacked |
| Dracophage Shot | Dragon | Tech | S | 3 turns | 20 | 70 Power, 30 Wyvernfell |
| Berserk Slide+ | Dragon | Tech | S | 3 turns | 45 | 120 Power, 20 Wyvernfell |
Passive Skills
| Skill Name | Element | Type | Effects |
|---|---|---|---|
| Elemental Assault (XL) | Ice | Speed | Damage dealt to the Wyvernsoul Gauge +50% if using an elemental weakness |
| Dragon Breaker (XL) | Dragon | Tech | Wyvernfell +25 |
Building the perfect Wyvernfell build
Going through the game Monsties, it becomes possible to build a pretty solid Wyvernfell specialized Monstie.
Monstie
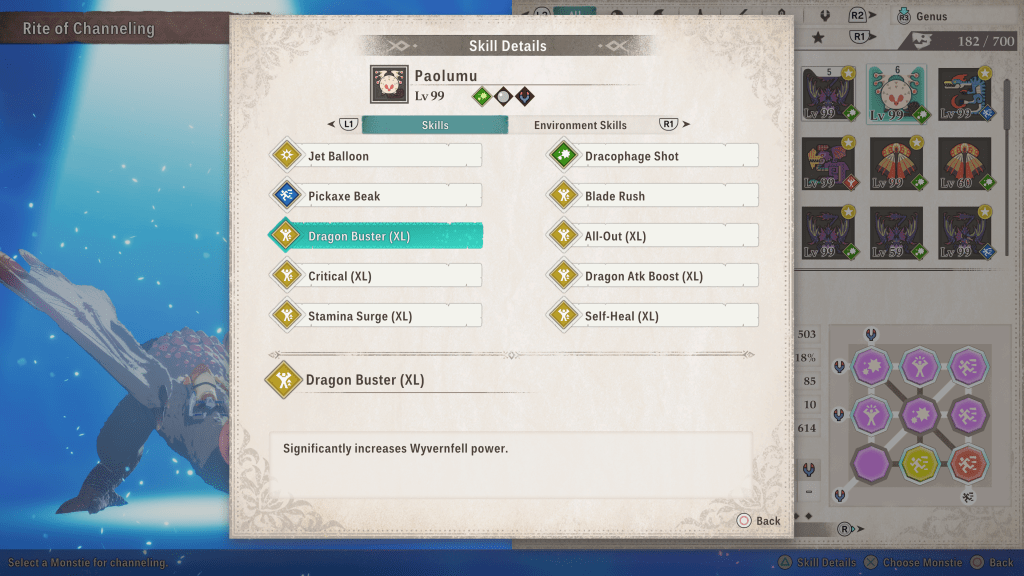
For the species, the Monsties with the strongest Wyvernfell value are Gypceros, Barroth and Chatacabra, having 56 Wyvernfell as a basis but getting 5 more through Bingo Amount Bonuses, giving them a base line of 61 Wyvernfell. Paolumu is right behind with a solid 60 and to me is better due to its Kinship Attack. It’s an AoE dealing 120 Wyvernfell (so great with the idea of the build) and 120 Power. Looking more closely, the third best candidate is Yian Garuga. Despite only having 44 Wyvernfell, it also has a 5 bingo bonus of 15 Wyvernfell, raising its potential to 59. It also has a base 10% Crit Rate, giving it some chance to do 1.5 Wyvernfell damage sometimes.
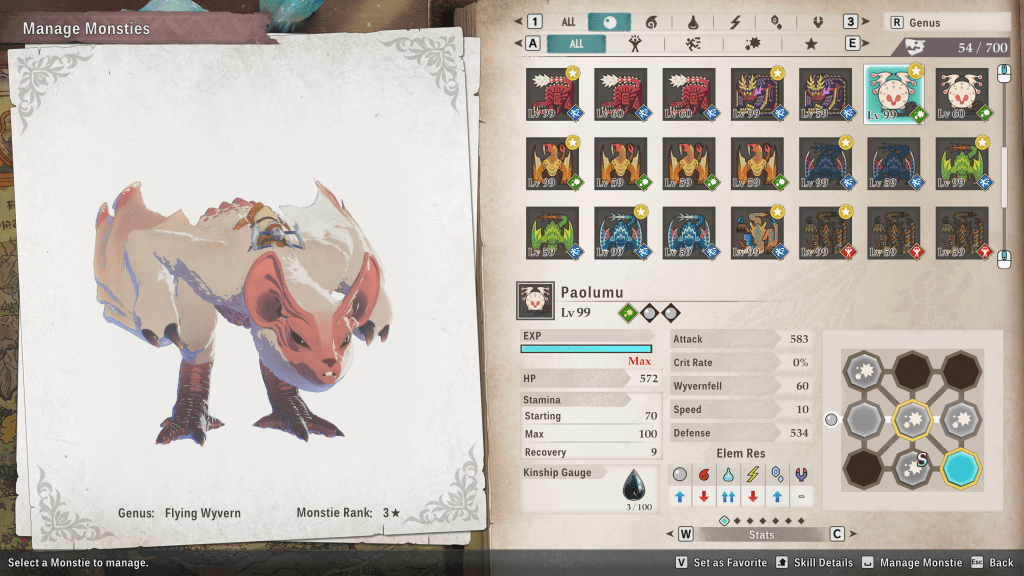
For Active Skills, Pickaxe Beak is definitely the best for this build. Coming from Yian Garuga, it has a 40 Wyvernfell value for a weak 15 stamina cost, making it already pretty solid. But its main strength is the fact that it stacks the Wyvernsoul Defense Down debuff, increasing your Wyvernsoul damage every time you use it. Due to the fact that your main attack is dragon, giving your Monstie a dual dragon element can be good to improve its regular damage (this has no impact on Wyvernsoul damage, purely regular dps).
Other Active Skills that work well with this build are Dracophage Shot, giving you a Tech answer and easier Bingos, or Gale Trap who has the strongest Wyvernfell value in the game and will deal great damage to the Wyvernsoul Gauge once the debuff has been stacked enough. Just keep in mind to renew the debuff before it expires. You can also consider buffing skills like Egg Skill: Icebreaker or Blade Rush.
For Passive Skills, you want to get Dragon Buster (XL) first for obvious reason. Some great genes to use after this are:
- All-Out (XL): +30% damage to your skills but at the cost of +20% stamina cost (which isn’t that much since your skills cost 15 and 20 stamina)
- Critical (XL): 15% Crit Rate so 15% chance to deal 1,5 Wyvernfell damage
- Dragon Atk Boost (XL): +20% damage for Pickaxe Beak (and Dracophage Shot)
- Elemental Assault (XL): if against something weak to dragon
- Stamina Surge (XL): the stamina regen helps if you use All-Out
- Soul Kinship (XL): faster riding, allowing you to use your powerful Kinship Attack sooner
Hunter
For your Hunter, as usual, Goss Harag armor is a solid basis, especially since it has Dragon Buster (L) and 3 slots allowing to adjust the skills. A HH with Militant March can help the stamina management if you’re running All-Out and Hammers are generally a strong option for Wyvernfell builds as they have strong skills with high Wyvernfell values, the BLNT versions dealing 15 more Wyvernfell damage. To cite a few:
- Sweet Spot (BLNT), 75 Wyvernfell value for a 20 stamina cost
- Perfect Crush (BLNT), 85 Wyvernfell value for a 30 stamina cost
- Perfect Strike (HVY), 110 Wyvernfell stat but a 50 stamina cost
It’s also worth noting that Hammer has two passive helping its Wyvernsoul damage, Striking Secret, allowing your regular attacks to damage the Wyvernsoul damage, and Soulbreak who increase the damage to the Wyvernsoul Gauge on a partbreak. Just keep in mind to use Head-to-Heads often as they reduce the stamina cost of Hammer skills.
Partner
You can use Kora as a support. Aside from her defensive abilities, her Gravios Bishaten Embers grants 3 more turns to debuffs, allowing you to increase the duration of Wyvernsoul Defense Down. I don’t think it’s worth adding to your Monstie itself as it is a Speed move, just like Pickaxe Beak, but it can be viewed as an option for Garuga since it has fire element as a basis.
Thea is also a good partner with her HH as he has a Wyvernfell (M) song.
Demo fight against Ibushi & Narwa
This run changes some skills to add more survivability and use Hammer’s Perfect Strike to delete entire Wyvernsoul Gauges. Thea is chosen as Ibushi & Narwa cleanse their debuffs when they change their states, making Bishaten Embers kinda useless.
My Paolumu is Proactive so I use riding sometimes to replenish its stamina by preventing him from spamming Pickaxe Beak. He also has a Support Skill Tendency, meaning he can manage Blade Rush on his own.

