This article goal is to guide during your progression through Frontier High Rank. With 12 years of updates, Frontier is full of a lot of unique systems that can be hard to grasp for newcomers. I will here explain you these systems.
[Update april 2026: this is an english version of the original FR guide. This guide was initially made on the Mezelounge server who had a french patch. As such most screens are in french but the menuing should be the same. I also moved later towards the rain server later and added mentions for this server specifically.]
- Online ressources
- Rank system
- HR1: Welcome to Mezeporta
- HR2: the end of low rank
- HR3: the high rank begins
- HR4: The end of high rank
- HR5: Gou rank and Frontier real beginning
- HR6: last stop before G rank
- HR7: the end of the road and a new start
Online ressources
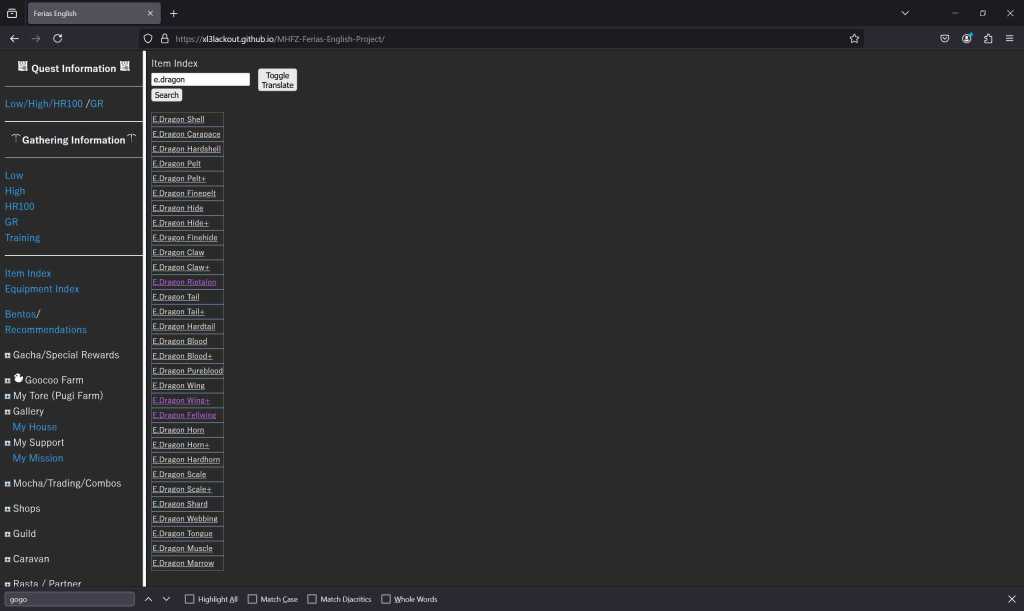
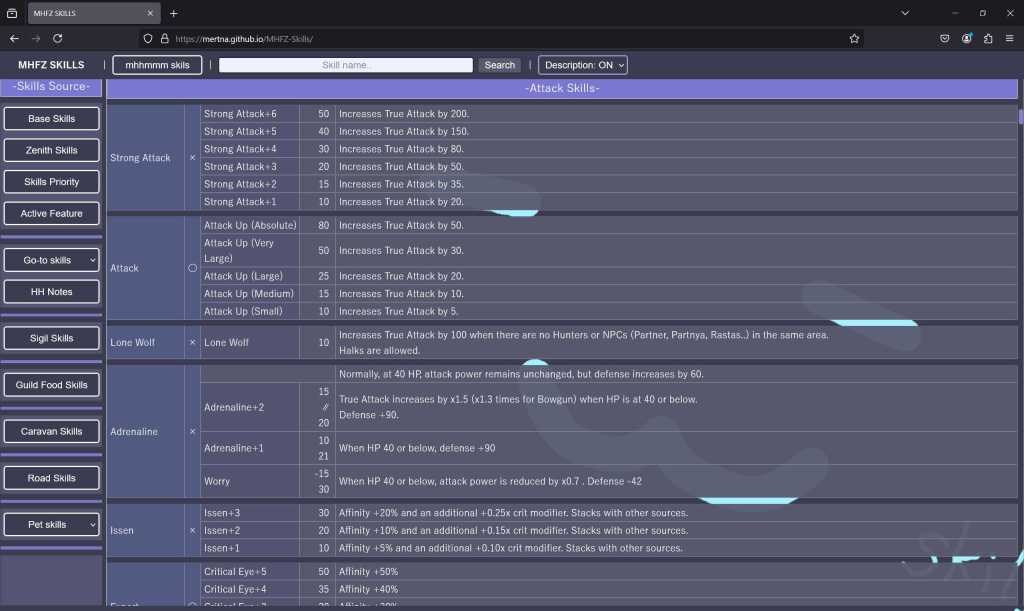
Ferias, Frontier’s kiranico
Like mainline games, Frontier has its own kiranico, a database that can give you intel on where to get what and a lot of infos crucial for your game confort (especially on a game as obscure as this one). This site is called Ferias: https://xl3lackout.github.io/MHFZ-Ferias-English-Project/
I invite you to explore the site to familiarize yourself with the rich data it contains. A few honorable mentions are:
- Carve Tables: drop lists based on the monster and conditions to get them (partbreak, capture, carving, etc)
- Item Index: possibility to search a specific drop and see where and how to get it
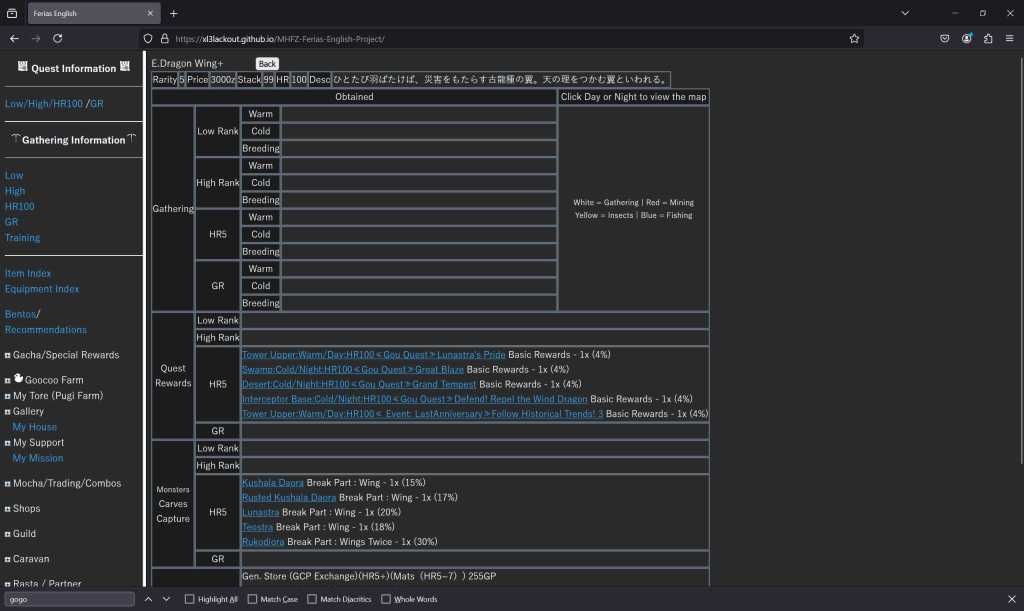
MHFZ Skills by mertna
Frontier has a lot of unique skills (not even accounting unique systems like Zenith skills). This is why mertna’s site details every skill the game features right there: https://mertna.github.io/MHFZ-Skills/
You can find these infos on the previous site too but they’re better presented here and you also get the Go-to skills page who tells you which skills to priorize for your weapon in G rank.
MHSX2G, Frontier ASS
And finally you’ll need a tool to look for the best set possible, especially since Frontier use the old point system. Here is your best option: https://drive.google.com/drive/u/0/folders/1VihaVE_dY6W0gFzXDGEILffLewckACbQ
Due to Frontier complexity, the software needs a little setup before being fully operational:
- Under Filters, chekc Items then Edit right to Tags. In there, under Decos, remove all Raviente decos (search Ravi and remove everything that’s not Gravios). Then go in Items and do the same for all Raviente drops
- Press Edit right from Equipement Types. This part allows you to limit the armor from various ranks. Disable everything then enable what you have access to (for instance Standard Armors when you begin)
You can then press Search in the bottom left corner after you’ve selected your skill list (be realistic, don’t ask for Strong Attack aka a G rank skill in a HR set) then check the results in the Results tab.
This skill won’t be used as much during HR, we’ll talk more about it in G rank.
Rank system
This guide will detail the various Frontier system following its rank system. And since it’s a MMO who evolved with its various updates, the game is different than mainline games progression-wise. This first part will condense the rank explanation, while the following ones will focus on the systems themselves.
- HR1-2: low rank
- HR3-4: high rank
- HR5: Gou/Elite rank. This is a special rank born before Frontier had G rank content. It unlocks:
- HC monsters, stronger versions of the original ones huntable at all the previous ranks with a special rare drop tied to each rank
- Exotic monsters, monsters from mainline games such as Brachydios and Deviljho but with the Frontier twist
- Burst species, monsters that evolved differently from their base species
- Origin species, ancestors from some original monsters
- HR6: Supremacy rank. Ultimate step before the G rank, it’s one of the hardest step in Frontier with variants of already known monsters such as Teostra or Pariapuria
- G rank: G rank as you know it, unlocking Conquest quests
- GR100 rank: Exotic monsters G rank versions are introduced
- GR200 rank: “Z rank” introducing Zenith monsters, each of these monsters having additionnal harder quests at GR400, 600 and 800
HR1: Welcome to Mezeporta
Follow the Hunter Navi
One of the most useful mechanics of Frontier is the Hunter Navi. This tool will give you explanations and goal to reach to learn about Frontier systems, while also giving you rather generous rewards. You can access it by pressing R1+R2 or within the Pause menu.
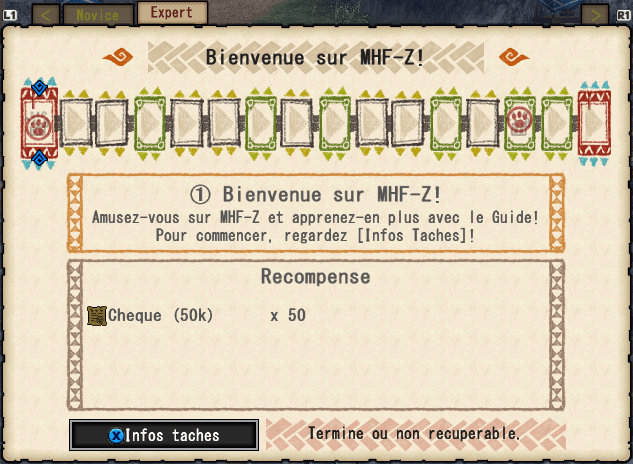
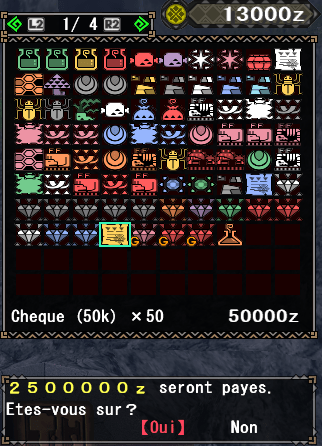
One of the first goals you should do under HR in the HR tab will grant you 50 50k Cheques. These are tickets that can be sold to get zenny, just like the gold and silver eggs from mainline games. If you do the maths, you’re now 2 500 000z richer and the game hasn’t even begun.
Another objective for more easy zenny is to go to the Rasta Bar and talk to the Rasta Counter.
Aside from that, do not hesitate to complete the various objectives for their rewards and to learn more about the game (even though I’ll obvioulsy dwelve deeper on it here).
The Mezeporta Square
The Mezeporta Square is your new hub and it has a lot of stuff! To simplify, I’ll only focus here on the most important features for your adventure.
General Store and Combo Shop
The General Store is the main shop in Frontier. You can buy there various items and a lot of stuff to use in your future combo recipes.
What to buy in the General Store?
Frontier was subscription based, with various formulas granting various benefits. Since the game is dead, a lot of the paid features are now directly active for free. This implies more things to buy in the General Store, reduced prices and the Premium Bonus. Due to this feature, you’ll receive Cheques to sell after each quest, solving any issue you could have on the zenny front.
rain server special mention
rain uses the N Course which I’ll detail in a later section but works on similar basis. The other Courses are also active during the week-ends.
Money out of the equation, what should you buy asap? First and foremost, buy Storage Guide – Expert and Storage Guide – Master to increase your item box size under Books. You can also consider the Book of Combos which will be useful later.
After that, it’s good to stockpile on some items you’ll use often:
- Under Basics: Potion, Nutrients, Whetstone, Honey, Powercharm, Armorcharm
- Under Special: Mandragora, Catalyst, Life Crystals, Wyvern Claw, Might Seed, Armor Seed, Psychoserum
All this will allow you to make some mega potions (potion + honey), secret potions (nutrients + honey + mandragora), life powders (life crystals + wyvern claw), demondrugs (catalyst + mightseed) and armorskins (catalyst + armorseed). You can also ignore some of these items if you don’t plan to use them.
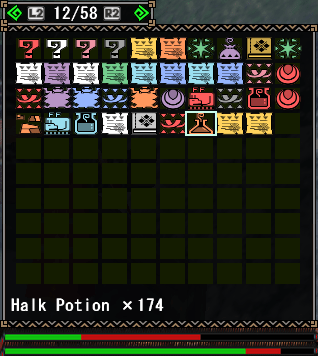
Daily Special: N Points and Halk Pots

Let’s talk about the Daily Special. This is an habit to take every day who gives you access to a few quests with generous rewards but more importantly gives you 5 N Points and 5 Halk Pots. N Points were gained when you played in the partners cybercafes. Obviously it’s kinda hard nowadays to get some. You can trade these for ressources in the dedicated section.
Halk Pots back in the days were granted by your Halk, at the pace of one per day, hence the name. Nowadays, you get 5 each day through the Daily Special. This item is overpowered, reducing any damage taken by 70% (be careful though about poison, fire auras and grabs). You can only use 20 each day (5 back in the days but the cap has been improved in the final months of the official Frontier). They’re next to mandatory through HR6 and a more than welcome confort if you want to play without pressure.
Daily Special also allows you to try 2 Daily Quests at the General Quest Counter. These quests have generous rewards so do not hesitate to check them from time to time.
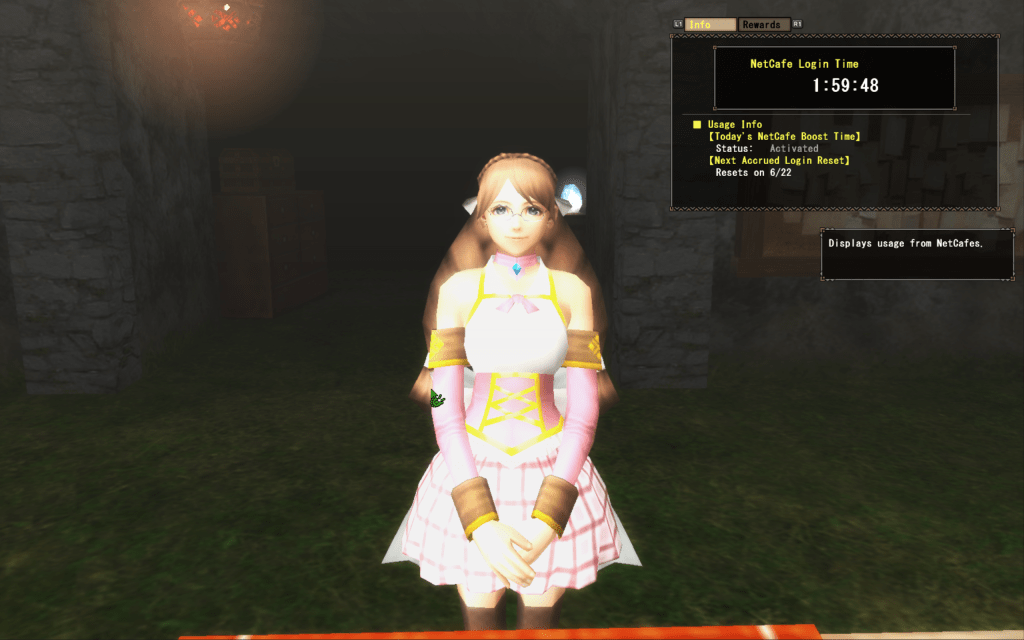
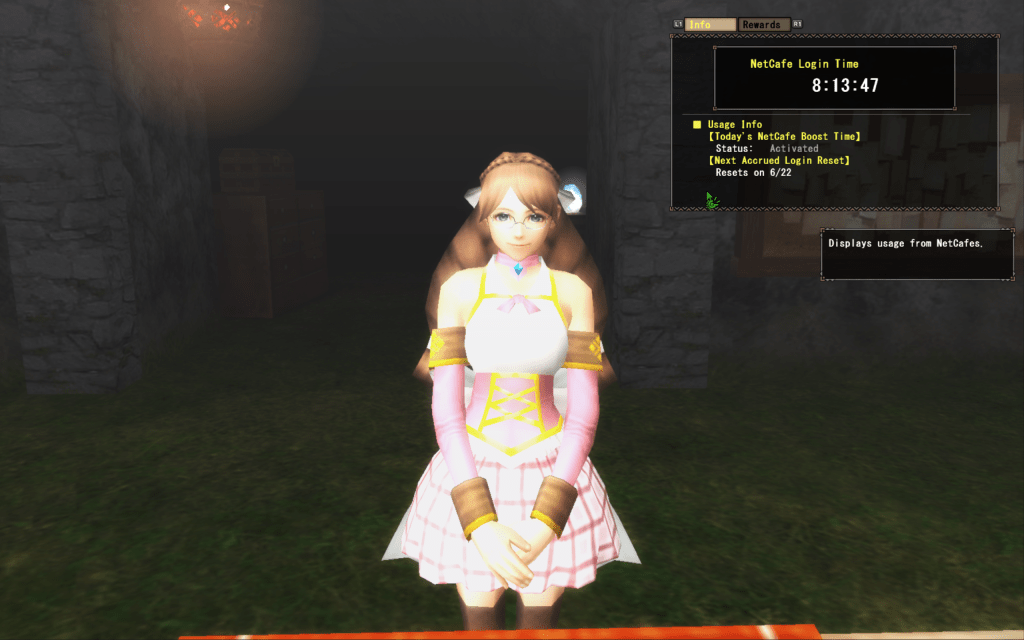
rain server special mention: cybercafe at home
If you play on the rain server, the N Course is active. Originally this was the Course tied to Netcafes, the japanese name for cybercafes. The more you played in a Netcafes (spending your money obviously), the more rewards you would have received. rain has this system active but no matter where you play.
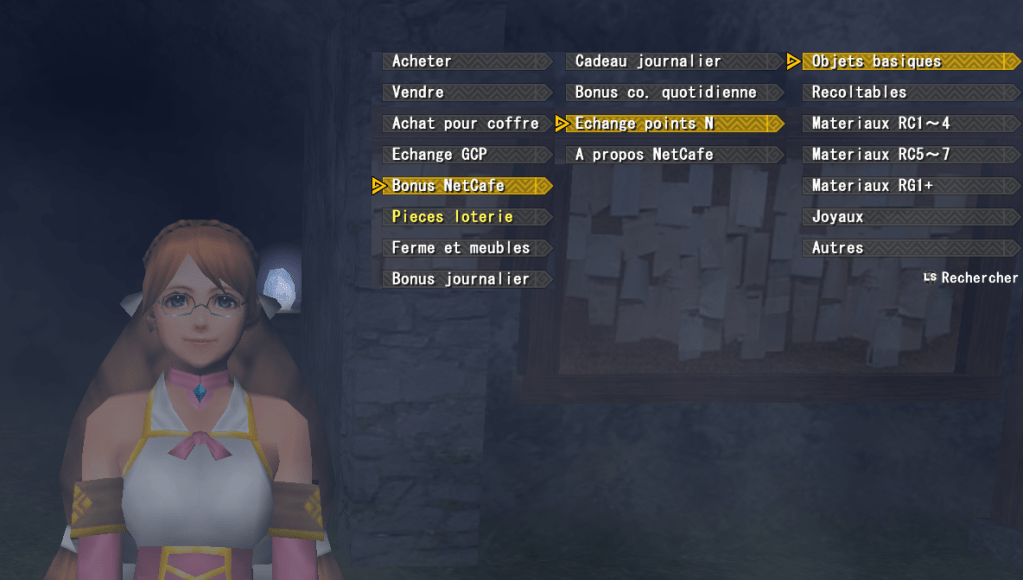
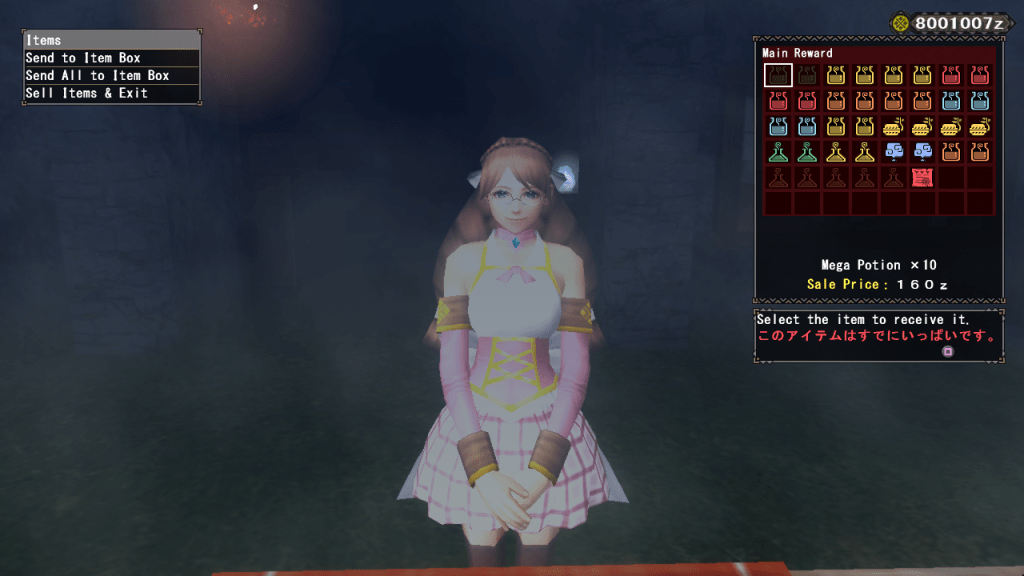
To receive your rewards, go in the General Store under NetCafe Benefits. First, you can claim a massive item pack under Daily Gift.
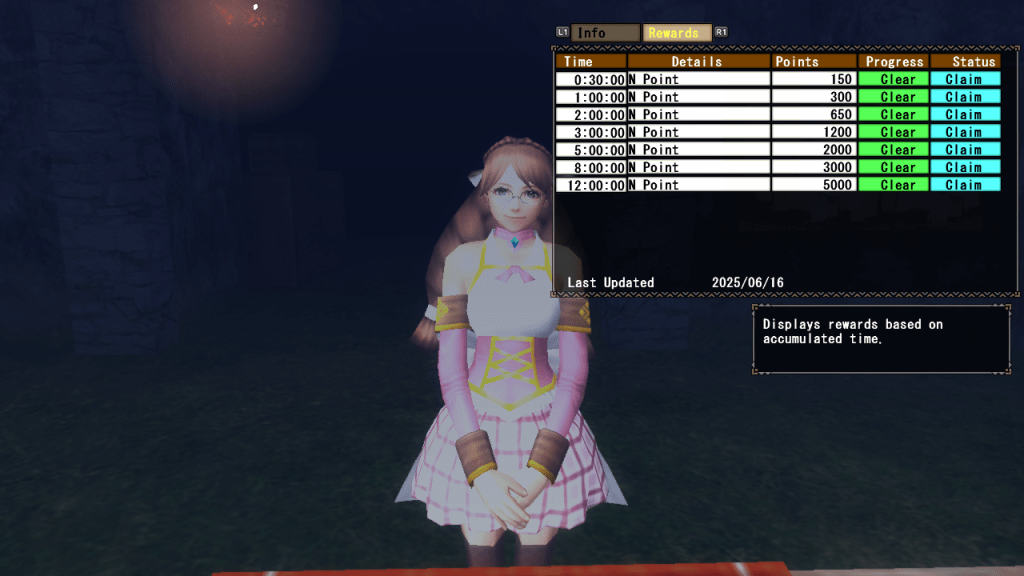
Then there’s the Repeat Login Benefits. The first menu Accrued Status allows you to ckeck in the first tab how long you’ve played Frontier this week. Then you can check in the next tab the rewards corresponding to this playtime. If you can claim some of these rewards, you can go back to Claim Accrued Rewards to get some pretty massive N points amount which you’ll be able to trade for various ressources. You should keep some for your HR5 set decorations but you can also use them to aid in your set building through your progression.
If you want to leech the system, you can just open a dialogue window and go to sleep. The game doesn’t disconnect you so long as a dialog is open.
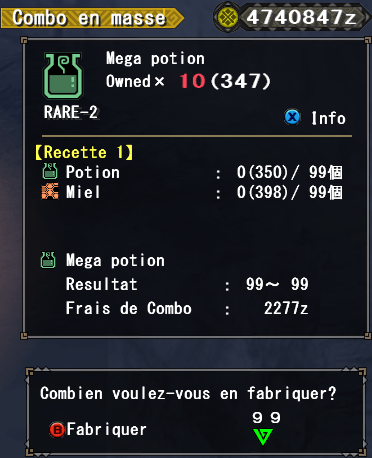
Bulk Combine at the Combo Shop
The Combo Shop features are less useful at the beginning of the game but you can use it to Bulk Combine, making a lot of combos at once instead of one by one. Note that you need to do the recipe on your own before it being available through the Bulk Combine feature.
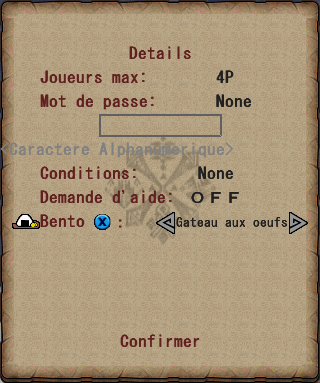
Grocery Store and Bentos
Bentos are Frontier meals, granting you health, stamina, attack and defense buffs until your first cart. So you better eat before you go in a hunt. To make a Bento, you’ll need 2 ingredients which can be bought at the General Store, at the Grocery Store or in a Guild Store if you join a Guild with a Hall.
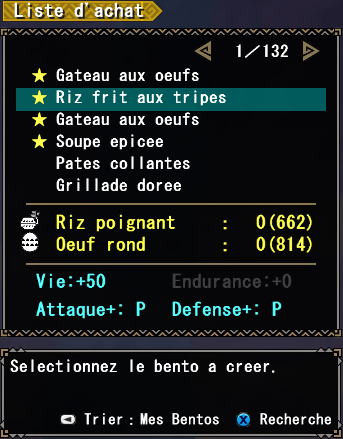
Frontier also has a Season system, affecting your meals efficiency. A meal who increases your stat during a season can reduce them during the next. It’s better to have 3 base meals, one for each season. Here are 2 meals with ingredients who can be bought in the Grocery Store that grant you 150 health:
- Warm + Cold Season: Fist Rice + Round Egg
- Breeding Season: Fist Rice + Power Lard
Once you’ve registered a Bento, you can equip it in the quest selection screen. It will be used at the start of each quest so long as you have the ingredients available. You’ll need to reset the Bento everytime you login. The Bento is shared amongst all quest participants without consuming more items.
To learn more about Bentos and see other recipes, I’ll invite you to check ferias where you’ll find Bento recommandations in the dedicated section, including some for meals reducing your max health and stamina, ideal when you’re using Adrenaline or Starving Wolf. You can eat these dedicated Bento in My House so that their effects aren’t shared with your teammates.
Workshop
Last stop on the Square, the Workshop allows you to craft your weapons and armors. Frontier has a lot of special weapon and armor system so I’ll talk about these when we’ll get there.
Note that you can only swap your equipement in the Workshop or at the Item Box from My House in My facilities.
Standard Armors
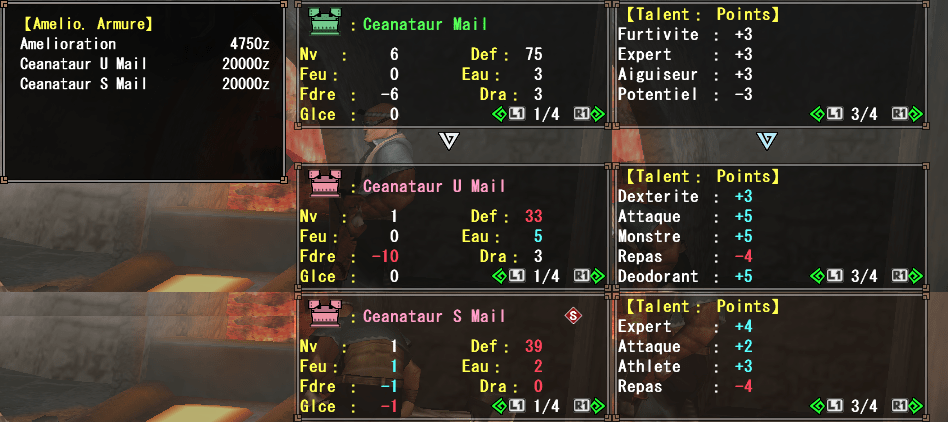
During HR1 to 4, low and high ranks, you can craft and upgrade standard weapons and armors, with a similar system than the one in mainline (armor spheres for the armors, components for the weapons). Note that there’s only one system for both ranks: you need to craft a low rank armor, upgrade it multiple times, change its series, etc until it reaches high rank.
Series change, available after a certain number of upgrades, change the armor name (Ceanataur > Ceanataur S or U), upgrade or change its skill points and raise its maximum defense level (after an initial downgrade). But you’ll need specific component for each armor pieces of the same serie. You’ll need to farm 5 times the materials to fully change your armor series.
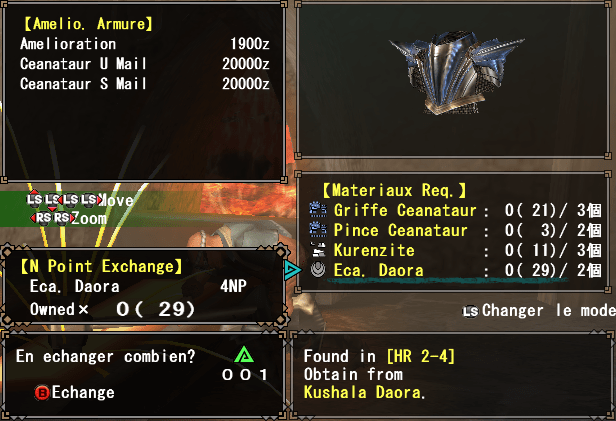
Where to find specific components?
A nice feature of the Workshop allows you to check where to farm the components you’re missing. To check this, press the left stick when checking the components of the equipement you want to make. Do note that this is a basic indication, there might be other options (for instance Kushala Scales can be acquired on Kushala itself but also mining in the Tower area).
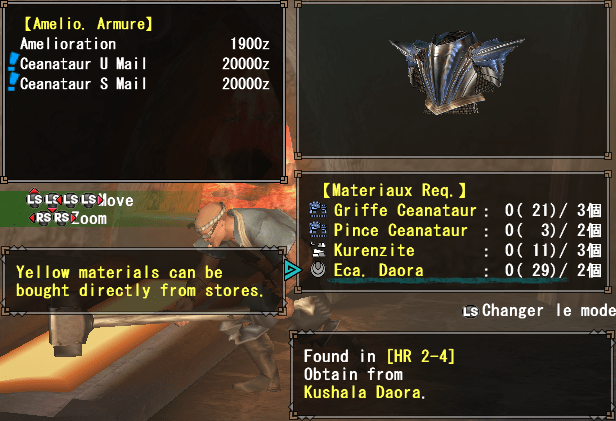
Yellow written items can be bought immediately using points if you select them. But I’ll suggest you rather keep your GCP, Guild Contribution Points, as those will be more useful starting from HR2.
Surprising decorations
Check also the decorations / jewels. While in mainline, usual decos were amongst the line of “Attack 1 grants 1 point in Attack and -1 point in Defense for one slot”, in Frontier, Attack 1 grants 3 points in Attack and -1 point in Defense. And while Attack 2 granted 3 points in Attack for 2 slots… Attack 2 here grants 4 points without any malus. So do not hesitate to check the decos you can craft from time to time, you might find some nice surprises.
My Support
My Facilities is an area that gets improved with each passing HR, granting various useful systems. Starting from HR1, you can access My Support which allows you to manage your non-human supports.
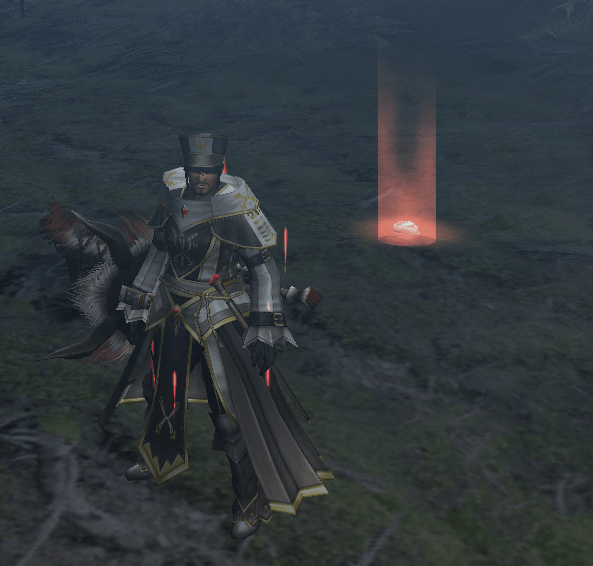
Halk
The Halk will be your first companion in Mezeporta. This domesticated wyvern can attack during your hunts and use various special abilities which can be teached with Skill Books it can drop at the end of each quest. Effects vary a lot, from damage buff based on the monster type or locations to special moves or even support effects such as the ability to throw a Life Powder. Also note that your Halk is not a quest participant, it doesn’t take a slot amongst the quest party (and you can thus 4 hunters in a hunt with 4 Halks).
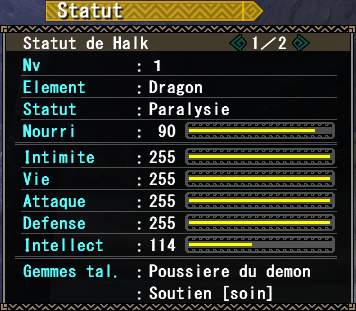
The Halk can be fed at the rock in the middle of the area. You can give it monster components to change its status and element (it uses both at once). The Halk has an appetite, limiting how much element/statuts points it can get each day. This value can be reduced using a Yase Yase Food, the Hunter Navi providing 10 of those.
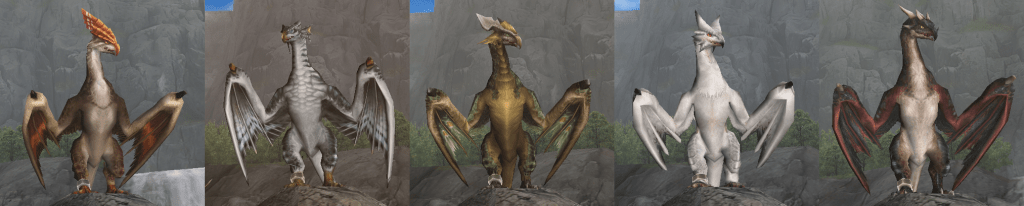
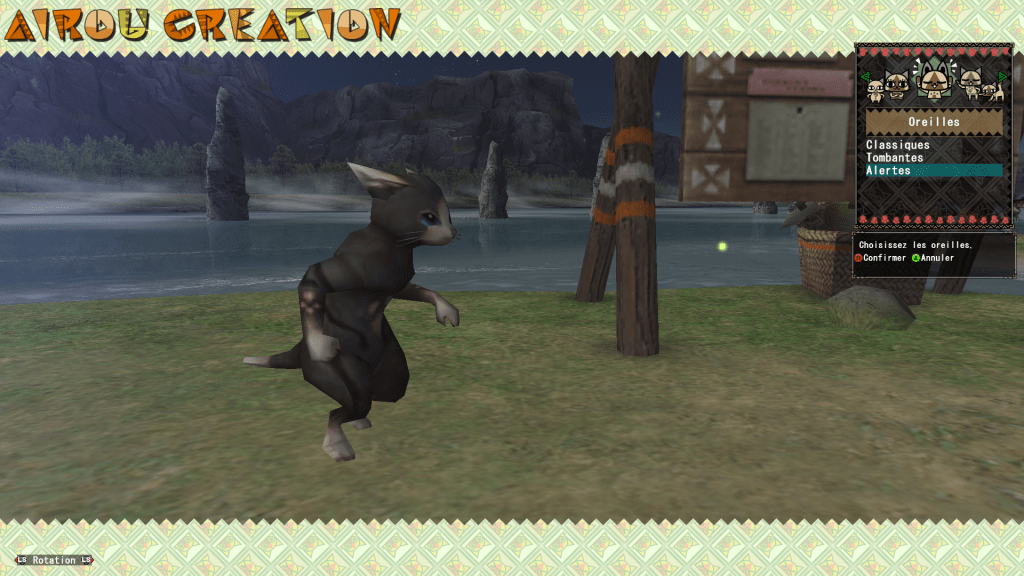
Once one of these values reaches 100, it gains the corresponding status/element, overriding the previous one. Element also impacts your Halk appareance and since it’s quite hard to change, might as well choose a design you like from the get-go.
The Halk can evolve up to 2 times just like a Pokemon. These evolutions increase its stats and also its appareance so do not neglect them. To evolve, you need all 5 stats gauges to maxxed out in Status (255). To do so, you’ll need to train your Halk with the Halk Instructor. Intimacy increases on its own so favor one of the other 4 stats. Once a stat reaches 255, it can’t progress further and any point invested in it is wasted. So check from time to time your Halk progression to change its training if needed.
rain server special mention
Your Halk can also drop Halk Feathers. Feathers are linked to your Halk element and can be used at the Combo Shop to fuse Halk Whistles who works like horns, granting your companion buffs (but at the risk of breaking).
Partnya
Second companion, you can recruit a Partnya, essentially the Frontier version of the Palico, by talking to the Halk Instructor. You’ll be able to recruit more later. The Partnya takes a party slot in your quest so you can’t bring it with you if there are too many players.
The Partnya main strenght is its ability to grant you a second row of partbreak drops in the quest reward screen, a most important property during endgame, most notably against Zenith monsters.
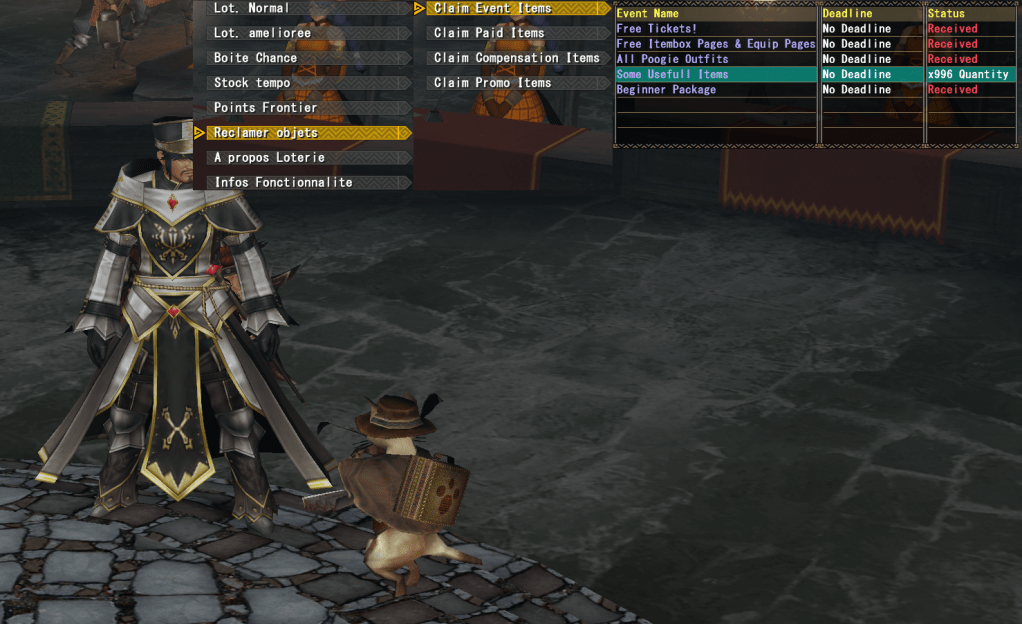
Your Partnya has a role which can be changed using a Book of Kindness, allowing you to personalize its support abilities during the quest. The Mezelounge server grants this precious item in the Workshop. By talking with the Harisen Felyne, you can get some presents. Go in Claim Items then Claim Event Items then select Some Usefull Items to receive 1 Book of Kindness. You can repeat this manoeuver 999 times so you have some margin to change your Partnya role.
rain server special mention
This offer doesn’t seem to exist on rain
My Garden
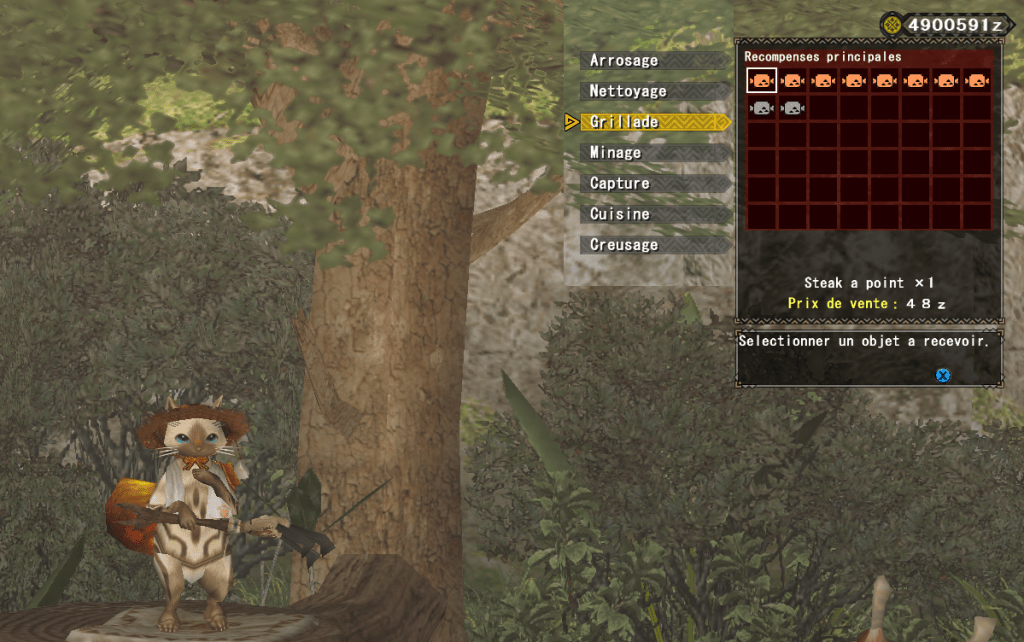
This is Frontier farm. You can choose once between each quest an option with the Straw Felyne and get a few free items.
Here are the items you’ll received based on each option:
- Watering: herbs, seeds, mushrooms…
- Cleaning: claws, scales, fangs, bones, garbages, tranq bombs…
- Cooking: cook raw meat to get some steaks
- Mining: ores, armor spheres…
- Catching: insects, honey, spider webs…
- Pickling: special mechanic turning an item into others
- Rubbish: healing items, tools, life powders…
Note that Cooking requires you to provide the Raw Meat and to have it in your item pouch when talking to the Felyne.
You can also buy Garden Tools in the General Store to increase My Garden performances a few times. Once a Tool expires, you’ll have to buy it again. You can find this in Farm & Furniture > Buy > Buy with zenny > Garden Tools.
My Garden also allows you to manage Gooks, the Frontier duck mascots. But this is a whole other system who might end up having its own article later as it’s rather complex.
General Quest Counter
Not much to say here, select General Quests to select a quest. In Hunter Quests, you’ll find quests ordered by ranks, key quests being indicated by a yellow square on the top right corner. Once every key quest is completed, you’ll be able to take on the urgent quest to get to the next rank.

If you want to join a friend quest, go to the Quest Board. And once you’re ready, you can go to the Quest Gate to start said quest.
Two highly useful feature in this Counter and the G rank ones are the History and theSearch.
- History allows you to check the 5 last quest you did in the current session (it resets when you disconnect). You can quickly find a quest you just did instead of wandering in the menus
- Search allows you to filter quests based on selected parameters such as target monster. Useful if you want a certain monter at a certain rank. Note though that the monsters are listed using the japanese alphabetic order (so generally you’ll have to go through the listing one by one to find your target)
Quickly getting the right gear
rain server special mention
rain offers a Rathalos armor amongst the rewards who can be claimed at the Workshop Harisen Felyne, strong enough to power through up to HR3, after what you’ll be able to swap for the HR3 urgent monster armor to carry you up to Gou rank.
Also it seems the quests mentionned in the following part are only accessible in the Newbie 2 Worlds
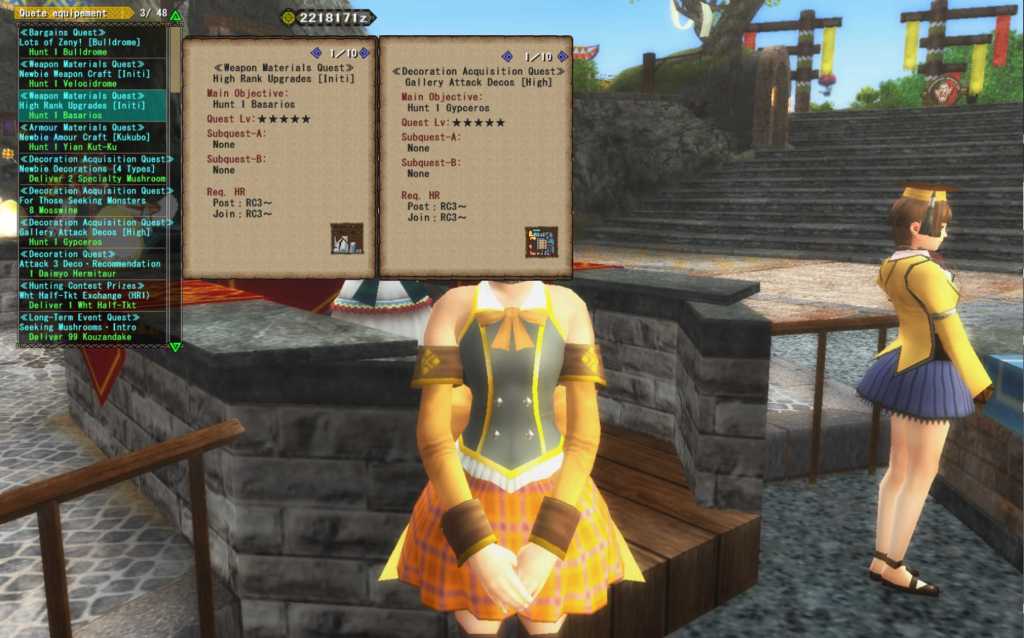
Since Frontier had a ton of updates, the dev team added equipements and bonuses to help players quickly get through the beginning of the game, kinda like World Defender set. Thus you can immediately take some Gear Acquisition Quests at the General Quests Counter which will allow you to make a solid set without having to farm up to HR4, aka the end of high rank. You’ll find these in Other Quests > Gear Acquisition Quests.
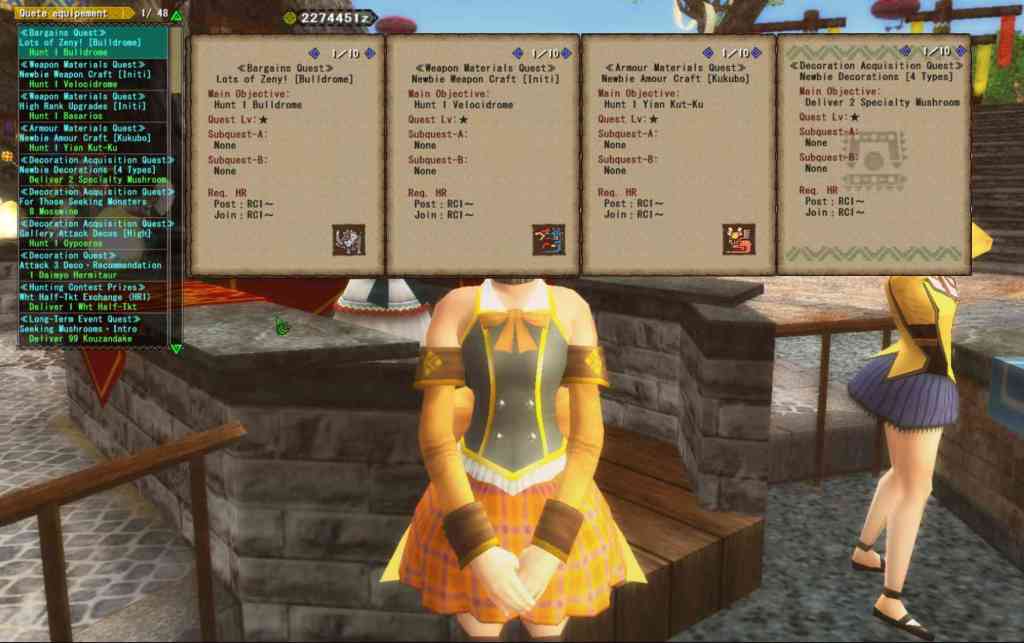
These 4 quests will grant you:
- 1 million zennys through Cheques reselling
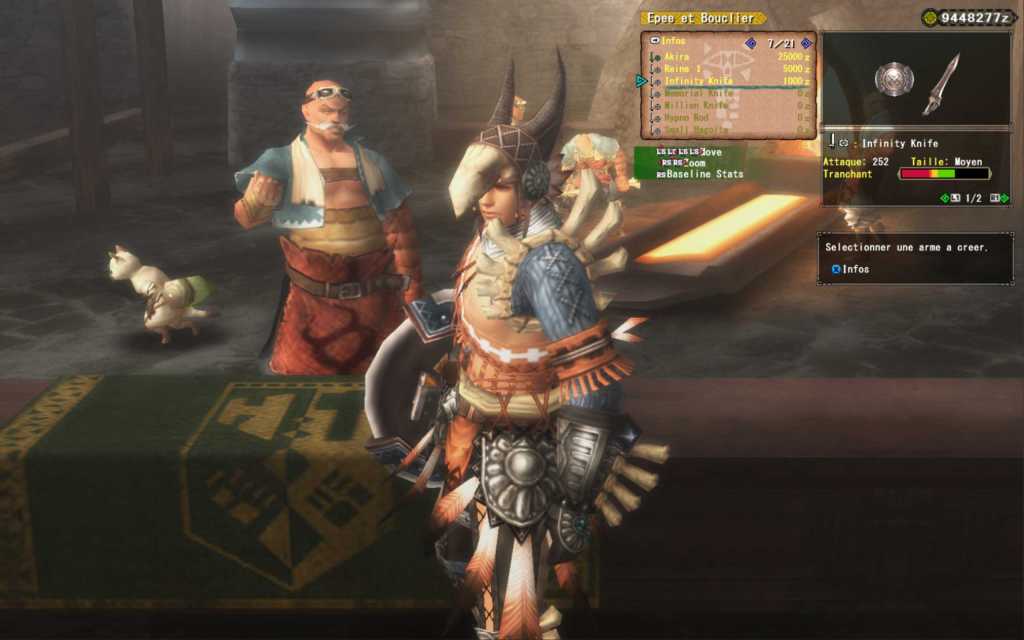
- An Infinity weapon with medium green sharpness and 130 true raw (your base weapon has a short yellow sharpness and 60 true raw)
- The Kukubo armor set which can be found under Special Armor > Event Armor around page 7-8 and grants you notably Evasion +1 while also being upgradable up to high rank
- 4 sets of 10 decos, notably Attack 2 (4 Attack points)
Another interesting quest is For Those Seeking Monsters who will reward you with psychoserums and Hunter Deco if you have an hard time finding monsters on the map. The deco grants 5 points for the Hunter skill, 10 points showing you the map while 20 points adds the monster position on said map permanently.
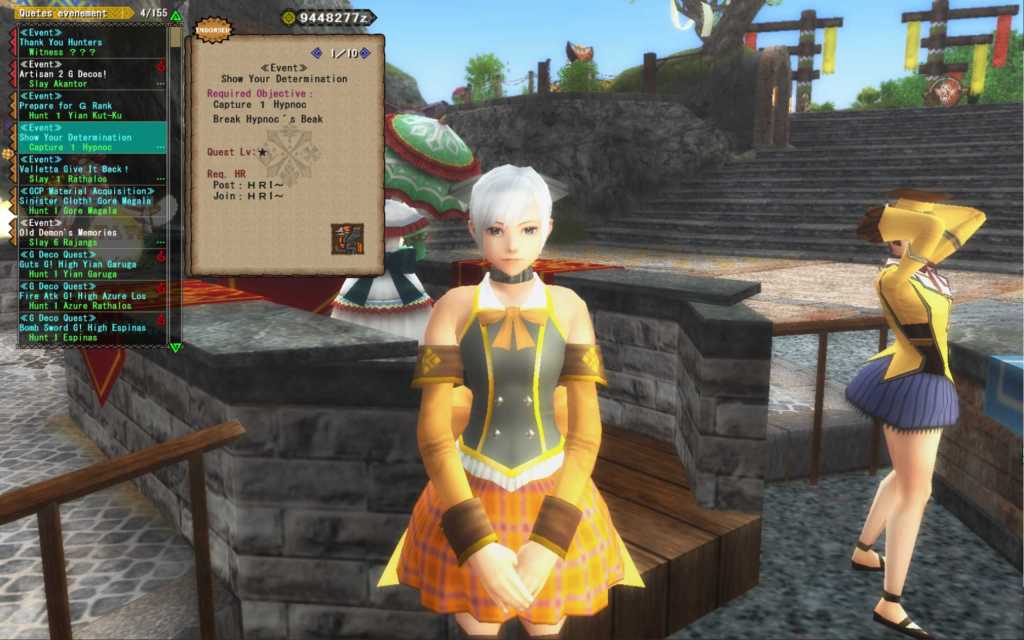
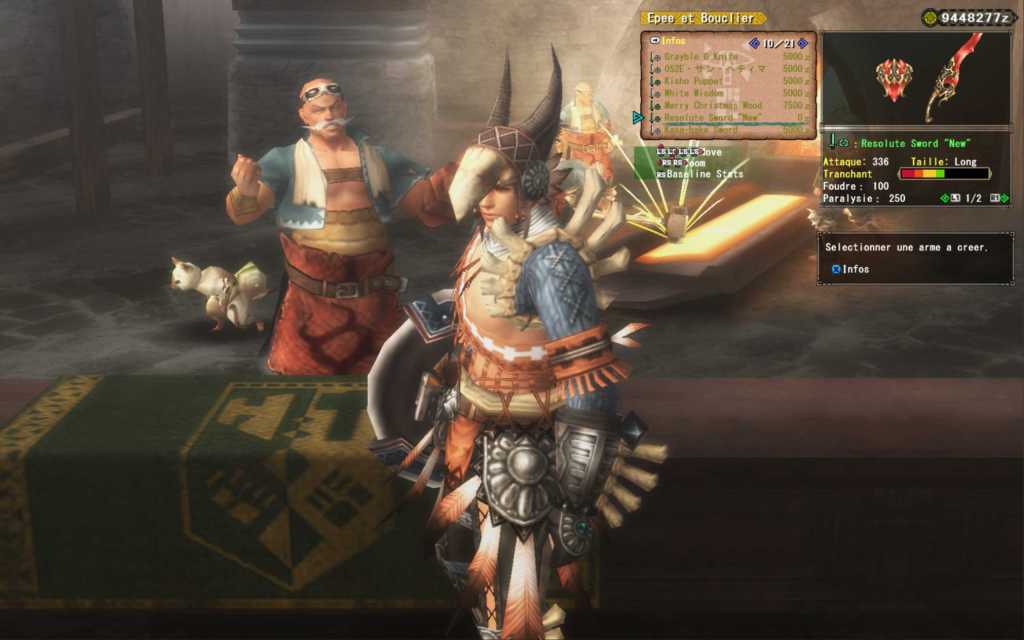
If you want an even stronger weapon, you can do the event quest Show your determination (4/155). If you manage to capture the Hypnocatrice and break its beak (look for the feathers on its back lowering), you’ll get a ticket to make a Resolute weapon. With blue sharpness, thunder, paralysis and 3 decorations slots, they are totally busted and can be upgraded with next to no drops and all the way to the end of G rank. But doing so will make you essentially skip the HR experience which is kinda sad.
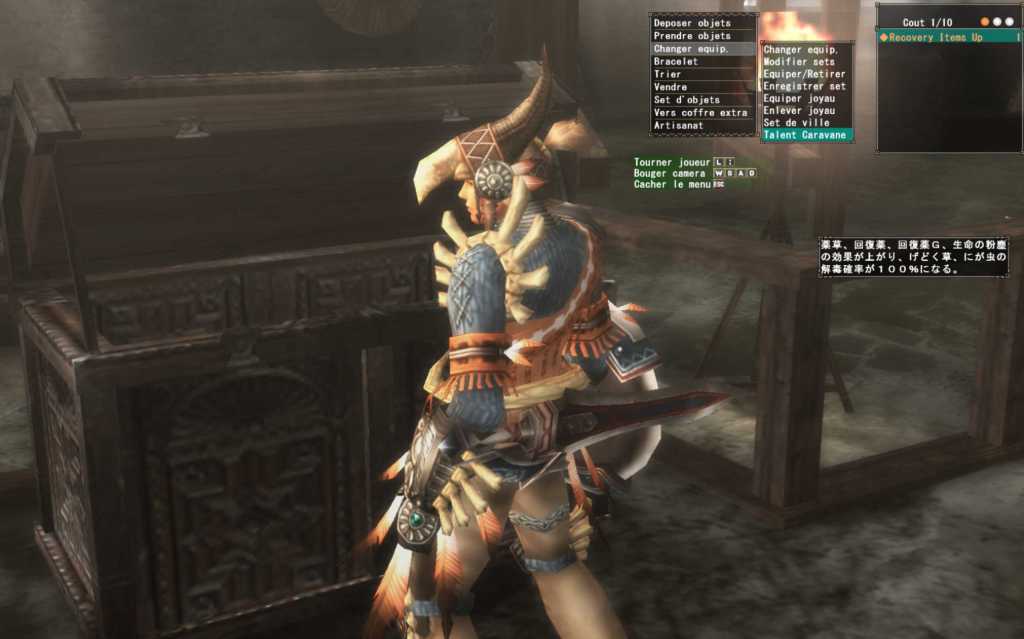
Item sets
Managing the item pouch in 2nd gen is a nightmare: it’s highly limited (20 slots only, some taken by items that aren’t items anymore nowadays such as whetstones, pickaxes and bugnets) and you need to unload after each quest. While gathering, I highly suggest you stick to one ressource type: only ores, only bugs or only plants. That will avoid you having to manage the inventory 20 times through your session to make some space for a new ressource.
Regarding the unloading, you can automatize this using an item set. Ahead of its time, Frontier had the option to register item sets. Set your item sets to immediately get rid of what you’ve gathered. I usually have a dedicated gathering item sets with only pickaxes, bugnets and a farcaster to keep 17 slots empty for gathering. You can buy pickaxes and bugnets at the General Store.
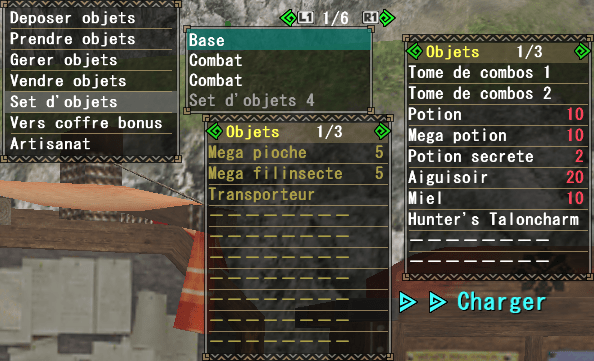
You can quickly change your item set once you’ve reached the chest using a controller by pressing the L and R buttons. L1 equips item set 1, L2 the 2, R1 the 3 and finally R2 the 4. It’s a small reflex to learn between 2 quests: chest, quick L button press and let’s go!
HR2: the end of low rank
HR2 is already the end of low rank indeed. As explained before, Frontier has a rather compact rank structure.
My first recommandation would be to buy House Expansion 1 at the General Store under Books. Aside from making your house friendlier, it will allow to recruit a Partner and to improve your item box capacity.
Aside from that, most quests are classic aside from Monoblos. Indeed, this quest is historically a rite of passage… Which you need to take on your own alone. That said, if you’ve made the Kukubo set who has a end of high rank defense level, it should be pretty easy.
Your very own Partner
You might have noticed that you’re not alone in your solo quests. As Frontier was made as a multiplayer game and for 4 players, the devs created Fostas, immortal NPC hunters who replace the missing players in your quest. A variant of those are Rastas, NPC hunters based on real players you contract… But the feature wasn’t implemented as of me writing these lines.
Fostas are cool and all but what if I told you you can make your very own Fosta with broken stats and totally customizable, pretty much like a Wilds Support Hunter but even stronger? Let me introduce you to your Partner, your new best friend.
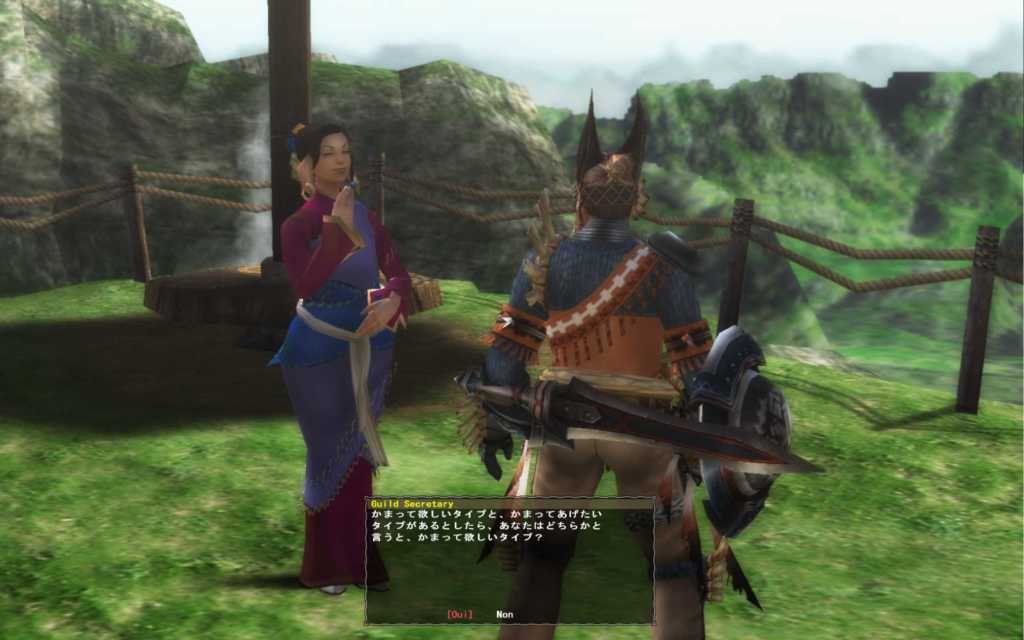
Recruiting a Partner
Recruiting a Partner can be done at the Rasta Bar. Once inside, talk to the Legendary Rasta wielding the weapon you want your Partner to use. If you have some doubt, you can check the Rasta weapon in Status.
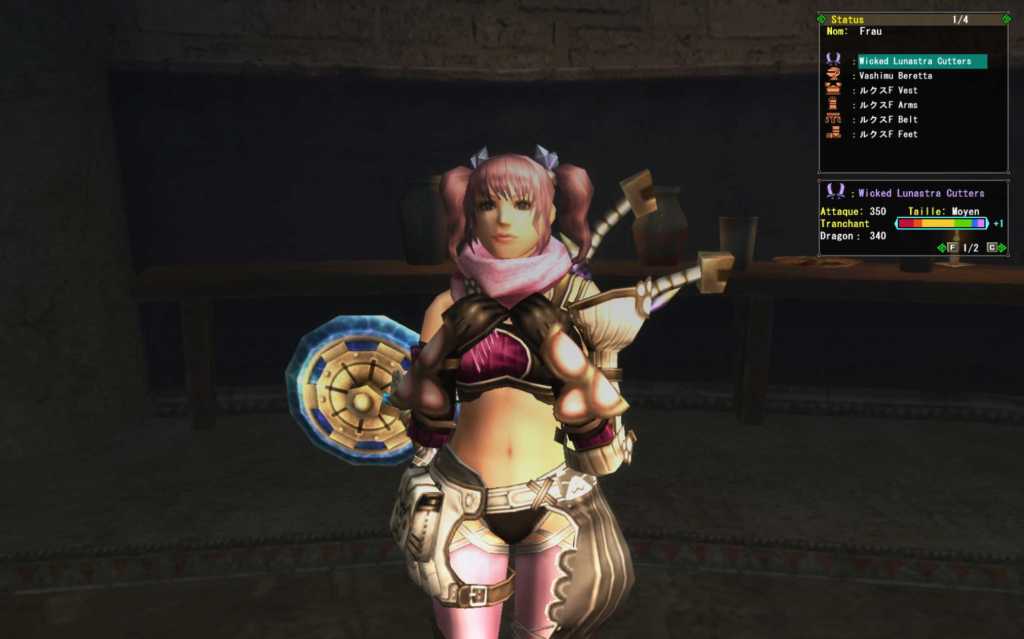
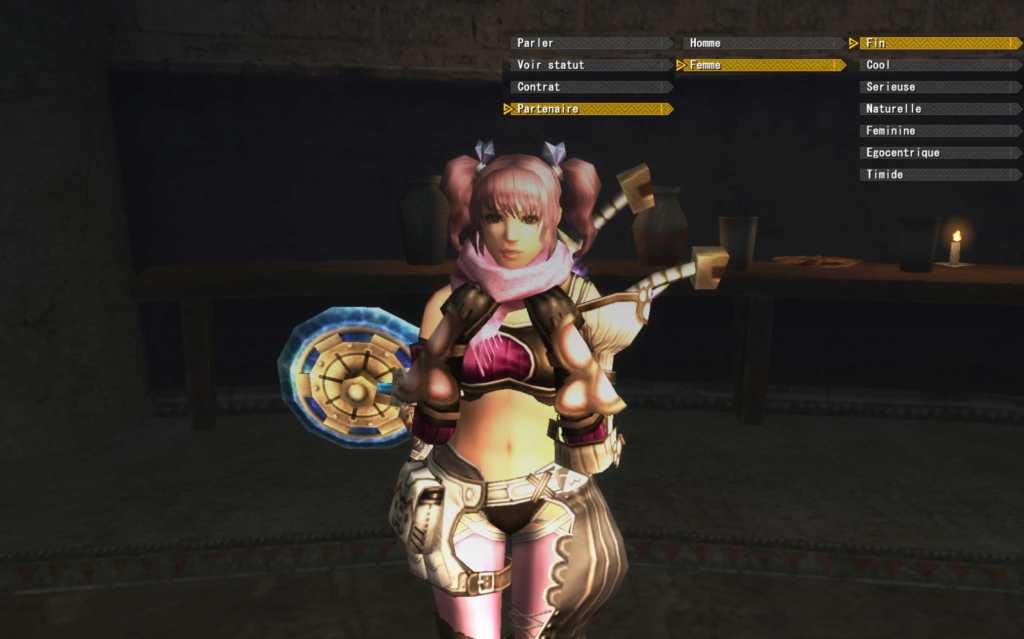
Once you’ve selected the right weapon, select the Partner option and define the Sex and Personnality of your Partner. The Personnality affects automatic lines your Partner says at the beginning and the end of a quest, when the monster goes in another area, a part breaks or when the monster has lost half its health. The game will show you a recap of your Partner details at the end where you’ll be able to confirm or cancel.
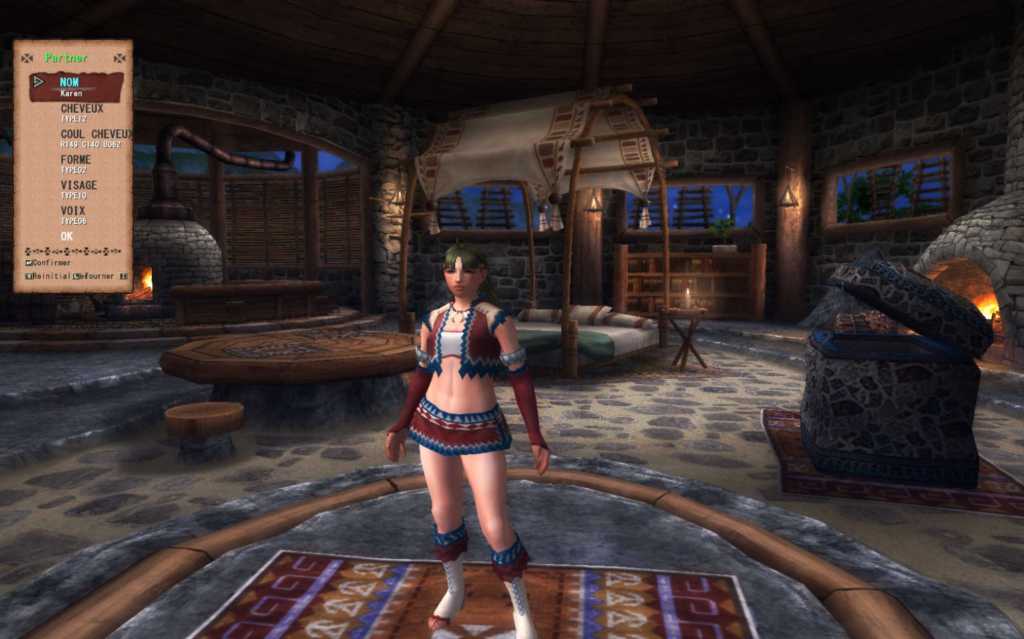
You can then go to My house where you’ll be able to customize your Partner by choosing its appareance and voilà, you now have your very own Partner!
A rather weird hunter
The Partner has some weird mechanics regarding its inner workings. You can create equipement for the Partner or gift them some of yours but taking back is steeling: this is a one sided operation where the equipement you give is definitely lost. But that makes it a good opportunity to get rid of some armor pieces or weapons you won’t use anymore.
Armor wise, these have fixed stats no matter the armor components. Be it a Velocidrome or a Fatalis armor piece, they will have the exact same stats on your Partner. The armor type has an impact on the defense. A G rank armor has 3 times the defense of a Standard armor. But once again, be it G rank Velocidrome or G rank Fatalis, it’s 230 defense for everyone. Armor upgrades are useless here.

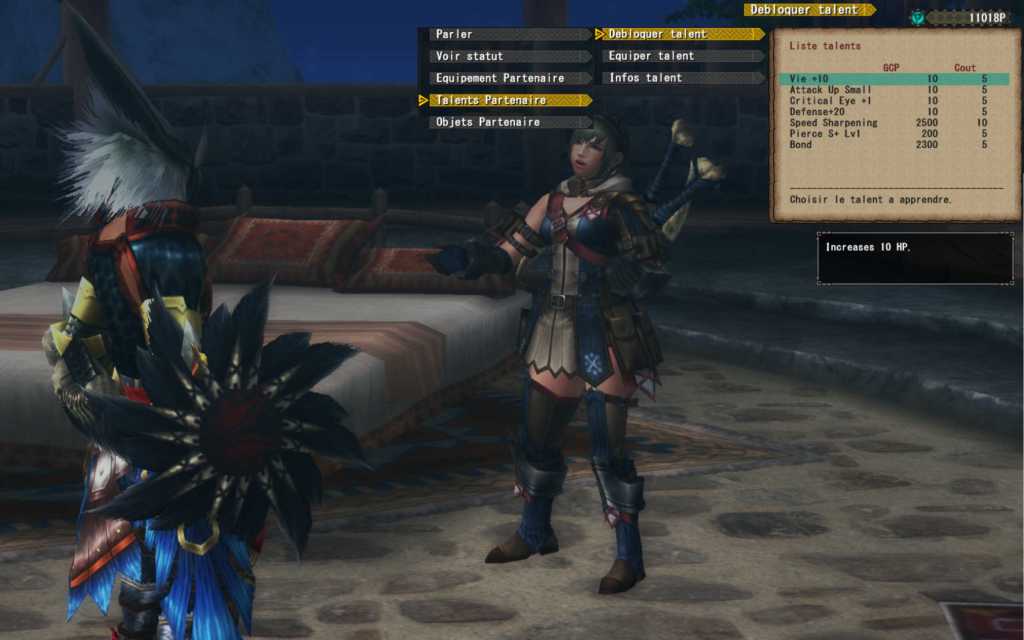
Armor skills are disabled for the Partner. Instead, you can teach them skills in My House using GCP, Guild Contribution Points. The skill choice increase with your Partner rank, which increases with the quests you do together, but also with the skills it already knows. You can check skill unlock conditions in Skill Settings > Skill Infos while talking with them. And the cost of some skills is really high. For instance, Weapon Handling required to unlock a lot of others skills cost no less than 3000 GCP. Hence my previous recommandation to keep your Guild Points.
Just like the armors, weapons have common raw and element values within a weapon type. But the sharpness, status and parameters proper to the weapon (Hunting Horn songs, GunLance ammo type) are kept. It can be interesting to upgrade your Partner weapon at least to improve its sharpness.
You might have noticed that your Partner weapon’s element value is at 0. This is because the Partner has a weapon mastery value for each type going up to 999. Increasing the weapon mastery increases the weapon stats by up to 100 raw and 1500 element, an absurd amount for weapons like Bow and Dual Blades. Weapon mastery is slow to increase though. You can help using tickets dedicated to your Partner. These can be earned by completing a stamp card at the end of each quest so do not hesitate to use them.
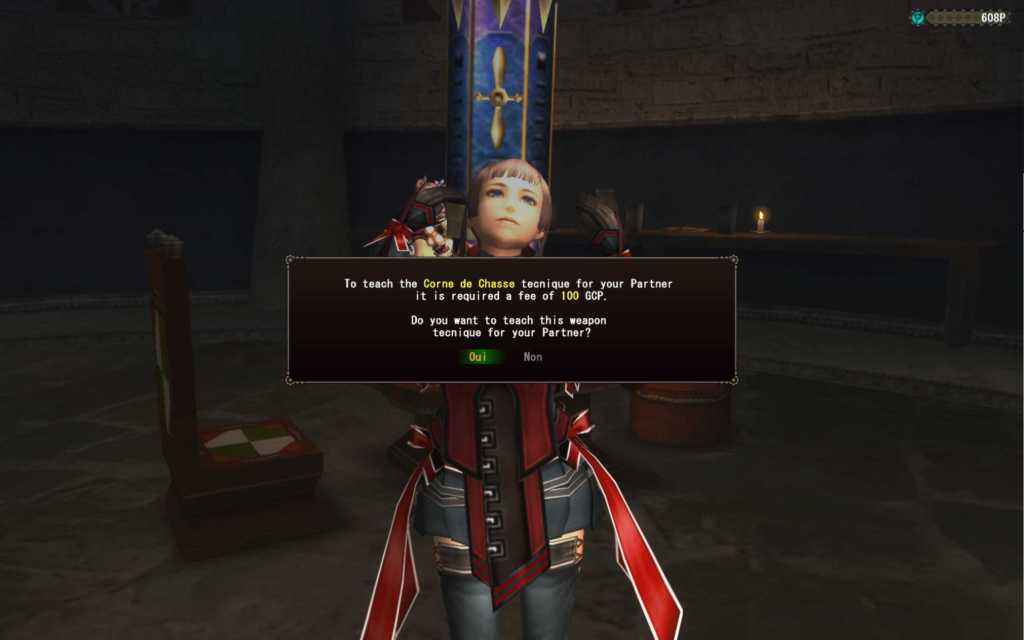
Your Partner can only use one weapon at the beginning. You can teach them more by talking to the corresponding Legendary Rasta at the Rasta Bar but this will cost you some GCP. Note that the weapon mastery is exclusive to each weapon type.
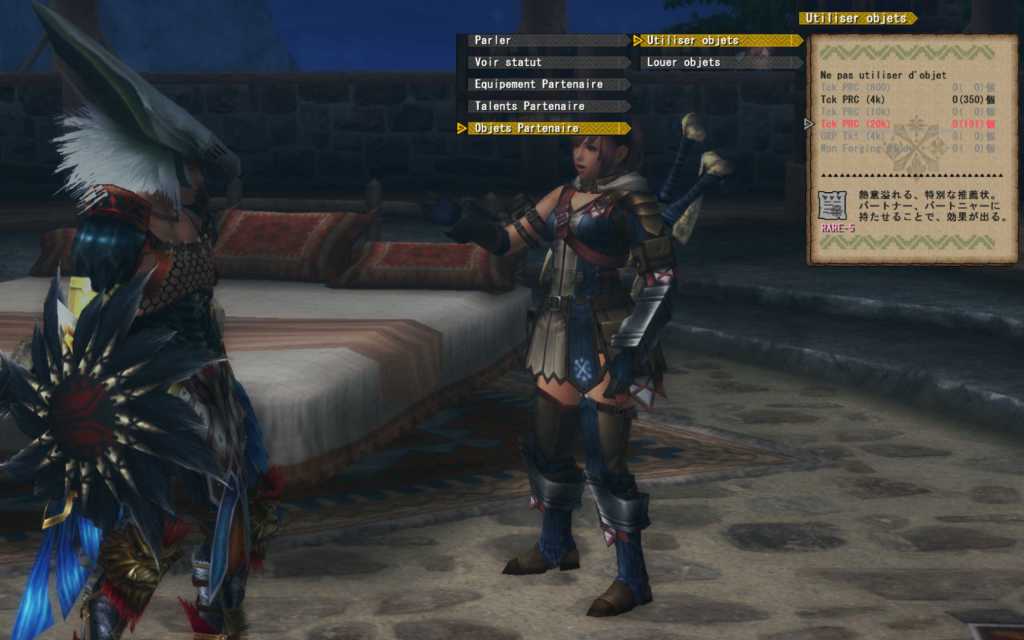
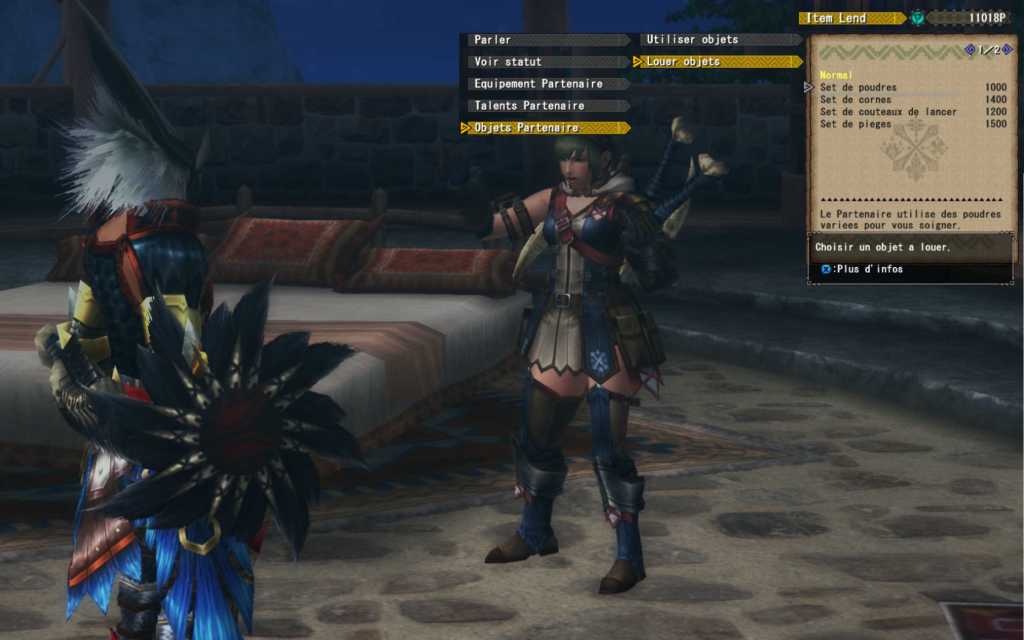
To end this section, you can rent an item kit from the Guild for your Partner to use, for a GCP cost under Item Settings > Item Lend. You can choose between a healing powder kit, horns to grant various buffs, traps and even throwing knifes to inflict some status. Your Partner can only use one item kit, ordering another one will make you lose the previous one selected (and thus waste the GCP already spent) so choose wisely.
The Caravan Jewel
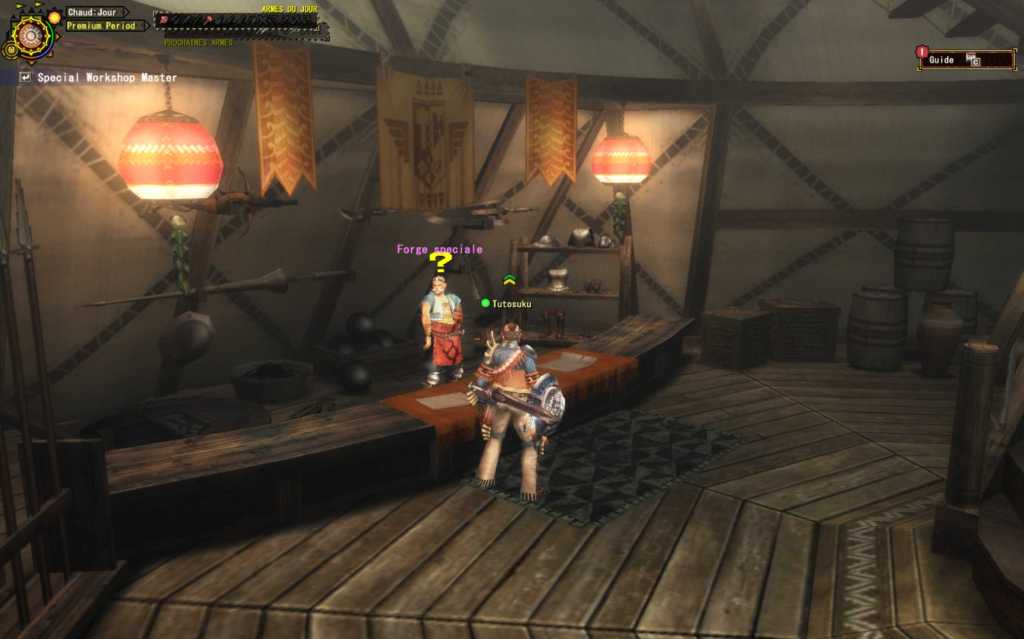
Go to the Pallone Caravan as soon as you reach HR2 so that Boss Kiel gives you a Caravan Jewel when you reach the center of the plaza.
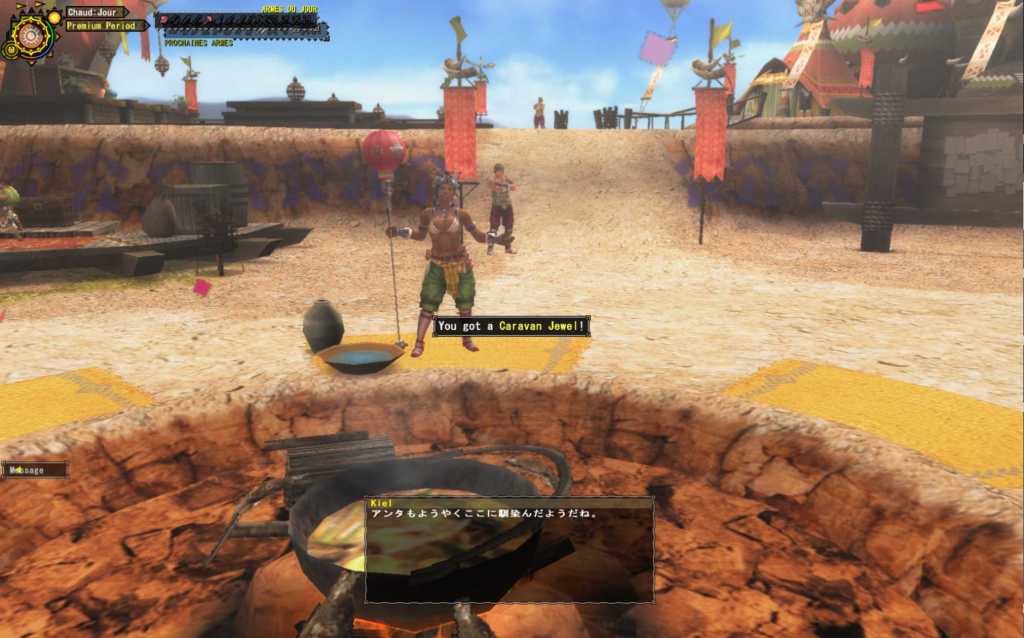
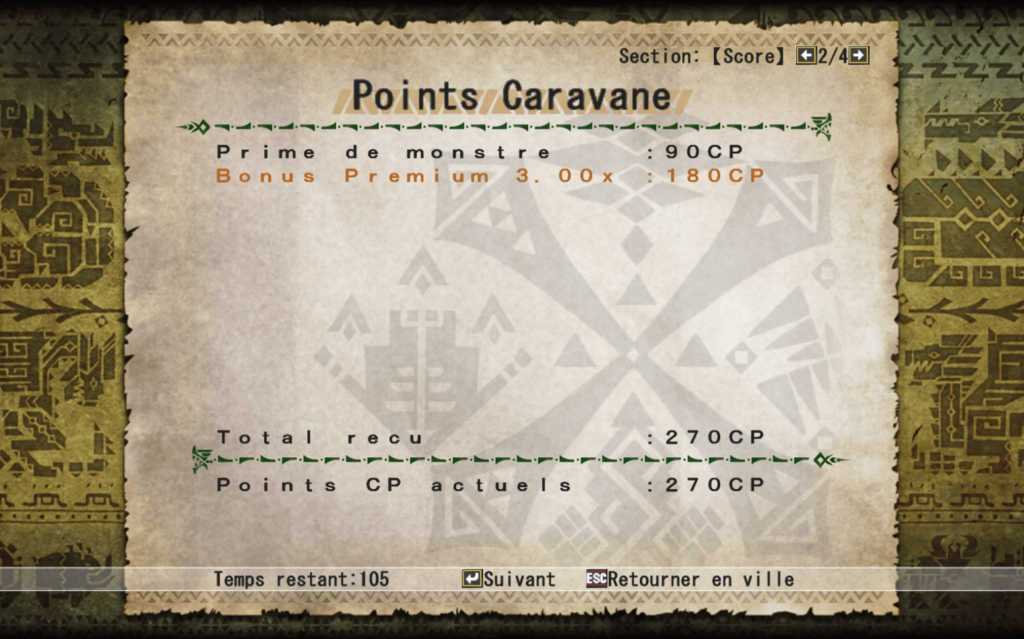
The Pallone Caravan is an area dedicated to Caravan Quests, special quests with steps to complete. You must clear all quests from one rank to reach the next one. These quests replace every item you collect or carve for CP, Caravan Points, and will grant you more Caravan Points which can be used at the Special Workshop to improve your Caravan Jewel.
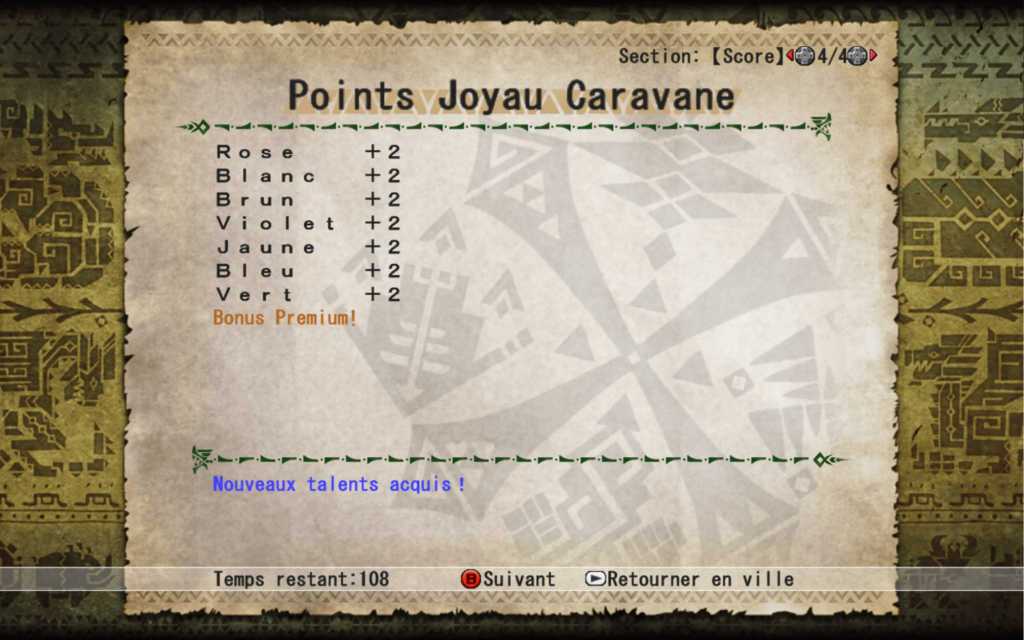
From now on, at the end of any quest, you’ll receive Gem Points from various colors. Once you reach a Jewel level max point ceiling, you can go to the Special Workshop in the Guest House to get to the next level. You can also change there your Jewel color, the color changing the color points you get at the end of each quest.

Even regular quests grants you Caravan Points and Jewel color points.
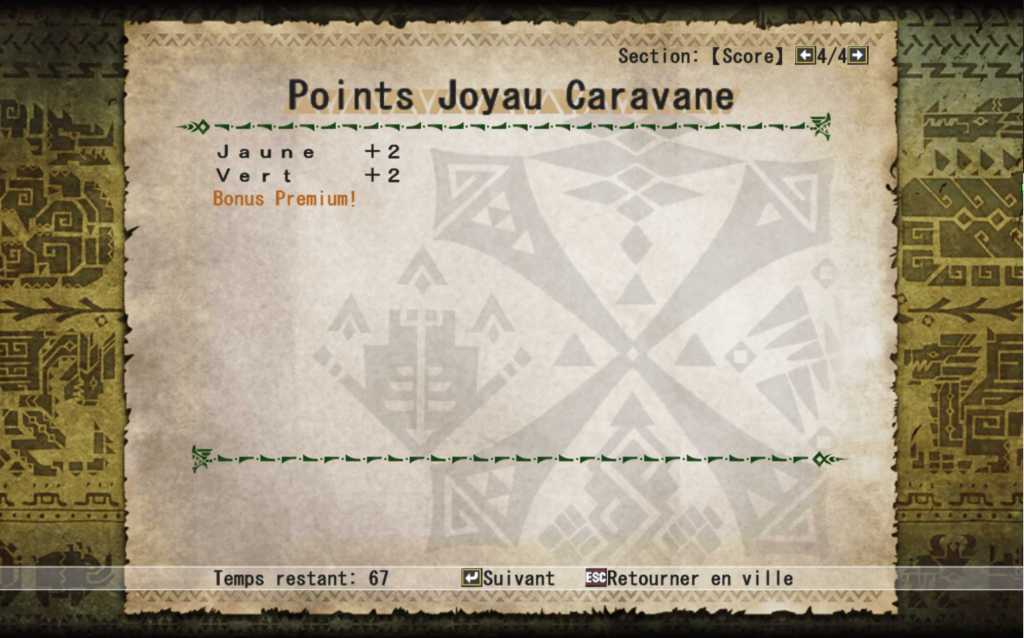
The Caravan Jewel can be used to equip bonus skills and the Jewel levels allows you unlock new skills once your reach a certain amount of points in every color. For this reason, you should make your Jewel multicolor before any huge hunting session. With only one color, you usually get 4 points for the selected color and 4 points from a random color. With a Multicolor Jewel, you get 2 points in every color plus 2 in one random color, making reaching the point ceilings way more easy.
Do note that a Multicolor Jewel color will be reset to a random color every day. Back in the days, changing your Jewel color was obviously a paid feature and you had to pay every day to get the Multicolor status back.
Your Caravan Jewel allows you to equip up to 3 skills with a 10 total cost, with each skill having its own cost. Caravan Skills have various effects, one of the very first one granting you +10% health on healing items. Amongst the skills you unlock later, you can get a permanent 5% raw increase or a 1 in 8 chance to no take damage when you get hit (up to 20 times per quest). You can check the list on Ferias under Caravan > Hunter Jewel.
The Hunter’s Taloncharm, a test of patience
Since you’re at the end of low raw, you can fight Lao-Shan Lung to get its claws. These can be combined with the power and armor charms to increase their effects. But Frontier pushed the mechanic even further. You can combine again the claw you obtained with another charm to make a talon who push the effects even further. And you can even fuse the power and armor talons to get the Hunter’s Taloncharm who will grant you both the attack and defense buffs in only one item slot!
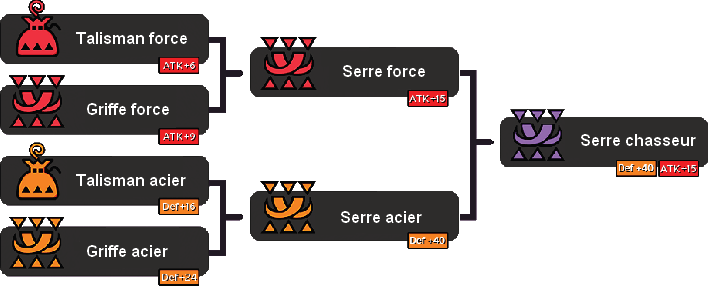
The main issue is the Lao-Shan itself. The pacifist solution is to trade the 2 claws needed with the N Points Exchange from the General Store for 18 points per claw so a total of 36 points (easy on rain, 8 days of login on Mezelounge) or using GCP for a total of 180 GCP (but once again, you should keep those for your Partner). Or you can go for the violent solution and farm the quest but keep in mind that a Lao-Shan quest is essentially 30 min of walk through long corridors while hitting a punching bag.
HR3: the high rank begins
Congrats first for having survived Espinas brutal onslaught with its insta-charges, poison and bullshit stuns. You’re now in high rank. If you have followed this guide to the letter, you should now have a Kukubo set already with high rank defense levels. And this rank doesn’t add that much new stuff.
One of the first thing to do would be to buy House Expansion 2 under Books at the General Store, granting your last House update and increasing your item box storage to its limits.
Gear Quests return
rain server special mention
Once again, these are only accessible in the Newbie 2 Worlds
Some Gear Quests were locked behind HR3 and you can now do these!
These new quests will grant you:
- materials to improve the weapon you got from the previous dedicated Gear Quest (increasing its true raw from 130 to 190)
- At least 5 Atk Gallery Jewels (3 Attack points, 2 Crit Eye points, 2 Adrenaline points) who will replace your Attack 2 Jewels, adding Adrenaline +1 and more importantly Crit Eye 3 to your set
Gallery Jewels were initially tied to the Gallery mechanic. I won’t go in detail but essentially you could ornate a dedicated room using Furnitures bought at the General Store and do design contests with the server members (and earn the tickets to make these decos).
This same quest will also grant you various other decorations granting you 3 points for an elemental resistance and 2 other skills which can be useful (the dragon jewel can trigger Status Attack who improves your status damage for only 5 decorations).
Breaking the limits with Transcendance
Once your reach HR3, the Guild Master on the Square will want to talk with you. Doing so will unlock the Transcendance. This is an item who will always be in your item bar and disabled at the start of the fight. After 5 to 6 minutes engaged with a monster, the Transcendance will be fully charged. You can use it like a regular item, the animation making you invincible during its activation.

Under the effects, your attacks are enhanced and you get defensive buffs for a full minute. If you manage to deal enough hits to the monster in that state, you’ll be able to trigger the Ultimate Hexarush, a powerful hit dealing various temporary status conditions to monster based on your weapon element.
| Element | Effect |
|---|---|
| Raw | Deals a lot of damage and inflict a flash effect bomb to the monster |
| Fire | Deals continuous fire damage, being able to trigger flinches on its own |
| Water | Deals weak water damage and make the monster parts softer for a long duration |
| Thunder | Deals thunder damage and paralyze the monster (unless immune) |
| Ice | Freeze the monster, preventing totally from moving or acting. Tails can’t be cut in that state and certains monsters are immune to the effect |
| Dragon | Deals dragon damage and a lot of stun damage, being able to stun monsters |
But if you don’t deal enough hits, the Transcendance state will be disabled after 1 minute and will need to be recharged. Note though that the hit count for Hexarush is kept between 2 Transcendance states and that the future Hexarush attempt will be easier as a result. The count is also shared in multiplayer, making it easier to land a Hexarush with your friends. You can disable Transcendance in the Transcend Status, which will remove the item from your item bar.
You might have noticed in this menu that each element has a a gauge. In fact, your Transcendance gets stronger with using a weapon of the proper element. This level increase increases the damage buff you get during the Transcendance state and the defensive bonuses linked to the state.
| For | Raw bonus | Element bonus |
|---|---|---|
| Blademaster | 101 to 113% | 110% to 200% |
| Gunner | 101 to 113% | 101 to 113% |
| Defensive buff | Effects | Min-max values |
|---|---|---|
| Strength | Increase defense and elemental resistance | 50 def and 10 res 800 def and 100 res |
| Focus | Grants an initial charge to Transcendance | 0% 25% |
| Spirit | Increases Transcendance duration | 60s 120s |
| Heart | Grants a Hyperarmor effect | / |
| Speed | Grants a Movement Speed Up effect | / |
| Heal | Grants a instant heal effect to all allies when triggering Transcendance | / |
Diva Quests
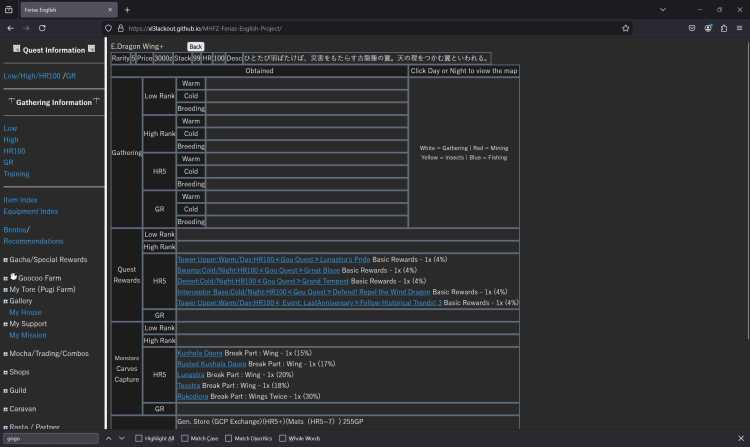
Diva Quests were scenarized quests, separated amongst 15 chapters divided in episodes. Those are translated on the Mezelounge server as of me writing these lines (no idea for rain). Back in the days, they were needed to unlock the Tonfas in G rank. At the end of the game life, they allow you to unlock the Diva songs who grant you temporary buffs, Tonfas being instantly unlocked when you reach G rank. You also get by doing these the Iriku armor set granting you various defensive buffs and the Diva weapon series who have the Music hybrid element. They’re not needed for your game progression, I’m only mentioning them as they are introduced at this point of the game.
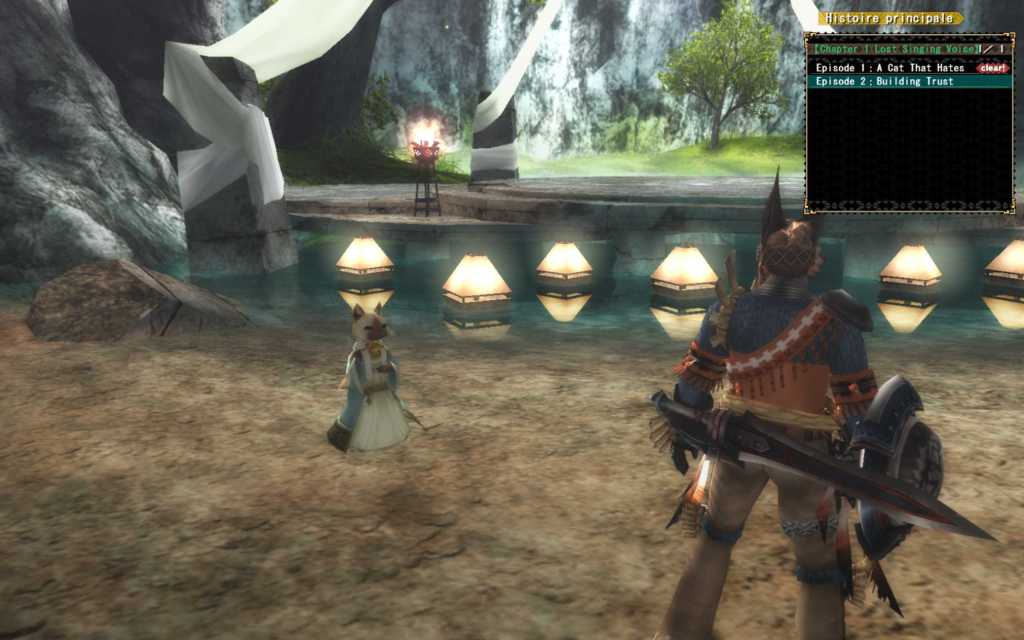
These quests can be done by going to the Prayer Fountain right in front of the Rasta Bar. You can find the full quest list on Ferias: https://xl3lackout.github.io/MHFZ-Ferias-English-Project/quest/sg.htm#lU001
HR4: The end of high rank
Not a lot there but the urgent quests will trigger multiple objectives in the Hunter Navi who will grant you the mats to make a weapon from each category with various element and status. Hunting the monster complete the task and nothing prevents from crafting any other weapon with the mats given to you.
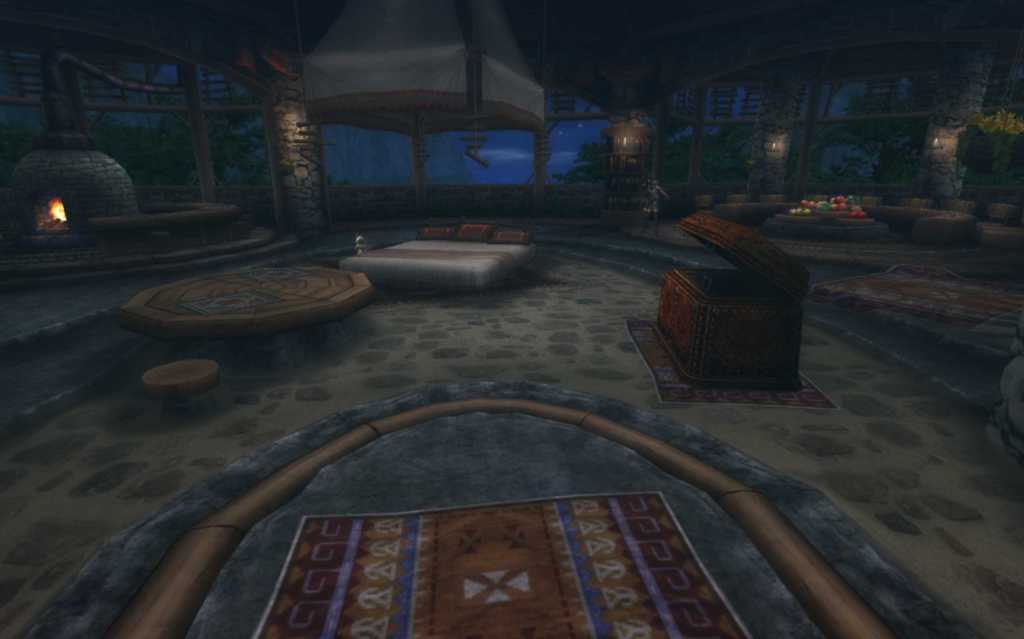
My Tore
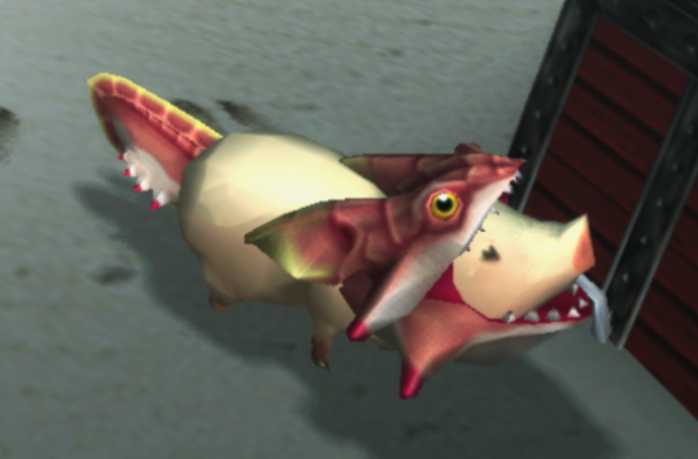
Poogie is here in Frontier in a dedicated space and can even join you in your quest to grant you an appreciated help. The first step to get your very own Poogie is to go to My Tore in My Facilities to recruit a Manager who will handle this space. There are 3 sisters and you can choose which one will be your Manager with a small interview given to you when you enter the area.
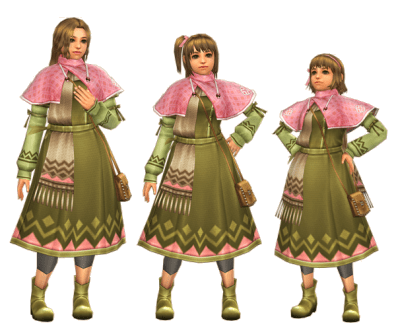
Here are the answers to pick your Manager:
- Older sister: yes – no – yes
- Middle sister : yes – yes – yes
- Younger sister : yes – yes – no
- Random : no – yes – yes
You have to wait one server reset for your Manager arrival. In the mean time, you can get a ticket for 30 Tore Points you’ll use to buy your Poogie through the Hunter Navi, task 7 in the HR tab.
The next morning, your Manager should be here. And to take some good habits, starts by claiming your Tore Points by selecting the Get Points option. The Manager will grant you 1 or 2 points, alternating each day. If you don’t claim them, she can store them for a few days.
You’ll need 30 points to get your Poogie and since I guess you don’t want to wait 20 days, go to your item box to picket the 30P Ticket you’ve received from the Hunter Navi (at the end of your chest with auto-sorting). Put it in your item pouch then claim your points with the Manager.
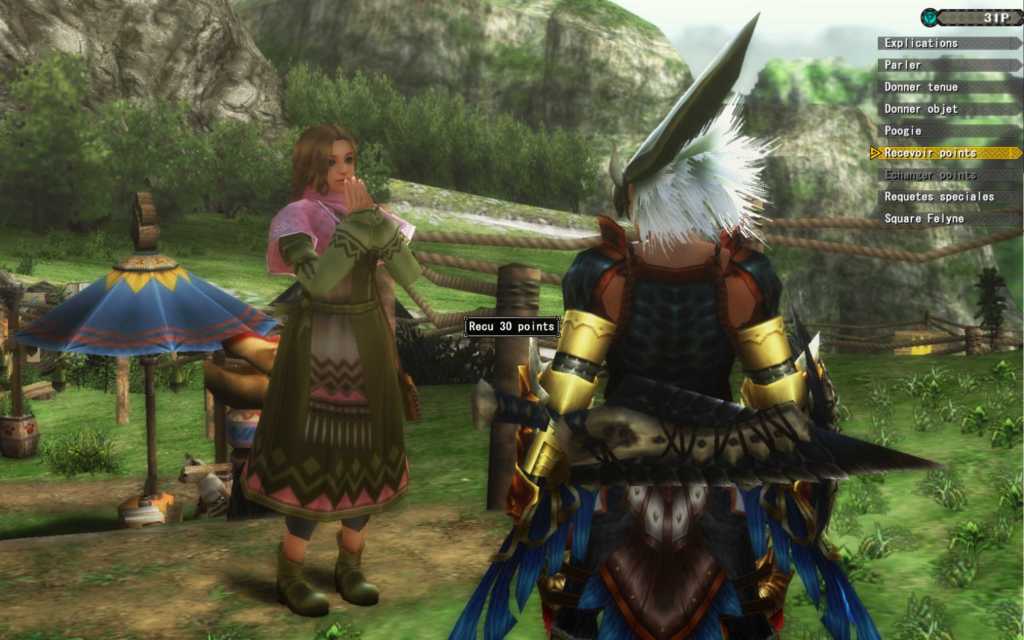
Since you’re now rich, you can buy a Poogie from the Manager.
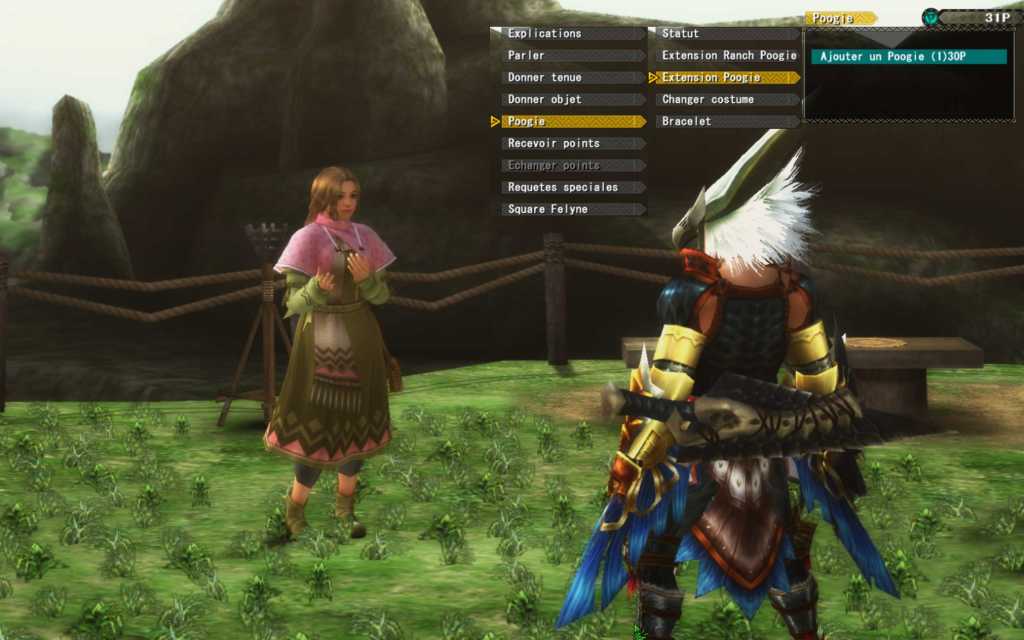
Your Poogie will appear later. In the meantime, you’ll have completed another task from the Hunter Navi for another 30P ticket. This ticket will be used to unlock an Extension from the Poogie Ranch, the Departure Facility.

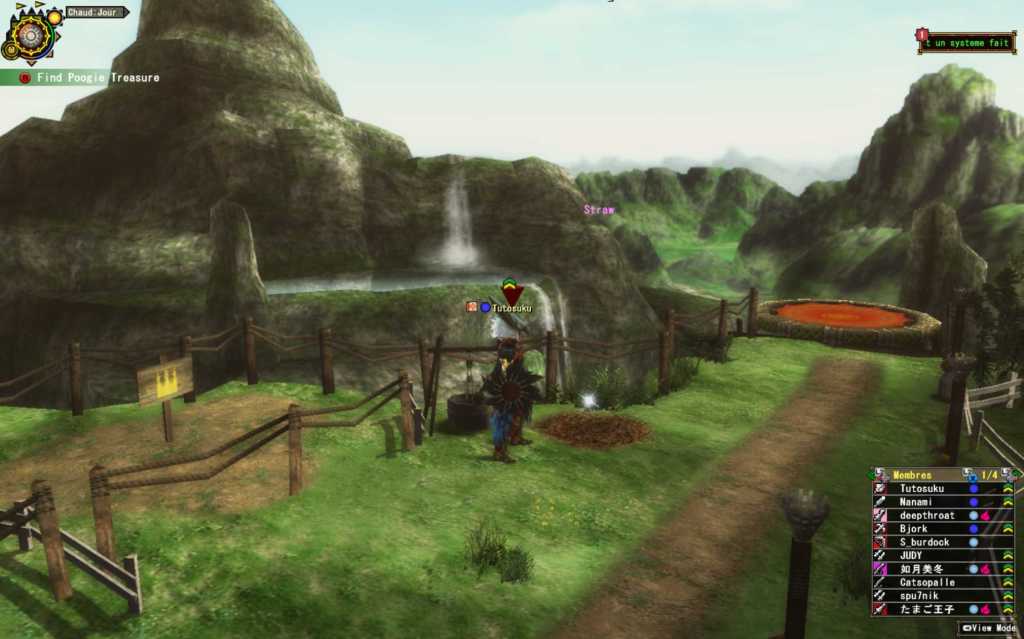
This will allow you for your Poogie to join you in your quests. He will spawn randomly during the quest, granting you random items more or less useful. He can also grants you a bonus carving who will be stored in its nest in My Tore on its Straw.

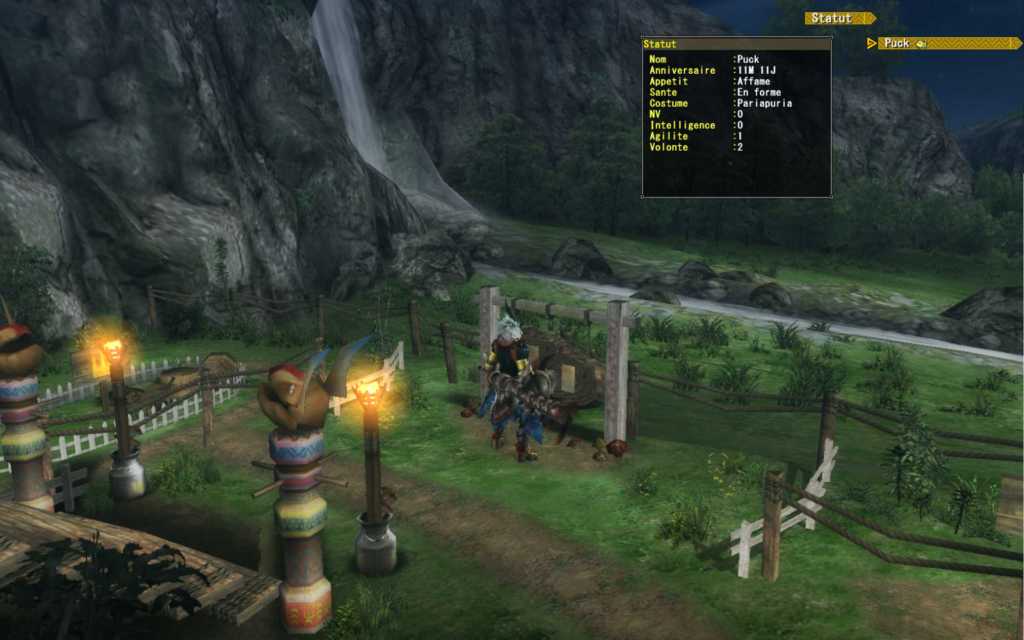
Your Poogie has some stats you can check at the nest. These stats impacts the Poogie apparitions and its actions.
| Stat | Effects |
|---|---|
| LV | Increase the Poogie apparition rate and its chance to bring an item to its nest. Calculated from the sum of the 3 other stats rounded down |
| Intelligence | Increase the chance Poogie brings you useful items |
| Agility | Increase the chance Poogie appears when you’re low on life or when you take a hit |
| Willpower | Diminish the time between 2 Poogie apparitions |
These stats can be increased with various Facilities than can be bought from the Manager just like how you bought the Departure Facility (but Poogie won’t join on your quests if he’s training).
| Station | Intelligence | Agility | Willpower |
|---|---|---|---|
| Obstacle Course | + 2-3 | + 1 | – 1 |
| Climbing | – 1-2 | + 1 | + 3 |
| Running | + 1 | + 3 | – 1-2 |
| Study | + 3-4 | – 2 | + 1 |
Poogies can also wear costums allowing them to equip Skill Cuffs. Instead of buying these with Tore Points, Mezelounge gifts you those just like the Partnya’s Book of Kindness. So do not hesitate to claim these from the Harisen Felyne at the Workshop under Claim Items > Claim Promo Items, to grant some drip to your porcine friend.
Skill Cuffs can be crafted at the Workshop and acts like the mainline games charms, granting you bonus skill points. They aren’t really useful though until G rank so I’ll come back to these when we’ll get there.
HR5: Gou rank and Frontier real beginning
Welcome to Gou rank, a intermediate rank before G rank and where Frontier truly take off. This rank was in fact Frontier’s first endgame. Indeed, while the game released on July 21 2007, its G rank only arrived on April 23 2013. During these 6 years, the game stagnated in Gou rank…
Which means a lot of time to make a lot of updates with a lot of equipement systems and special mechanics. So strap yourselves and let’s go!
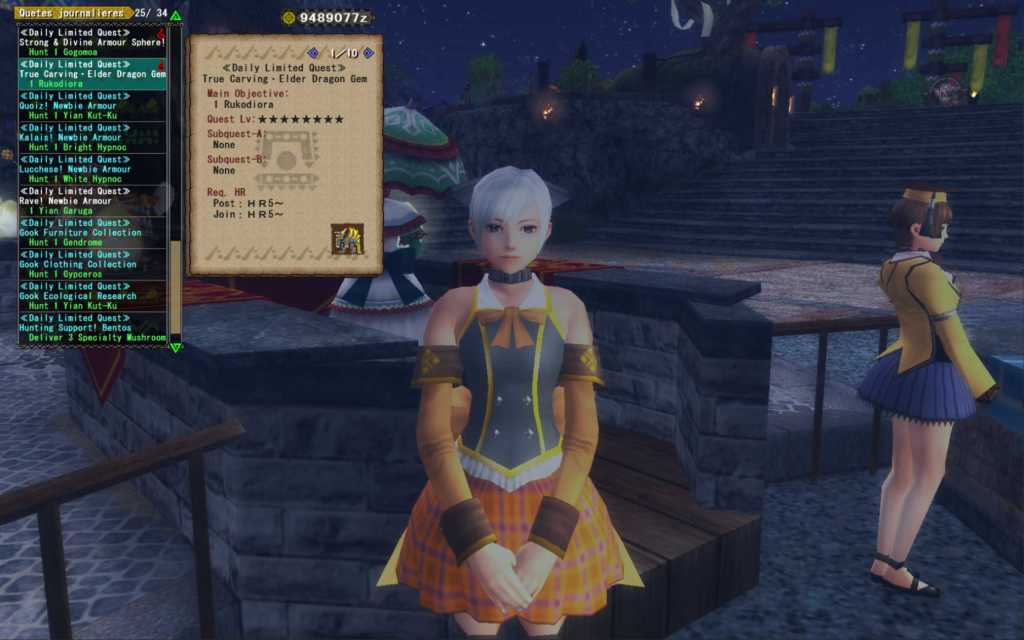
Do your Daily Quests
As a reminder, when you get your Daily Special at the General Store, you get 2 attemps for the Daily Quests. These become way more important when you reach HR5 thanks to these 2 quests.
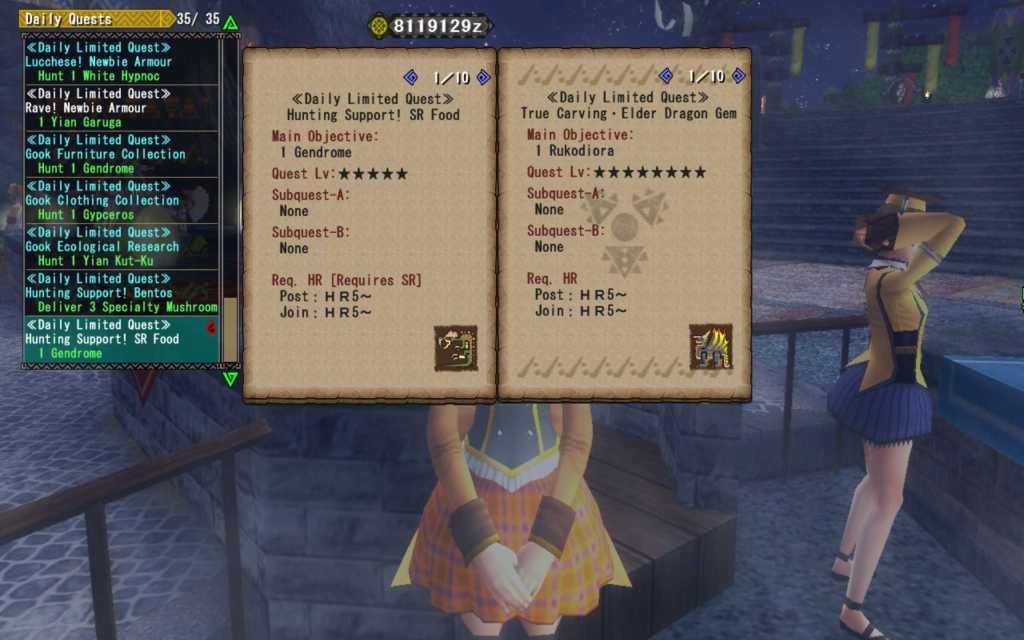
The Rukodiora quest guarantees an Elder Dragon Gem, a drop needed for essentially every Gou armor piece. Would be a shame to miss on that one.
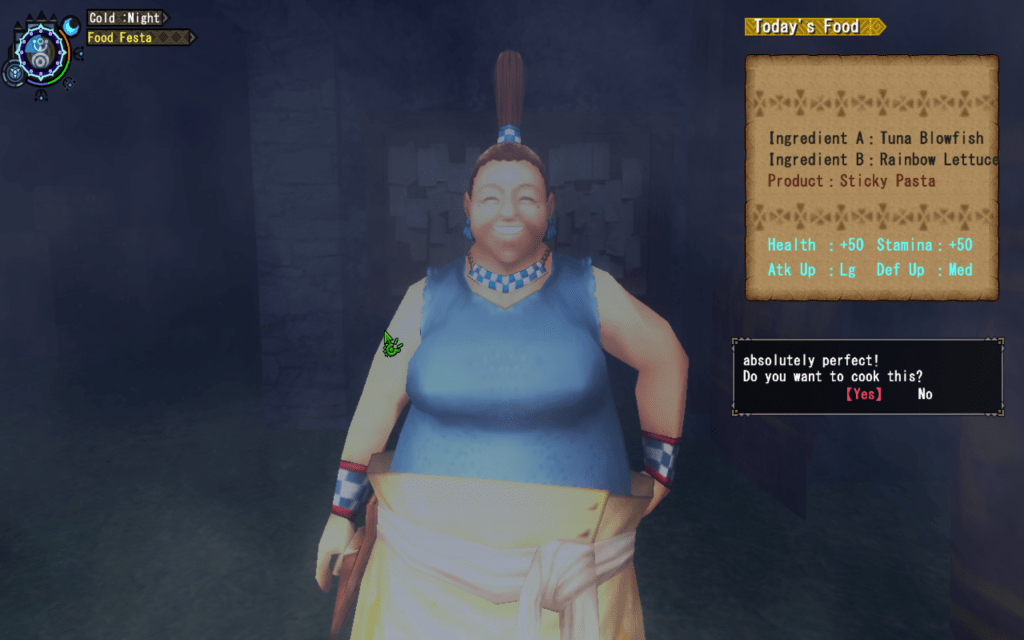
Regarding the HC Gendrome quest, it grants you 10 samples of rare ingredients for your Bento. These can be obtained during HC hunts but you only get one of those after each hunt while this Gendrome will fill your stocks generously. With these ingredients, you can make one of the better Bentos, Sticky Pasts. So do not hesitate to farm this quest once you’re done with the previous one.
Hunt with Style
Once you arrive on the Square, the Guild Master will want to talk with you and will unlock your Hiden Book, teaching you the Heaven and Storm styles. You can change your style at the Workshop or in Your House item box in Change Equipment > SR Settings > W> Style.
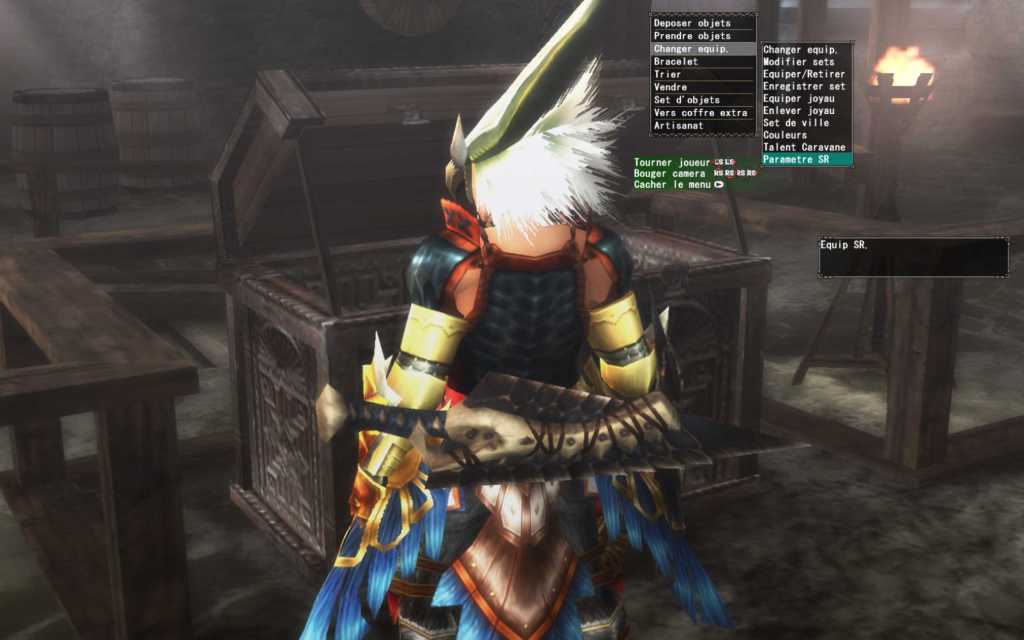
Each Style grants you new attacks and moves which are detailed and showed here: https://lescarnetsdelawycademie.fr/weapons-frontier/
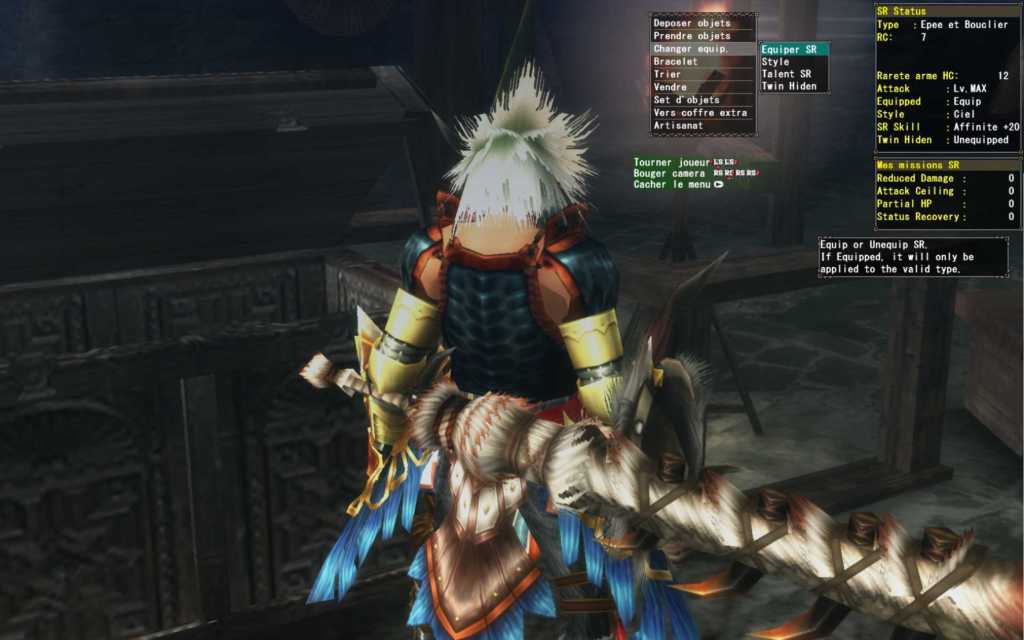
Aside from changing your Style, this menu also allows you to set your SR Skill, skills you’ll unlock by raising your HR. For the time being, you only have access to Defense +60. At HR6, you’ll get elemental resistance skills and a buff to whetstones, while you’ll get a skill granting you a massive 20% affinity buff when you get to HR7.
You’ll also find some interesting parameters in this menu:
- HC weapon rarity: the max weapon rarity level you can use to get a 50% bonus on zenny and Guild Point while fighting HC monsters. Rarity 7 at HR5, rarity 10 at HR6 and 12 at HR7.
- Attack: a permanent attack buff. 15 points at HR5, 45 points at HR6 and finally 100 points at HR7.
Various monsters
No less than 5 different monster types start out in Gou Rank, with one alterating the monsters you already knew.
Gou Monsters
This one is pretty fast: these are the monsters who already showed in the base roster. Without much of a surprise, they become stronger with new moves since you just took a rank.
The main novelty here is that they will grant you Generics Materials. For instance, a Rathian will give a Rathian Scale in low rank and a Rathian Scale + in high rank. In Gou rank, she will now give Flying Wyvern Scales, with 2 variants called Scale + and Scale ++. Be it a Rathalos, a Khezu or a Basarios, all will drop “Flying Wyvern” drops. Each monster category has its own drops (Carapaceon, Pelagus, Elder Dragons, etc).
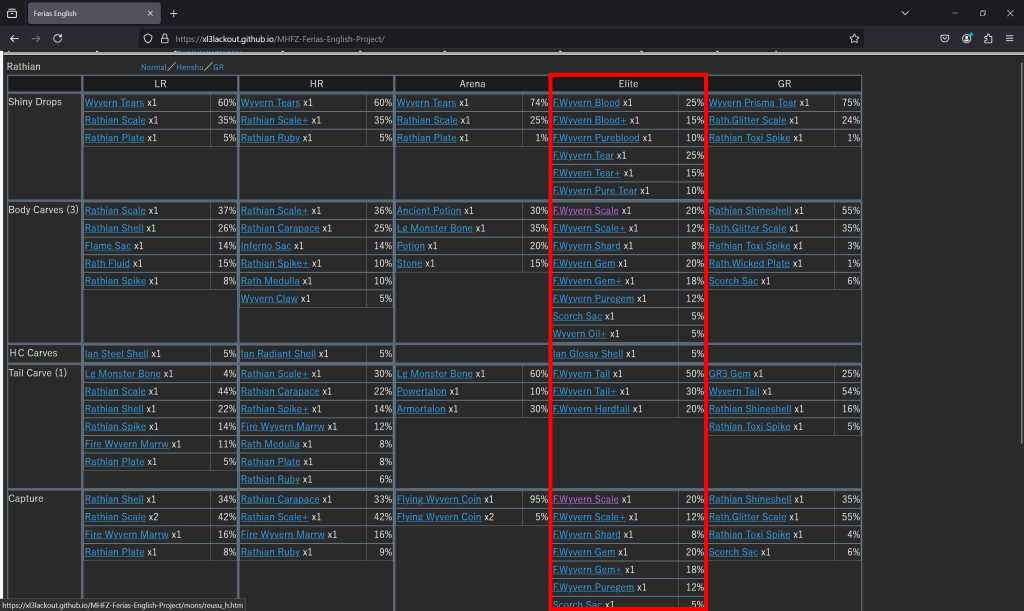
Note that not all Flying Wyverns give all “Flying Wyern” drops. You can use the Search function at the Workshop to check what monster has the better chances to give you the drop you need. Ferias is also a precious tool to get a good idea of what to target and your odds.
New monsters you’ll meet in HR5 like Forokururu or the Gougarf duo will use regular drops.
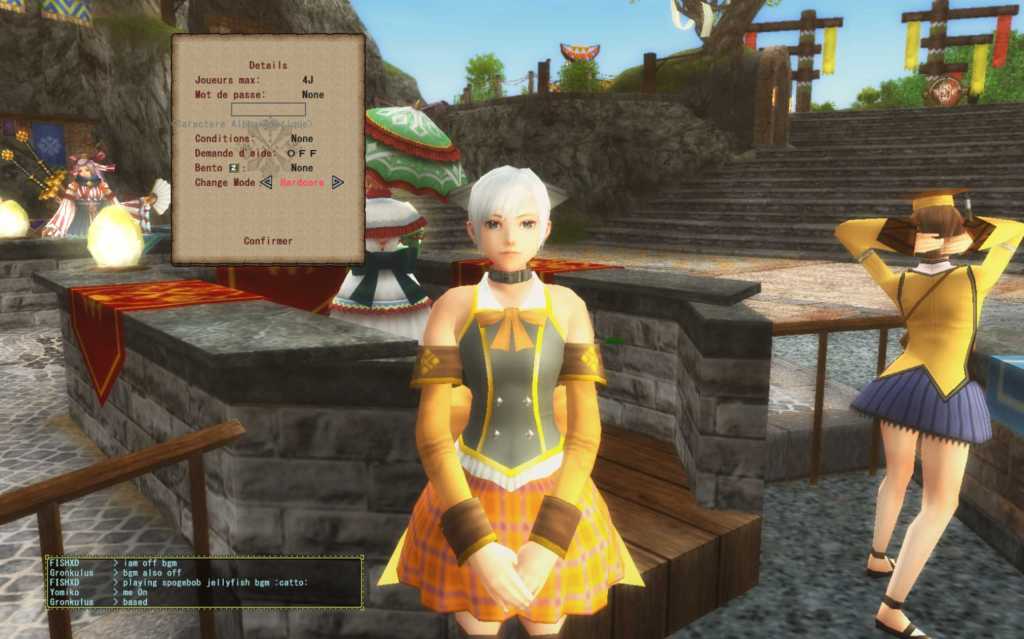
HardCore Monsters (HC)
HC Monsters are variants of the monsters you already fought, with generally physical changes and new attacks. Almost any quest you’ve already done now gets an HC version. The mode can be selected when you take your quest.
Hunting a HC Monster allows you to get a new drop for each rank, needed for some equipement upgrades.
| Rank | HC Drop |
|---|---|
| Low (HR1-2) | Abio. Malice Bone |
| High (HR3-4) | Abiorugu Feral Bone |
| Gou (HR5-6) | Abiorugu Solid Bone |
| G | Abiorugu Heat Bone |
This new drop is forced into the monster previous carving table. The older carving table who represented 100% of the odds is now redistributed on 95% and the new drop makes for the missing 5% for low, high and Gou ranks. In G rank, you only have 2% chances to carve the HC drop. A sound indicate when you carve the HC drop. This drop can ONLY be carved so you can’t get it through capture or quests rewards. This also means that Poogie and its extra carve can give it to you, so don’t forget to check the Straw in My Tore, you might get a good surprise…
Beating a HC Monster also rewards you with a rare Bento ingredient which can’t be bought but can be farmed with the Daily Quest mentionned before.
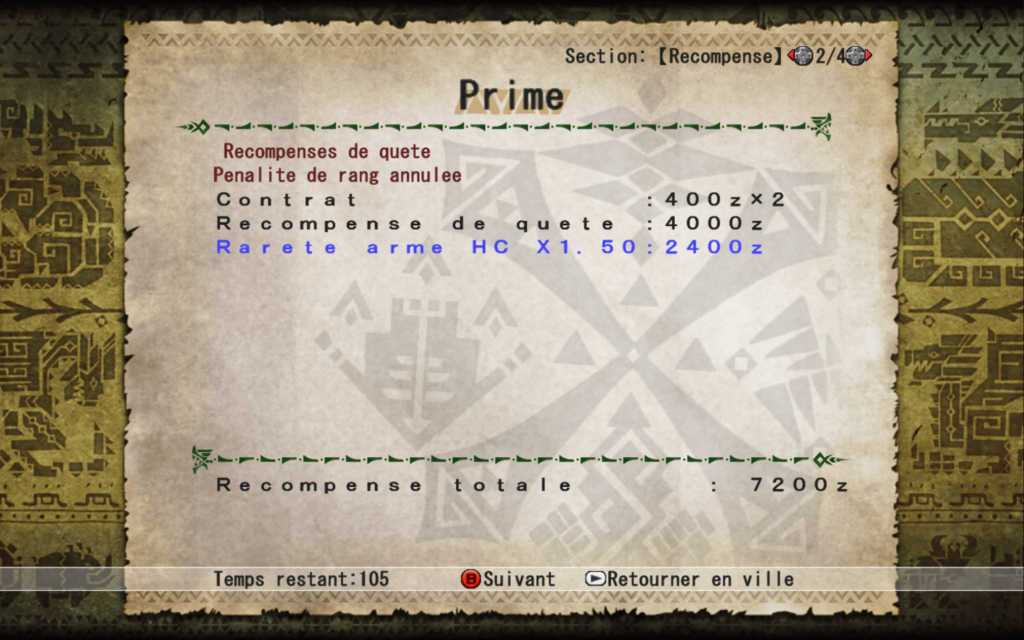
Last specificity of HC Monsters, fighting them with a Gou ou HC weapon which rarity is lower than the HC Weapon Rarity parameter in your SR Settings will increase the zenny and GCP reward from the quest by 50%
Origin and Burst Species
This is a distinction for some newer monsters. Origin Species are living fossiles, ancestors from some monsters you’ve already met. These includes:
- Gureadomosu, Gravios ancestor
- Yama Kurai, Yama Tsukami ancestor
- Toa Tesukatora, Teostra ancestor
- Voljang, Rajang ancestor
As for Burst Species, they’re alternative evolution variants of some other monsters you already know:
- Zerureusu, based on Rathalos
- Meraginasu, based on Espinas
- Diorekkusu, based on Tigrex
- Garuba Daora, based on Kushala Daora
- Vasuraburosu, based on Diablos
You’ll need to hunt all these monsters to get to HR6.
Exotic Monsters
Exotic Monsters are monsters who have been recently discovered in the Mezeporta region. Essentially, these are mainline monsters ported in Frontier after MHDos. You can fight them in Exotic Quests but these quests are specials as they disable Halk Pot. So be careful if you tend to rely too much on these.
There are 3 unique Exotics Quests called Armor Crafting who will instantly grant you the materials needed to craft one armor piece. Be cautious as these quests require you to hunt the monster AND break a specific part. If you defeat the monster without having break said part, it’s a quest fail.

A LOT of armor and weapon systems
SP Equipements
I’ll quickly go over these. These are armors and weapons with various colors and mainly for esthetic purpose. You can find them under Special Armor > SP Armor and they need Dyegrass which can be collected while gathering plants. They have no skill points, having instead a SP deco slot. SP Decos are powerful decorations, allowing you to customize the armor piece… But they’re weaker than the other HR5 options.
Weapons can be found at the end of the base Create Weapon menu. Your weapon can be improved as an SP weapon 3 times within that rank, increasing your true raw from 190 to 270 while adding a short blue sharpness. SP weapons also have a special property granting them 10 raw and 20% affinity when used on Gou or higher quests. Once again, these are weaker than the other options but it make for a good basis to begin HR5.
Gou and Heaven Equipements
You can find these under Gou Armor for the armor and Gou Weapons for the weapons. Crafting these equipement requires Proof tickets which can be earned by doing Gou quests with the corresponding monster. To make an armor piece, you’ll also need an Elder Dragon Jewel. You can get one on HR5 Rukodiora partbreaks and as a quest reward with 10% chance. There is also a Daily Quest against a weaker Rukodiora who guarantee at least within the quest reward. Be sure to pass at the General Store and pick your Daily Special to be able to do this quest.

Gou armors have the Skill Reinforcement effect. Wearing one or multiple of these pieces will increase the compatible skills. For instance, having Attack +4 (50 skill points) while wearing a Gou armor piece will automatically grant you Attack +5 (which should have costed 80 points). Note though that this Reinforcement effect only works if you have at least 26 stamina (so more than the minimal stamina) and a certain amount of health varying based on the number of Gou armor pieces.
| Number of Gou armor pieces equiped | Health required to get the Reinforcement |
|---|---|
| 1 | 100% |
| 2 | 90% |
| 3 | 83% |
| 4 | 76% |
| 5 | 70% |
You can check if a skill get the Reinforcement effect on mertna’s site but the game also shows you this in your Status screen with a blue arrow next to the skill.
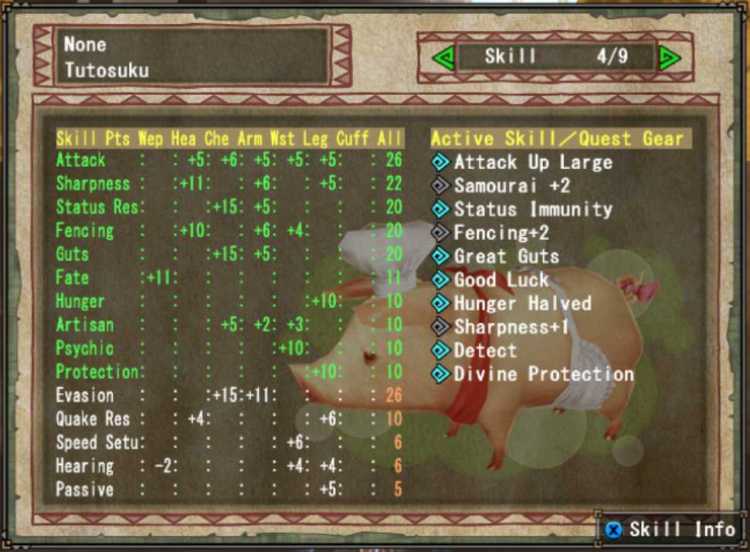
When you’re making your set while using the Gou Reinforcement, keep in mind that said Reinforcement only works above a certain health threshold. For instance, you see above Status Immunity, granting me immunity against poison, paralysis and sleep, turning into Status Immunity (Myriad) protecting from almost every status in game… As long as I have enough health. You can check if you have enough HP with your hunter icon in quest who will alternate with a little character flexing its arm if the condition is fullfiled.
Gou weapons have bonuses varying based on the weapon type:
- Blademaster: Mind’s Eye (no bouncing) at max health and stamina
- LBG: can go for continuous rapid fire to chain a large number of shots
- HBG: unlock a Thermal Cannon cumulating your shots heat to unleash a laser similar to a Gravios beam
- Bow: blast coatings
Heaven Equipements
Once a Gou armor is upgraded to lvl 7, you can upgrade it using a low rank HC drop. They become Heaven Armors and reinforce Gou weapons in Gou HC, Supremacy (HR6) and G quests. They also improve the HC Weapon Rarity parameter in your SR Settings menu (where you select your Style), allowing you to get extra zenny and GCP on HC quests with a weapon rarer than rarity 7.
| Nb of pieces | Health required | Attack Bonus | Element/Status Bonus | HC Rarity |
|---|---|---|---|---|
| 1 | 100% | +15 | +2% | +1 |
| 2 | 90% | +30 | +4% | +2 |
| 3 | 83% | +45 | +6% | +3 |
| 4 | 76% | +60 | +8% | +4 |
| 5 | 70% | +80 | +10% | +5 |
Heaven weapons are the next step for Gou weapons. With 2 Heaven armor pieces or more, Heaven weapons get powerful buffs varying based on the weapon type:
- Blademaster : +1 sharpness level (blue turns into white, white into purple, purple into cyan, etc)
- Gunner: the critical range modifier is greatly increased, increasing damage dealt at the optimal range
- Bow: power coatings buff goes from 150% to 170%
You’ll usually need a Gou rank HC drop to upgrade them, along with 3 Souls, obtained by doing a HC Gou or higher rank quest with a weapon of the same category.
Exotic Equipements
These can be found without surprise under Exotic Armor and Exotic Weapons in their respective menus and can be crafted with exotic monsters materials.
These armor pieces instantly grant you a skill. Aside from their innate skill points, they simply grant you an activated skill as if you had the required skill points. I’ll talk about this later but exotic skills are outside of Frontier regular skill limit, usually caping your armor set at 10 skills.
Exotic skills are as follow:
| Set | Exotic skill |
|---|---|
| Nargacuga | Evasion +2 |
| Barioth | Ice Attack +2 |
| Uragaan | Guard +2 [Blademaster] Maximum Bullets [Artilleur] |
| Deviljho | Starved Wolf +2 |
| Zinogre | Thunder Attack +2 |
| Amatsu | Water Attack +2 |
| Brachydios | Bombardier |
| Zinogre stygien | Dragon Attack +2 |
| Gore Magala | Focus +2 |
| Shagaru Magala | S. Immunity (Myriad) |
| Seregios | Critical Eye +5 |
It’s the same principle but simplier as any exotic weapon grants you the Speed Eating skill.
HC and HS Equipements
Some standard armor pieces (those you make in the Create Armor menu) can be upgraded as HC armor. These armor pieces grant you passive health regen so long as you’re above 50% health and have enough stamina but exclusively against HC monsters. The health regen is indicated by your health bar pulsing red. The regen speed and the stamina amount required change based on the number of HC pieces equiped.
| Nb of pieces | Stamina required | Health regen speed |
|---|---|---|
| 1 | 150 | 1 HP / 8s |
| 2 | 125 | 1 HP / 4s |
| 3 | 100 | 1 HP / 2s |
| 4 | 75 | 1 HP / 1,5s |
| 5 | 50 | 1 HP / 1s |
As for HC weapons, they’re crafted using Weapons Souls, drops you get specifically from killing HC monsters. You can find them in the regular weapon craft list between basic weapons and SP weapons. They have pretty good stats and a low rarity, making them ideal to get trigger the HC Weapon Rarity bonus… But just like SP weapons, there are better options in Frontier Gou rank meta.
HS Armors
HC armors can be upgraded as HC armor. They share the same effects but also grant you a defensive buff while using a HC, Heaven or stronger weapon, so long as you respect the previous limits (enough stamina and specifically against HC monsters).
| Nb of pieces | Defense bonus | Damage reduction |
|---|---|---|
| 1 | + 20 | 10% |
| 2 | + 40 | 14% |
| 3 | + 60 | 24% |
| 4 | + 80 | 27% |
| 5 | + 100 | 30% |
Building the right decos
Gou rank is hard, not even talking about Supremacy rank who’s right around the corner. Luckily enough, you can make powerful decorations to help in your progression. You’ll find these decos under G Decos in the dedicated menu.
To craft these decos, you’ll need Gou drops and specific jewels that can be earned in event quests. In these events quests, you’ll receive 4 jewels per completion, with chances to get additional slots of 2 or 4. While the fact that you’ll 15 jewels to make a deco might seem daunting, the effort is well worth the reward.
rain server special mention
Farming these decos is way easier here thanks to the N point system explained before. I’ll detail in the next part regarding a set to make how to get these jewels. Also the decorations mentioned here do no appear in the Workshop menu so long as you didn’t drop the correspond jewel.
Let’s take for instance Survivability G decos which can be found on page 15.
| Number of decos | Effects |
|---|---|
| 2 | Tripes: survive any mortal hit at 90 or more HP Evasion +1 Status Halved: poison, paralysis and sleep duration halved |
| 4 | Great Guts: survive any mortal hit with 70 HP or more Evasion +2 Status Immunity: immunity to poison, paralysis and sleep |
Obviously this is not a random example as Evasion is one of the more important skills in Frontier endgame to get through hits with your rolls iframes, while Guts is crucial in endgame as a lot of hits can tear through your health bar. As you can see here, with only 4 decos in a set that can fit 15, you get the strongest version of these precious skills.
These decos require Crabapple Jewels which can be obtained in the event quest Survivability G! High Abiorugu (90/155), along some Flying Wyvern Gou drops. Each event quest tied to a G Deco has the name of the deco in the quest name.
An all purpose set
rain server special mention
Reaching HR5, the game gives you a free armor set you can claim at the Harisen Felyne in the Workshop. It’s not broken by any mean but it’s a nice tool to farm the incoming set.
Once you have acquired some massive N points stocks, you can trade the jewels required to get the decos mentioned later in the General Store under Netcafe Benefits > N Point Exchange > Decorations. The jewels here have weird name with a 4 numbers codes and kanji, so I’ll only put here the 4 numbers code and the page in the exchange menu. You’ll need:
- 30 8520 (10/29) for 2 Fencing G
- 60 352F (13/29) for 4 Survivability G
- 30 F717 (10/29) for 2 Psychic G
- 30 1825 (11/29) for 2 Artisan G
- 30 6412 (5/29) for 2 Protection G
- 15 F613 (6/29) for 1 Attack G
All this will cost you 390 N points. You’ll also need 5 times certain monster drops for each decos, the choice is yours if you want to farm them the old fashion way or simply exchange them with N points. You can also farm the jewels doing the event quests, aside from Survivability G who wasn’t available on rain when I wrote these lines, no idea why.
Important point that you will now meet in Gou rank, Frontier sets can only equip up to 10 active skills. If you have 11 skills, the game will disable a skill using an internal priority order. Exotic skills, be it from your armor or weapon, don’t get added to that count and are out of this system.

Aside from this disclaimer, what set to make? For simplification purpose, I made a set who works for most blademaster weapons. That being said, you can find great sets on this site if you want something more specialized like for GS or lance: https://docs.google.com/document/u/0/d/16ej2fucgASg9vgHLt2rjFbu_nu0KGlWB3b0_DyC9NTM/mobilebasic
Once the initial craft is done, upgrades will require armor spheres you should get during your farming. You can also improve the Doragyurosu helm and Toridcless waist as Heaven armor for their buffs and one additional decoration slot, plus the Gougarf legs who will turn in a HS armor piece.
| Armor | Decos |
|---|---|
| Doragyurosu Helm | Fencing G Fencing G |
| Nargacuga Chest | Survivability G Survivability G Survivability G |
| Seregios Arms | Survivability G Psychic 2 G Psychic 2 G |
| Toridcless Waist | Artisan 1 G Artisan 1 G |
| Gougarf FX Legs | Protection G Protection G Attack G |
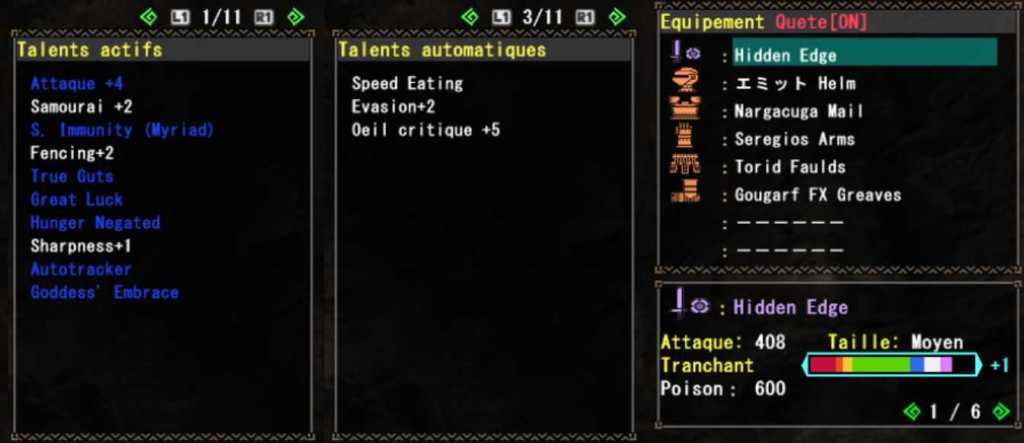
This set will grant you:
- Evasion +2
- S. Immunity (Myriad) [Gou Reinforcement at 90% health]: immunity to almost every status in game
- Great Guts: survive mortal hits above 70 HP
- Goddess’ Embrace [Gou Reinforcement at 90% health]: 1 out of 4 chance to not take any damage when enduring a hit
- Autotracker [Gou Reinforcement at 90% health]: monster position permanently shown on the map with a detailed icon
- Hunger Negated [Gou Reinforcement at 90% health]: prevents any max stamina loss
- Critical Eye +5: +50% affinity
- Attack +4 [Gou Reinforcement at 90% health]: +30 attack
- Fencing +2: no bouncing and a second hit at 20% power on every attack
- Razor Sharp +2: sharpness consumption halved with 50% chances of not using sharpness at all on top
- Sharpness +1
Small word on Fencing. While in mainline games it just prevents you from bouncing, in Frontier the skill is disgustingly broken. It adds a second hit to all your attacks that will deal 20% of the original hit, including element and status. This second hit doesn’t consume any sharpness and will copy the crits of its original hit. It also contribute to the Transcendance hit counts, making Hexarush way more accessible, and gauges recharge (LS, SA-F- Tonfas, MS, etc).
And you might have noticed this set use everything I’ve mentioned before:
- 2 Exotic skills with Critical Eye and Evasion, bypassing the 10 skills limit (use the Armor Crafting quests to make these easily)
- Gou Skill Reinforcement with 2 pieces, reinforcing 5 of your skills above 90% health
- Health regen from HC armors if you upgrade Gougarf legs as a HS armor piece
- G decos
- A SP weapon
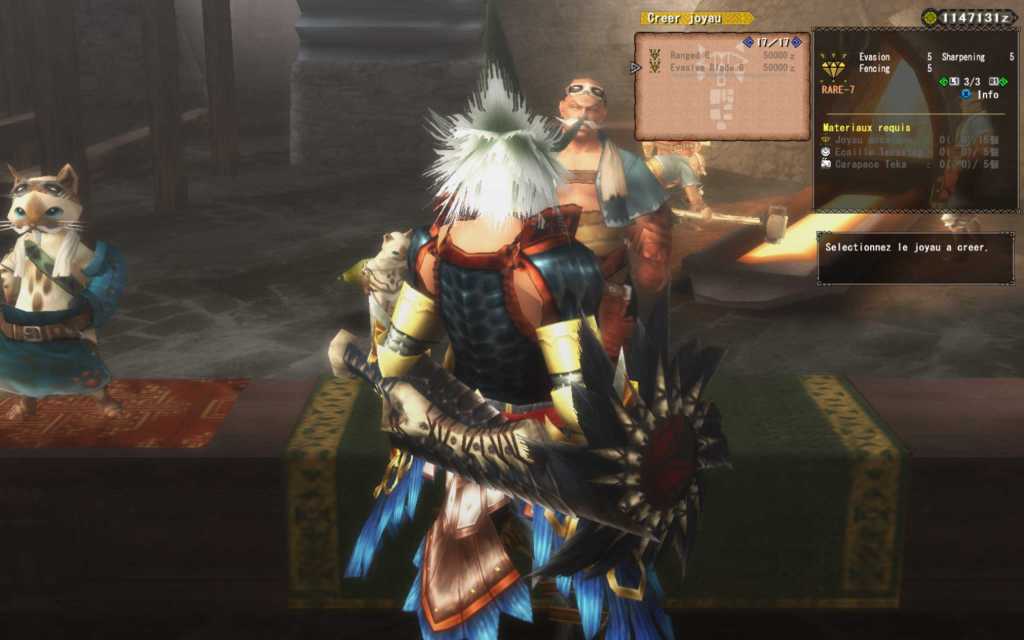
I recommand though you replace your SP weapon, Gou and Exotic weapons being way better. As an SnS player, I’ve swapped for a Nargacuga weapon. Exotic weapons don’t need to be upgraded, the Armor Crafting quest grants you enough drops to craft the weapon in 3 runs if you get a Narga Medulla and obviously the stats are way better (better affinity, purple sharpness with Sharpness +1, 3 decos slots, Speed Eating as an exotic skill, high poison value…). Only weakness is not being a Gou weapon meaning you don’t get the powerful offensive buff from the 2 potential Heaven armor pieces.
Keep in mind this will take some time to farm. Personally it took me 3 full days. To simplify this ordeal, you can complete the Hunter Navi tasks in the Old SR tab under Others, an old system who will instantly grant you its rewards, including GCP Tickets that can be traded at the General Store. The choice is yours if you want to use the Points acquired to trade some ressources or to buff your Partner. Have fun!
Amulets
This system was available since the beginning of the game but you likely never had to do some intensive farming before that point. During said farming, the Guild Master will call you at some point, enabling the Koryo Menu. These are objectives asking you to hunt a certain amount of each monster, going from 10 to 500. For each objective completed, you’ll earn a Koryo Medal.
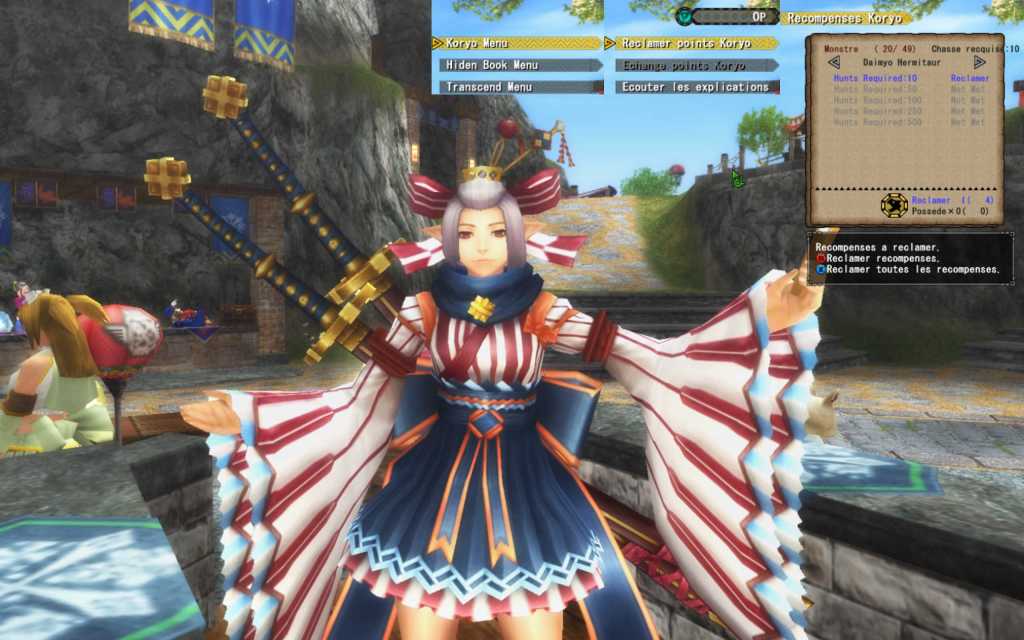
These medals can be traded at the Combo Shop under Amulets. These Amulets grant you various buffs such as increasing your max health and max stamina, reducing them to trigger skills like Adrenaline or Starving Wolf or even reducing the waiting time at then end of quests.
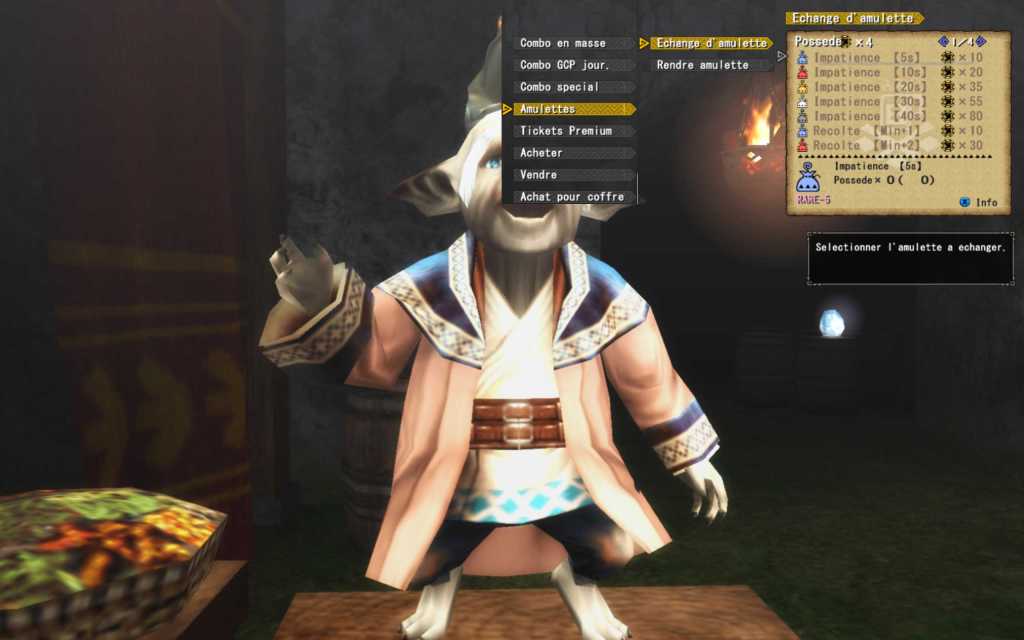
Since the medal numbers is finite, you can give back the Amulets at the same counter and get back your medals to trade another one.
HR6: last stop before G rank
You just survived the 22 urgent quests from Gou rank, congrats. Good news, you’re now in Supremacy rank and there’s only 5 quests. Bad news, these are against Supremacy monsters. Good luck, you’ll need it.
Quick reminder, you’ve unlocked elemental resistance SR skills for reaching HR6 so do not hesitate to use them.
Supremacy Monsters
Supremacy Monsters are overpowered variants of certains monsters you’ve already met. They’re the ultimate step before G rank and a brutal difficulty spike, these being powerful enough to even put G rank equiped players to the test. As a comparison, the beginning of G rank is way more easy.
Note that Supremacy monsters are by default HardCore quests, allowing you to enjoy the health regen from HC and HS armors.
Supremacy monsters have only 2 drops, Boiling Blood, common to all, and a drop specific to each species. Supremacy quest rewards are impacted by a certain number of parameters, carting or using a Halk Pot reducing your rewards. You’ll also a guaranteed Boiling Blood and two species specific drop if you managed to kill the monster before it flees.
Indeed, Supremacy monsters are so powerful that they can flee just like Elder Dragons. If you manage to deal enough damage and the fight last more than 20 minutes, the Supremacy monster will be repelled. The quest is still a success and you’ll get rewards but less than for a kill.
There also a Repel variant for each quest where the monster will flee once it reach the health threshold no matter the chrono. They are easier than the regular quest, making them good quests to farm the specific species drop. But your chances to get Boiling Blood are impacted by the quest type and if you manage to kill the monster.
| Monster | Repel quest | Hunt quest | Monster killed |
|---|---|---|---|
| Odibatorasu | 10% | 18% | 17% |
| UNKNOWN | 10% | 19% | 22% |
| Goruganosu & Aruganosu | 10% | 21% | 23% |
| Pariapuria | 10% | 20% | 24% |
| Doragyurosu | 10% | 22% | 25% |
| Teostra | 10% | 23% | 25% |
Supremacy Equipements
You thought your Gou equipements would stop at the Heaven level? Well think twice cause you can now push these to the Supremacy level, one last step before G rank.
Supremacy armors have the same buffs as Gou and Heaven armors (Skill Reinfocement and offensives buffs for Heaven or higher weapons on Gou HC, Supremacy and G rank quests) but lower the required health threshold, making them way easier to maintain.
| Nb of pieces | Health required |
|---|---|
| 1 | 67% |
| 2 | 34% |
| 3 | 1% |
| 4 | Permanent buff |
| 5 | Permanent buff |
Upgrading an armor in its Supremacy version will usually require 4 Boiling Bloods and 4 species specific drops.
As for Supremacy weapons, they’re essentially the same as Heaven weapons aside from better stats and a purely visual shiny glow. You’ll need usually 20 species specific drops from a Supremacy monster to upgrade them, with 3 Weapon Souls you’ll get by doing a Gou HC quest with a weapon from the same category.
My Missions
My Missions get unlocked at HR6. These are 250 objectives to complete during your quests. You’ll find them at the General Quests Counter under a new Missions options who will automatically sort the quest with the current Mission target.
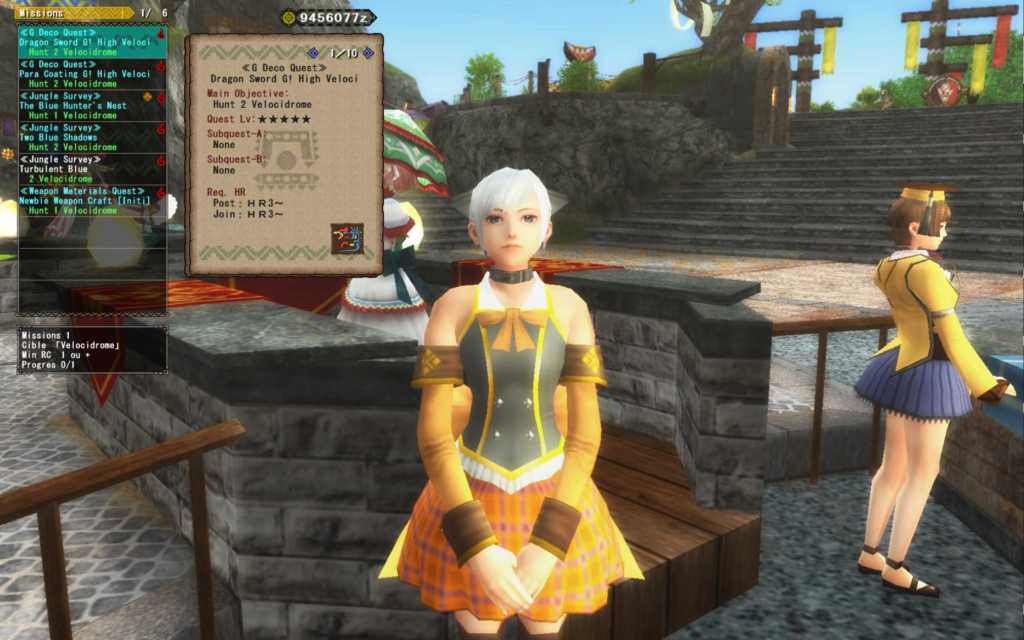
The very first Mission for instance will require you to hunt a Velocidrome with low rank difficulty at minimum (doing a Gou one will still confirm the objective). Harder Missions will change the target, the number of monsters to hunt, the minimal rank or even the HC status of said monster. You can also check your current Mission in Status > SR Status.
Once the Mission is done, you’ll receive one point in one of the four SR My Missions parameters which can be checked in SR Status or your Style menu. Each parameter grants permanent buffs:
- Reduced Damage: reduce damage from attack endured by 0,5% per level (20 levels, 10% damage reduction)
- Attack Ceiling: increase your attack ceiling by 40 points. Frontier has a 800 true raw ceiling. While it seems high currently, a lot of G rank skills have powerful effects like increasing your attack by +100. Doing My Missions is crucial to fully enjoy your G rank set (180 levels, max attack ceiling 8000)
- Partial HP: increase the red health portion after you take damage by 1% for each level (25 levels, 25% bonus red health)
- Status Recovery: reduce the status effects duration by 1,5 frames per level (25 levels, 1,25s status duration less at max)
HR7: the end of the road and a new start
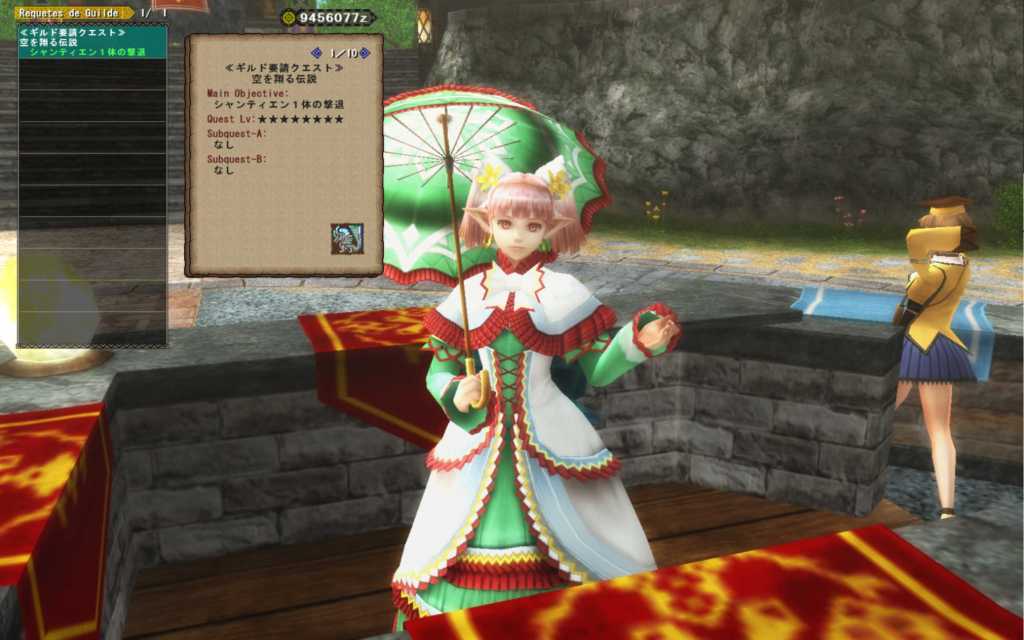
HR7 isn’t really a rank in itself. It unlocks access to the G rank test quest against Shantien, as well as a powerful SR skill granting you 20% affinity. You’ll need to go to the G Rank Quest Counter to take on this fight, behind the General Quests Counter. Go forth hunter, G rank awaits!
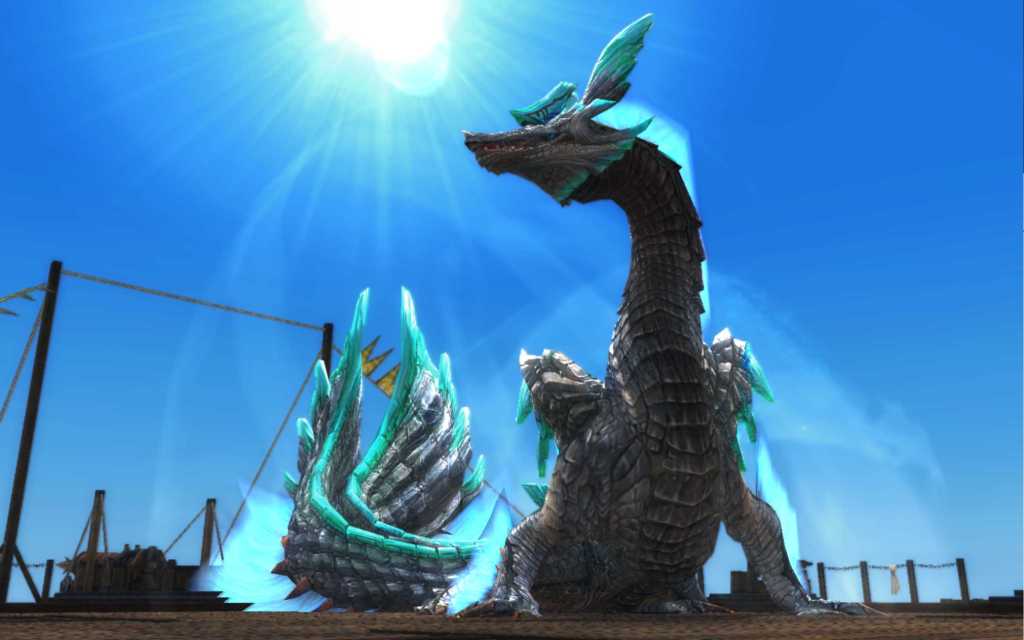
Once Shantien is defeated, go talk to the Guild Master to get your G rank, unlocking your GSR and Extreme Style! And I invite you to move on to the G rank Guide!