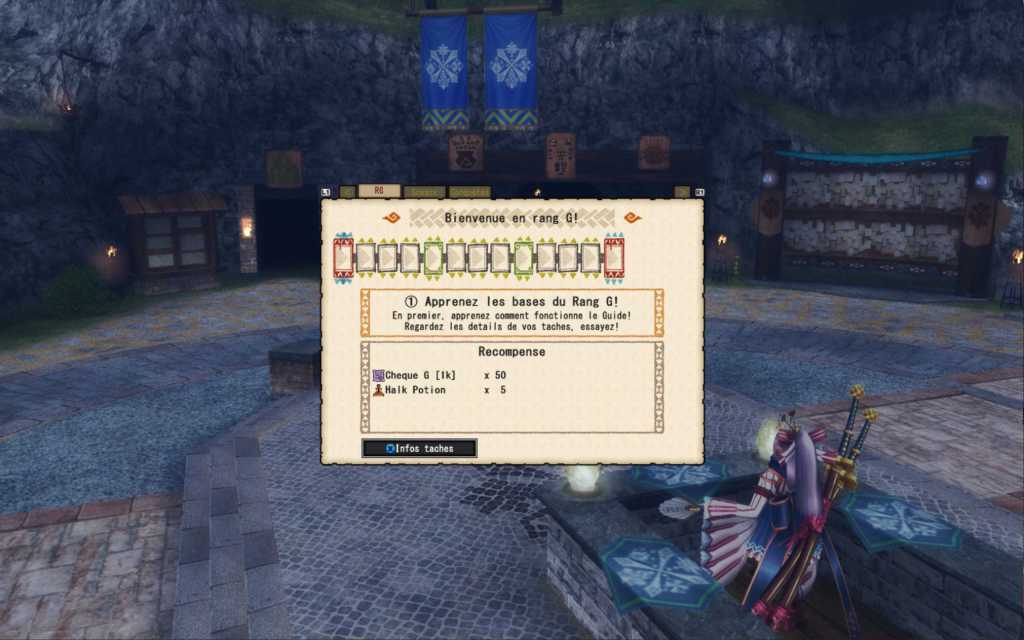
Congrats, you’ve just survived the Supremacy rank ordeal, defeated Shantien and are now in G rank! Just like Gou rank, Frontier had plenty of time and updates to make its own take on G rank, adding a lot of new systems. So let’s begin, shall we?
- Before we begin
- G rank: the basis
- To go further
- Systems unlocked with GR
Before we begin
A reminder of your situation at the end of HR
If you’ve just finished HR and have made the equipements recommanded in the guide, you should currently have:
- An armor including Supremacy pieces (or Gou/Heaven) reinforcing your skills aboce a certain health threshold, Exotic pieces granting you a free skill and eventually HS pieces granting you some health regen against HC monsters (but who will get discarded in G rank)
- a Supremacy weapon reinforced by your Supremacy armor pieces or an Exotic weapon granting you Speed Eating as a free skill
- your Caravan Jewel granting you Caravan skills
- your SR Skill (very likely Affinity +20%)
And if you didn’t do it, quick reminder to do some My Missions objectives, at least to increase your attack cap above 800. Not doing so will end up nerfing your G rank sets at some point.
Reminder of the daily systems
We saw a lot of things in the previous article so let’s review them quickly:
- Get the Daily Special at the General Store (Halk Pots, N Points, Daily Quest)
- Bully the Daily Quests Gendrome twice for some rare Bento ingredients in the dedicated quest
- Using tickets for your Partner to increase its progression (notably for Weapon Mastery)
- Feed your Halk in My Support and check if its training isn’t capped
- Getting your Tore Points for your Poogie from the Manager in My Tore
- Set your Caravan Jewel Color to Multicolor at the Pallone Caravan (week-end only on rain)
rain server special mention
Don’t forget to get your play time rewards at the General Store for some huge N Points amount.
G rank: the basis
G rank quests
Frontier G rank difficulty
Frontier G rank mechanics are rather unique. Every single quest is accessible at the beginning of G rank. You can go for a beginner-friendly Yian Kut-Ku or a world ending Rajang. But the difficulty logic changes a lot compared to mainline games.
rain server special mention
rain changes the G rank quest system. Here each quest has a minimum GR required to do the quests and their ranks have been changed.
On rain, doing quests above GR1 requires a Permit from the corresponding rank. For instance, doing a G2 quest will require a G2 Permit. You can get 28 G2 Permit doing the last G1 quest aka Pokaradon (and following the same logic a lot of G3 Permit by doing the last G2 quest, etc).
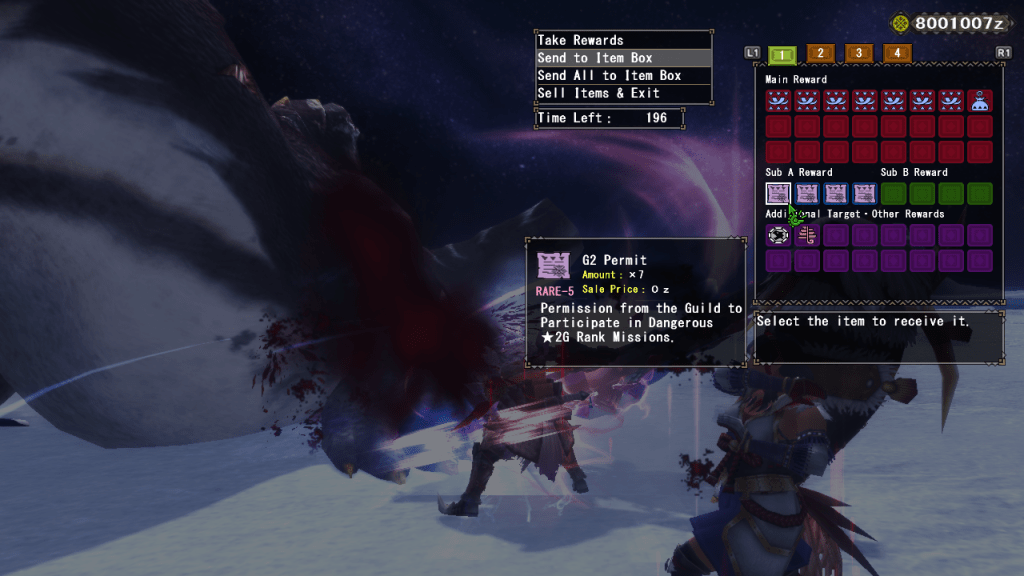
An alternative and funnier option is to go to the Hunting Road counter and start a solo Hunting Road Quest (I’ll explain the system in a later part). Defeating a monster will reward you with a minimum of 10 RdP. After that, you’re free to keep fighting or leave the quests. You’ll then be able to trade 9 RdP at the Shop of the same counter for 200 Permits of your choice.
Frontier puts defense back on front. In MH, the damage formula grants diminishing returns on defense: the difference in damage endured between 300 and 500 defense is lower than between 100 and 300. So increasing your defense isn’t worth it past a certain point. But in Frontier, G rank quests nerf your defense by 150 for each quest rank above GR1.
Frontier allows you reduce a quest rank by pressing L1 and R1 when you select it. But note that diminishing a GR quest level will reduce its rewards and the carves you can get (you can still carve 3 times but the game might tell you that you didn’t carve anything when doing so). You also can’t pick the HR mode of a quest with diminished difficulty.
rain server special mention
You can’t adjust the quest level on rain. Also, since they changed the G rank quests levels, you might meet some monsters at a higher level than the original one intended so be careful.
Conquest Quests
Aside from your regular G rank quests, you can access Conquest Quests. These are special quests against powerful monsters, these being Shantien (all the way to the end), Disufiroa, Fatalis and Crimson Fatalis (but Frontier version obviously).
These quests have 4 difficulty levels, 1, 200, 1000 and 9999. The 3 first levels increases the monster stats and its moveset while the last level harbors an extreme difficulty who will require a fully equiped and skilled group to deal with. It can be soloed but you’ll need to play perfectly to do so, with a fully optimized set and under Heroics effects through the whole fight essentially.
Also note that the only exclusive reward for lvl 9999 are tickets to make the transmog armor of the monster you’ve defeated.
Conquest Quests reward you with drops required to upgrade G rank weapons and GX armors (I’ll detail this later), the quest level having an impact on the drop quantity. The lvl 9999 guarantees a great amount of rewards without any RNG involved.
| Drop | Quantity lvl1 | Quantity lvl200 | Quantity lvl1000 | Quantity lvl9999 |
|---|---|---|---|---|
| Ulti. Conquest Bond | 1 guaranteed 1 [1%] | 2 guaranteed 2 [1%] | 5 guaranteed 5 [1%] | 15 guaranteed |
| Lumin. Armor Rock | 1 [10%] | 2 [10%] | 3 [10%] | 3 guaranteed |
| Komono Armor Rock | 1 [8%] | 3 [8%] | 3 [8%] | 3 guaranteed |
| Green Valor Stone | 3 [8%] | / | 3 [8%] | 3 guaranteed |
| Blue Valor Stone | 2 [8%] | / | 2 [8%] | 2 guaranteed |
| Red Valor Stone | / | 2 [8%] | 2 [8%] | 2 guaranteed |
| Yellow Valor Stone | / | 1 [8%] | 1 [8%] | 1 guaranteed |
You can get some of these drops in the Hunter Navi GR page dedicated to Conquest Quests.
And if you like to suffer, there’s the Shiten level who’s even harder than lvl9999.
Hunter Navi, the return
The G rank version of the Hunter Navi is a great tool to make your first steps in G rank so we’ll follow it through this article while adding further precisions and explanations.
gZennys
When G rank released, people had spent years in Gou rank and were filthy rich. The Frontier devs not wanting players being able to blaze through the content, they introduced gZennys, basically G rank zennys needed for this rank. The Hunter Navi grants you some as Cheques on its very first task so check this one quickly and sell the tickets to get a head start. Other Hunter Navi tasks will grant you some more later.
Extreme Style
Reaching G rank unlocks Extreme Style for every weapon. This is basically the strongest style by far since it grants you the ability to run with your weapon unsheathed and Breakfall which allows you to interrupt projections with a dodge to quickly get on your feet. Aside from that, Extreme Style tend to fuse the 3 other Styles without any demerit, making it the default style for G rank.
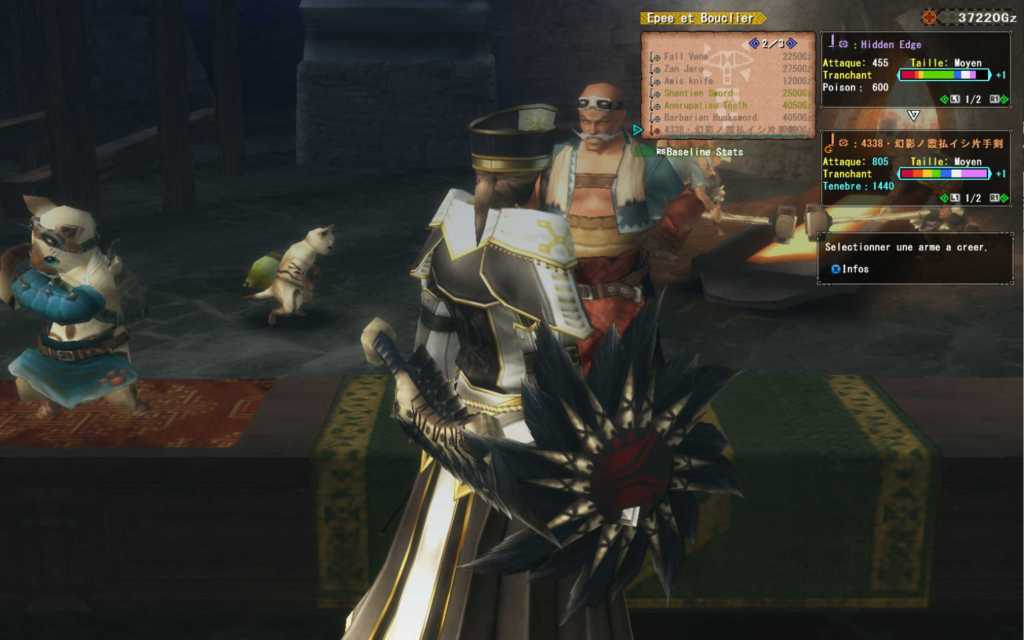
Your first G rank weapon
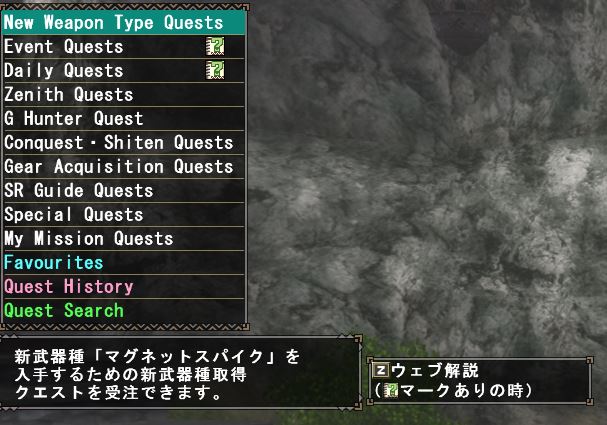
First thing first, reaching G rank unlock the ability to craft Tonfas and Switch-Axe F, which is quite different from the SA you know from mainline. Magnet Spike gets unlocked through a series of quest I’ll explain later.
Let’s not waste any time, we’re going straight for the G2 page of the Hunter Navi Task 2. What page G2? The one you’ll unlock when you clear the G1 page obviously but we’re moving faster than planned by the game here. And since what is already dead can’t cart you and we want this to be dead asap, it’s better to get a good weapon. You’ll find quests to make your weapons in the Gear Acquisition Quest section from the GR Quest Counter. Anti-X Weaponry! quests guarantee you 2 orbs every time you complete them, asking to simply kill pretty easy monsters. You’ll need 10 of these orbs to make a hybrid element G rank weapon, with stats equivalent to a lvl 50 one. Note that each orb only allows to build specific weapons. Here is the listing of the weapons you can get.
| Weapon | Element | Quest |
|---|---|---|
| SnS | Darkness | Anti-Chameleos Weaponry [1/37] |
| DB | Thunder Pole + Poison | Anti-Kushala Daora Weaponry [3/37] |
| GS | Thunder Pole + Poison Music + Sleep | Anti-Kushala Daora Weaponry [3/37] Anti-Kirin Weaponry [6/37] |
| LS | Sound Darkness | Anti-Teostra Weaponry [2/37] Anti-Rukodiora Weaponry [5/37] |
| Hammer | Sound Darkness | Anti-Teostra Weaponry [2/37] Anti-Rukodiora Weaponry [5/37] |
| HH | Thunder Pole + Poison Music + Sleep | Anti-Kushala Daora Weaponry [3/37] Anti-Kirin Weaponry [6/37] |
| Lance | Sound Music + Sleep | Anti-Teostra Weaponry [2/37] Anti-Kirin Weaponry [6/37] |
| GL | Darkness [Wide] | Anti-Chameleos Weaponry [1/37] |
| LBG | Thunder, Dragon, Poison Sleep | Anti-Kushala Daora Weaponry [3/37] Anti-Kirin Weaponry [6/37] |
| HBG | Water + Dragon | Anti-Teostra Weaponry [2/37] |
| Bow | Darkness [Rpd / Spr] Sound [Spr / Prc] | Anti-Chameleos Weaponry [1/37] Anti-Rukodiora Weaponry [5/37] |
| Tonfa | Darkness Sound | Anti-Chameleos Weaponry [1/37] Anti-Rukodiora Weaponry [5/37] |
| SA-F | Darkness [Ele] Sound [Ele] Thunder Pole + Poison [Ele] Music [Ele] | Anti-Chameleos Weaponry [1/37] Anti-Teostra Weaponry [2/37] Anti-Kushala Daora Weaponry [3/37] Anti-Voljang Weaponry [4/37] |
You’ll simply need to equip the weapon you’ve just crafted when you reach the G2 page to complete the linked task. These weapons have stats equivalent to G weapons lvl 50 and are a huge jump in strenght compared to your Supremacy or Exotic weapons, allowing you to power through G rank faster.
So I’m talking about lvl 50 but what does it means? Let’s look at the weapons you can craft when beginning G rank.
G rank weapons
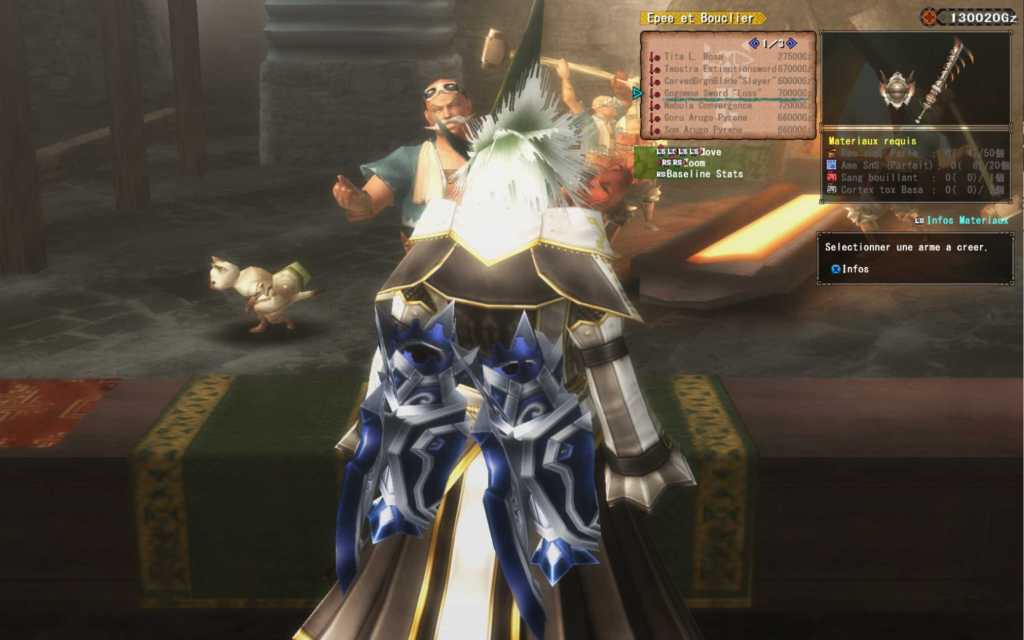
Since Frontier was a paid MMO who wanted to keep its players hooked for as long as possible to push them towards the “pay the special subscription with boosted drops” button, the G rank upgrade system was quite brutal. Each G rank weapon has no less than 50 upgrade levels to reach its full potential, each level requiring various ressources going from gathering to HC drops. Each level increases one of the weapons stats, making them pretty weak on their own.
When you reach level 11, the game gives you the choice between 2 recipes. The first one is the classic recipe who will grant you one level while the second is essentially russian roulette, costing one less ressource. You have 60% chances to increase the weapon level for a reduced cost… And 40% risk of simply losing your ressources and staring blankly at your weapon who stayed at its original level. While it seems generous at times, it can end up soul crushing when you’re on the fifth attempt (meaning you’ve already farmed 5 times the components for the reduced recipe and yes I’m talking from experience).
Starting from lvl 30, you’ll also need some Conquest Quests drops, namely Ulti. Conquest Bond and Valor Stone.
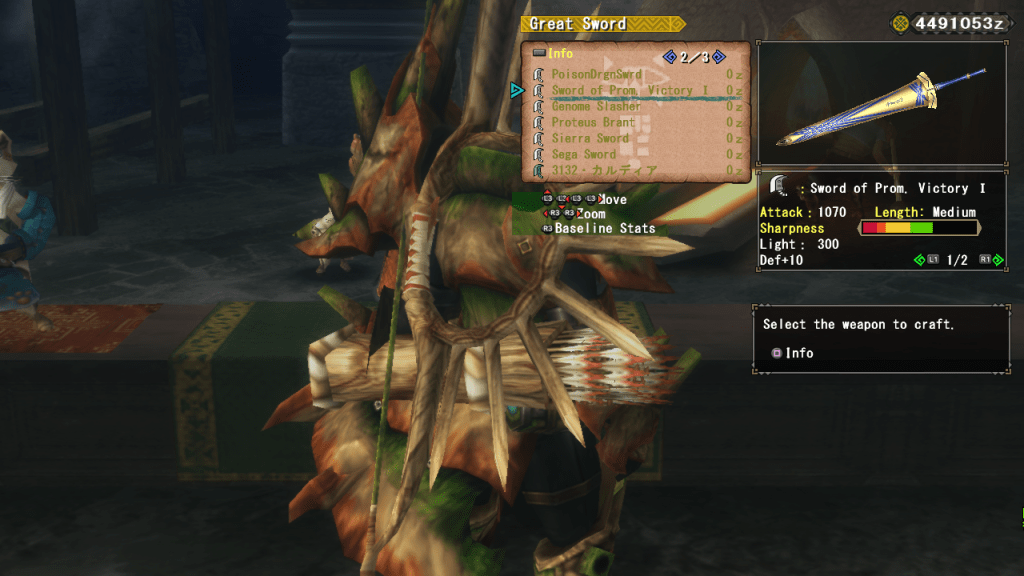
Supremacy G, Burst and Origin Weapons
Your Supremacy weapons can follow you in G rank! They still keep their Gou and Heaven weapons bonuses with 2 Supremacy or better armor pieces (good thing that these too can be upgraded at G rank level). Aside from that, they essentially have better stats. Note that these weapons can’t equip Sigil but have decorations slots (we’ll talk about Sigil soon).
Their upgrades can be quite hard though as you’ll need no less than 50 Supremacy specific species drops and 3 HC G rank drops (with as a reminder only 2% chance to be carved from said HC monster). You can also immediately craft as G rank weapons through the Supremacy Weapons option at the Workshop, the cost being increased with Weapon Souls you’ll get anyway by farming the Supremacy Quest with the same weapon type.
While the farming can seem grueling, G Supremacy levels have only 3 upgrade levels (and not 50 levels) and the next stage is rather interesting.
Burst Weapons
The next level of G rank Supremacy weapons and the most interesting by far. Indeed, aside from the obvious increased stats, Burst weapons grants you a specific skill based on the monster they come from, including some powerful ones like Vampirism on Varusaburosu weapons for instance.
Going from a Supremacy weapon to a Burst one is way easier, only requiring G rank Burst species drops and eventually some HC drops. Burst species are in specific quest menu alongside Origin species and can only be fought at GR7 with no option to reduce their level so you’d better be prepared for the fight.
Origin Weapons
The final G rank Supremacy weapon level. You still have your bonus skill, this one being even reinforced (on Varusaburosu weapons, Vampirism +1 becomes Vampirism +2 for instance), and the weapon stats are increased.
The upgrade into an Origin weapon follows the same principles as those for a Burst one, demanding G rank Origin species drops and eventually some HC drops. And just like explained before, Burst and Origin species share their own quest menu and are fought at GR7 with no option to lower their difficulty so be prepared.
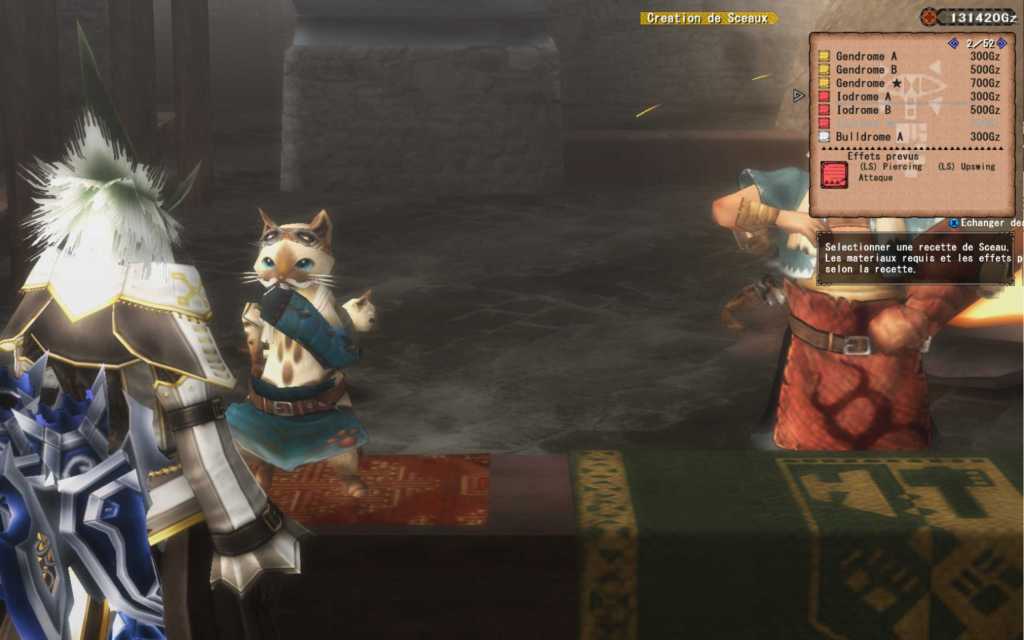
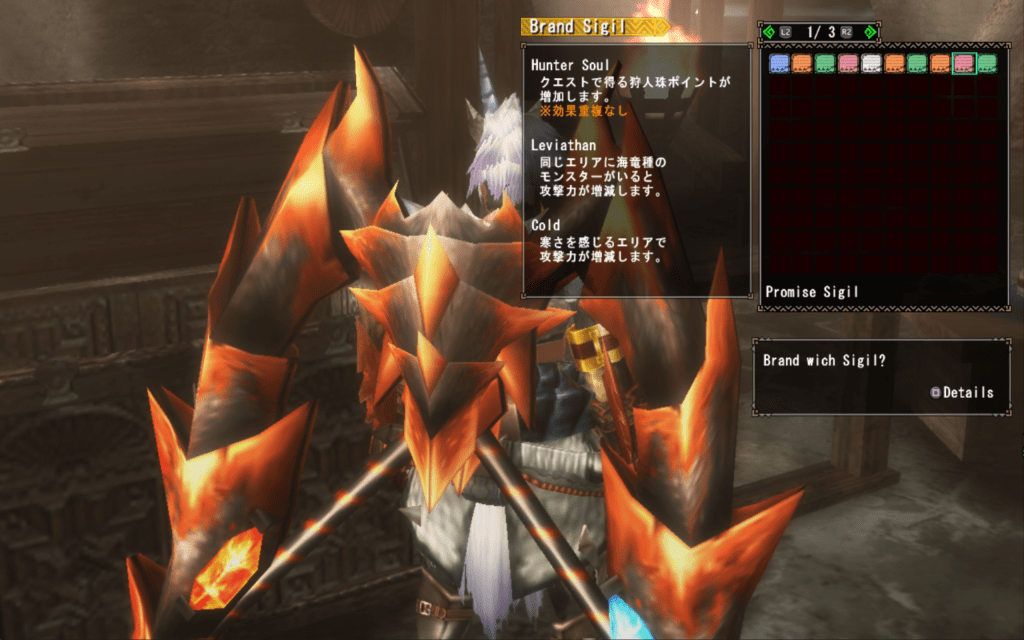
Sigils for your weapons
G rank introduces a new type of decos specifically made for your weapons, Sigils. Some weapons have Sigils slots while other can equip Sigils or regular decos freely. Sigils work in a similar fashion than regular decos but with some nuances. They don’t grant you skill points but instead effects directly applied to your weapon. And there are quite a lot:
- basic stats increase or decrease (attack, affinity, etc)
- stats increase or decrease tied to really specific conditions (one day of the week, specific hours, against certains monsters…)
- alterations to your weapon moves (adding a slicing projectile to Earth Style SnS combo finisher, speeding SA-F reload animation or increasing its guard angle, increasing HH musical hits MV…)
- weirder effects (reducing Shop prices by 10% by using a specific emote, increasing rank points at the end of the quest, carving 2 raw meats instead of one…)
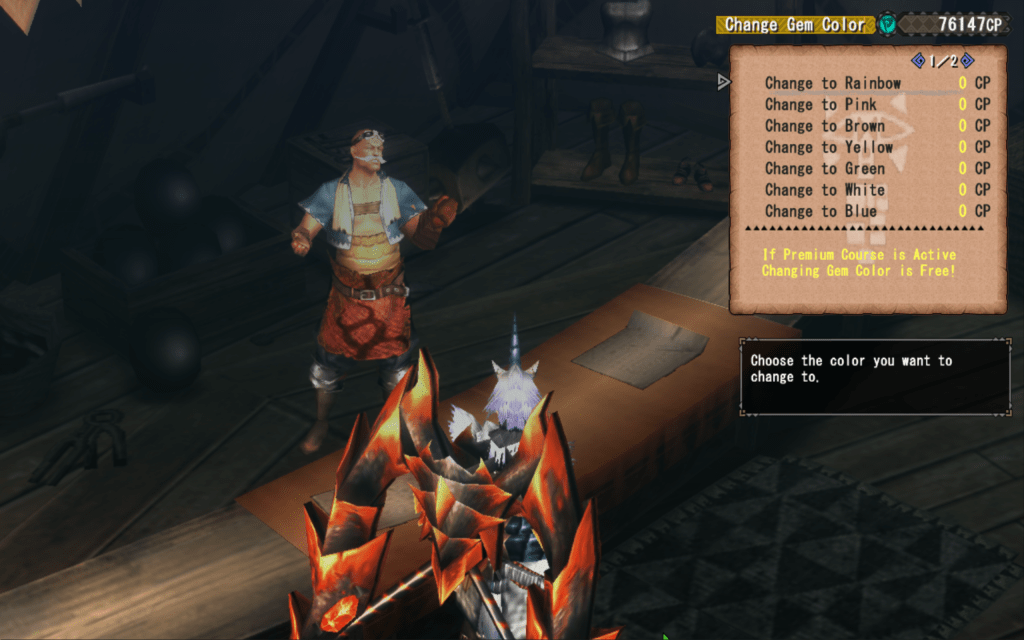
Sigils can be crafted at the Felyne Master, left of the Worshop Smithy. There are 3 recipes per monster, stronger recipes requiring rarer drops obviously. When crafting your Sigil, you’ll have a random chance of getting the skill indicated alongside other random skills. Each Sigil can have up to 3 effects, these effects usually stacking together.
Best way to use this system is usually to increase your weapon stats and eventually to add one or two weapon specific Sigils, while keeping in mind your Style since some Sigils are Style specific (reinforcing the SnS Combo finisher for instance is useless outside of Earth and Extreme Styles as the other two don’t have the move).
The Hunter Navi has a whole page dedicated to Sigils who will grant you 10 mats to make the third recipe for completing each task.
Your first G rank armor
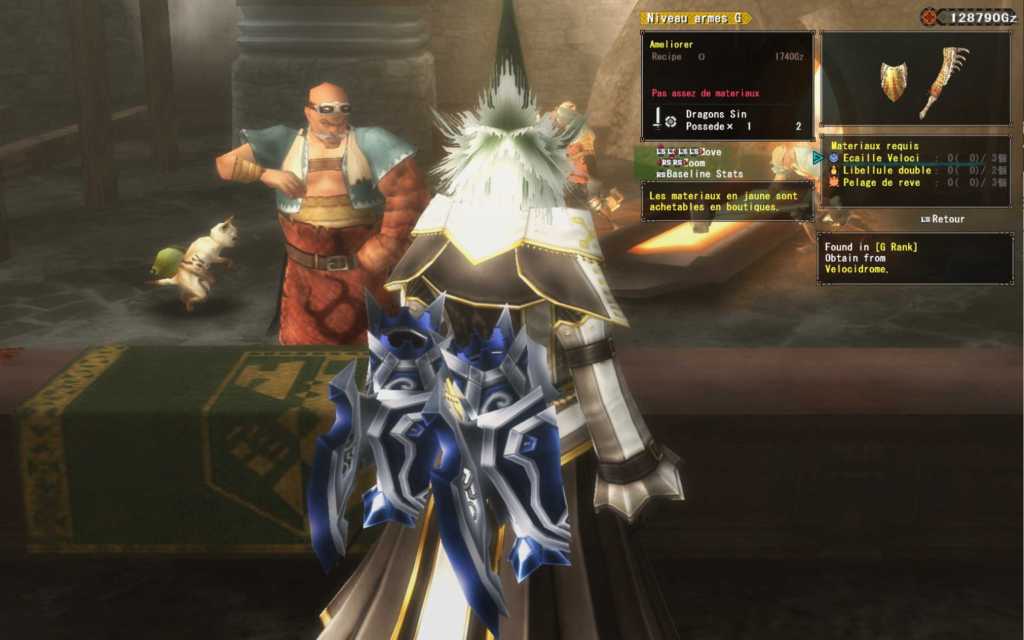
Each part of the G rank Hunter Navi will grant you a free armor set to progress in this rank. The first set is the Entora set and you’ll only have to fight a Velocidrome to get it. Just mark the task in your Hunter Navi and the G Rank Counter will show you the quest immediately.
Once the quest is done, you’ll get all the required materials and you’ll be able to make the Entora set at the Workshop under G Armors. Once you’ve equiped the armor, the Hunter Navi task will be completed and you’ll get materials to push your armor to level 7.
The following task is based on the same principale, mark it, G Rank Counter show you a Iodrome quest, do the quest to push your armor set to level GF7 (you’ll receive the mats for one piece so you need to do it 5 times). Upgrading the 5 armor pieces will give you the materials to push the armor pieces to level GX1 (extra caution here as you can use these mats to push an armor piece to GX2… Which means you will lack materials to push all pieces to GX1).
G, GF, GX, you might be wondering what I’m talking about right? So let’s take a break to see how G rank armors works in Frontier.
G rank armors
Aside from their superior defense and access to exclusive G rank skills, G rank armor pieces increases the number of skills you can add in your set. As a reminder, aside from exotic skills, your armor is limited to a maximum of 10 skills. Having G rank armor pieces increases this skill limit while granting you an attack buff.
| G rank pieces | Max skill limit | Attack buff |
|---|---|---|
| 1-2 | 10 | / |
| 3-4 | 11 | +30 |
| 5 | 12 | +30 |
G rank pieces have a specific upgrade system. First, upgrades don’t cost armor spheres but monster parts. Each piece of a set will cost the same mats at the same level.
G rank armors pieces can be upgraded to lvl 7. Once you reach that point, you can make them evolve as GF pieces, increasing their defense and the skill points they grant. The GF armor pieces also has 7 levels and can evolve in a GX armor piece with also 7 levels. GX upgrades uses Conquest Quest materials, namely Ulti. Conquest Bond and Armor Stones. G armor pieces thus have a total of 21 upgrade levels. GX armor pieces also tend to add skill points for a new skill on each armor piece (Entora is a special case, only maxxing Earplugs).
Supremacy G, Burst and Origin armor pieces
Supremacy armors can be improved all the way to G rank, with 2 upgrade ranks, kinda like G rank armor pieces. Note though that these armor pieces don’t count as G rank armor pieces and don’t increase your max skill limit. But the Gou Skill Reinforcement effect granting you an additional skill level makes it still well worth adding a Supremacy G piece in your set.
G rank Supremacy armor pieces are essentially Supremacy armor pieces with more defense.
Burst armors
Burst armors are the GF version of Supremacy G armors. They remove the health and stamina requirements to trigger the Supremacy armors effects, meaning you’ll permanently have Gou Reinforcement and attack and element buffs.
Improving a Supremacy G armor piece into a Burst once will require some G rank Burst materials. Burst species have their own quest menu with Origin species and are locked at G7 level with no way to reduce their difficulty.
Origin armor
The GX version of Supremacy G armors and their last level following Burst armors. They increase the offensive buffs from Supremacy armors.
| Pieces number | Attack buff | Element/status buff |
|---|---|---|
| 1 | +20 | +3% |
| 2 | +40 | +6% |
| 3 | +60 | +9% |
| 4 | +80 | +12% |
| 5 | +110 | +15% |
Origin armor pieces also lower the activation requirements for Heaven weapons buffs (+1 sharpness level for blademaster, increased critical range for gunners and stronger power coatings for bow). Equiping only one Origin armor piece will trigger the buff. The buff for gunner weapons and bows also works for regular G rank weapons which is why most endgame gunner sets includes one Origin armor piece. G rank weapons don’t get the raw and element buffs though.
As I guess you expect by that point, upgrading an armor piece as an Origin one will require Origin mats which can obtained by fighting Origin species. These can be found in a specific menu with Burst species at the G Rank Counter and their quests are locked at GR7 with no way to reduce the quest level.
G rank decos and refinement

The next Hunter Navi task will ask you to fight Gurenzeburu. The Barbarian Wyvern is a G7 fight so it’s quite the challenge (on rain, it’s also G7 but amongst the G5 quests and require GR34). Keep in mind you can reduce the quest level (not on rain) or use an Halk Pot, the game only asking you to complete the quest. Completing the quest will grant you mats to make its armor chest piece. Tasks 6 and 7 will ask you to craft the chest then improve it to GF7 and equip it.
All this crafting is used to introduce the Refine G Armor mechanic. Refinement allows you to turn an armor piece into a decoration and it’s what we’re about to do with the Gurenzeburu chest. Unequip the chest then go into Armors then Refine G Armor at the Workshop and select said chest. You can then turn it into a Guren BM GF deco (for BladeMaster GF).
Refining an armor piece will turn into a decoration with slightly less skill points than the original armor piece. You can refine G7, GF7 and GX7 armor pieces, the strongest decos obviously coming from GX armor pieces. But let’s face it, you might not want to farm multiple times the same armor piece to turn it into a deco…
Good thing then that Frontier ultimately introduced at some point the option to immediately craft a GX decoration without having to craft and fully upgrade an armor piece. You’ll find all these deocs under GX Decos in the decoration menu. The more accessible ones are under Monster. You’ll find 10 decos corresponding in the order to the helm, chest, arms, waist and legs, with a Blademaster BM version and a Gunner GN version. Two recipes are generally available to craft these decos, one using the G rank HC drop and the other one the rarest drop of the corresponding monster.
You might also have noticed a G Grade Decos option in the menu. These decos are equivalent to GF decos. Don’t hesitate to give it a look but generally GX decos are stronger.
Impressive G rank skills
Small pause in the Hunter Navi tasks. As we’ve already seen, you can make some quite impressive sets before even reaching G rank. So obviously, G rank sets will be even crazier. So how can you make a 10 skills set even crazier (aside from going up to the 12 skills)? Well by making the skills even more broken. To give you a few examples you’ll often see in endgame:
- Vampirism: 80% to get health back while hitting the monster
- Attack G: +200 attack
- Issen: +20% affinity and 150% critical multiplier
- Stylish Assault: +100 attack when perfect dodging a move
- Reflect: deal a 48MV hit in front of you when blocking a hit
- Sword God: Sharpness +1, Razor Sharp +2, Fencing +2 and Sharpening Artisan
- Three Worlds: immunity to roars, tremors and winds
- Drawing Arts: with the weapon unsheathed, Evasion +2, Peerless and Weapon Handling; with the weapon sheathed, increased health and stamina recovery sped
G rank skills are quite absurd compared to what we know in mainline so do not hesitate to dig a little, there’s a lot of stuff to discover.
And with this, we’ve covered the G rank basis. I let you continue with G2 and G3 pages of the G rank Hunter Navi. Reminder that you can complete the second task of the G2 page by simply equiping the weapon you’ve made earlier, no need to craft a new one.
The following section will cover endgame objectives then what you’ll unlock by reaching certain ranks.
To go further
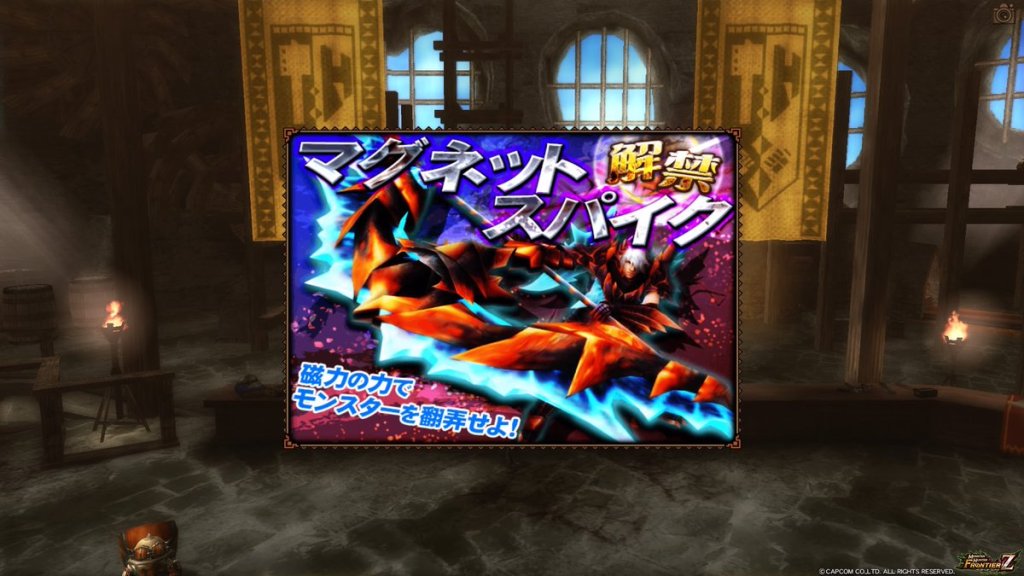
Unlocking the Magnet Spike
The Magnet Spike is the only weapon you need to actually unlock through a specific quest series which will require you to face Frontier 3 magnetic monsters to collect the mats required for your first MS. All these quests are solo-only with a Legendary Rasta by your side. This is not an obligatory step in your progression but it would be stupid to dodge Frontier most broken weapon.
You can start this quest by talking to the specialized Legendary Rasta at the Rasta Bar, Graham. He’ll only appear after you’ve talked once to the Workshop Smithy (which I guess should have happen at least once by that point).
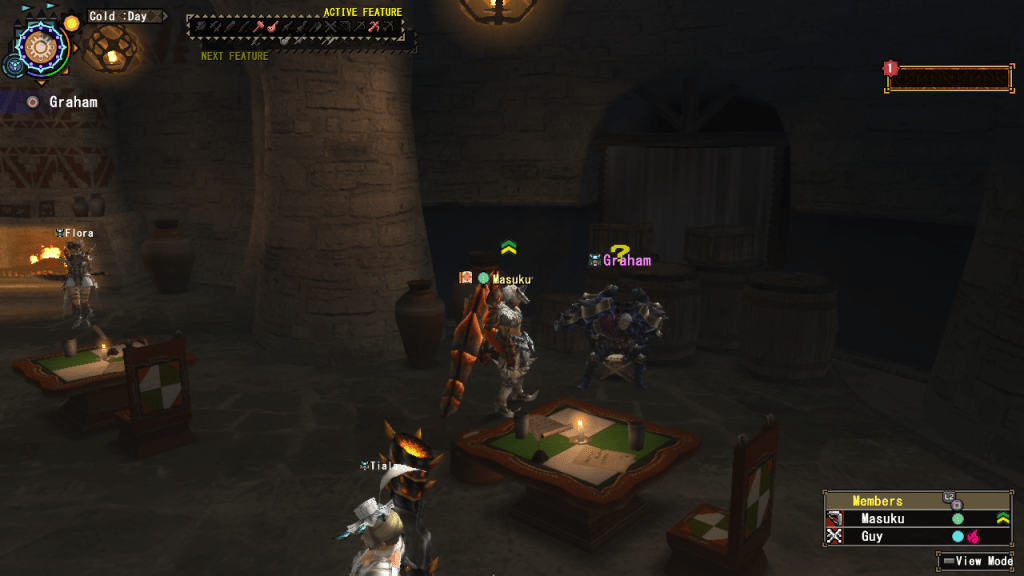
Once you’ve talked to Graham, go talk to the Felyne Apprentice near the entrance of Mezeporta Square who will give you some intel and the first quest of the series against the Gougarf duo.
Once the quest is over, go talk to Graham then to the Combo Shop owner. He’ll give you some intel on your next target, the electromagnetic Elder Dragon Rebidiora. Once again take the quest at the G Rank Quests Counter.
Last step, you’re missing one material to make the Magnet Spike. Go talk to Graham then to the Workshop Smithy who can’t identify the missing Material. Go to the Hunting Road Counter near the exit of the Workshop. The owner will identify your ultimate target, HardCore Rukodiora.
As you might have guess by that point, go to the G Rank Quests Counter to fight the Elder Dragon. Be careful as HC Rukodiora disables items if you’re too close from making, making it a formidable foe. You’ll have to play perfectly or have a really strong set for this step.
Once the Elder Dragon is dealt with, first congrats then talk to Graham one last time who will send you to the Workshop where the Smithy is waiting for you to grant you the ability to make Magnet Spikes.
Note that you’ll only have access to the bone model at first, the Proto Spike α (which is very likely to be way stronger than whatever you’re using when you unlock it). Magnet Spike appeared with Zenith monsters, meaning the other models will be unlocked at GR200.
Make your own G rank set
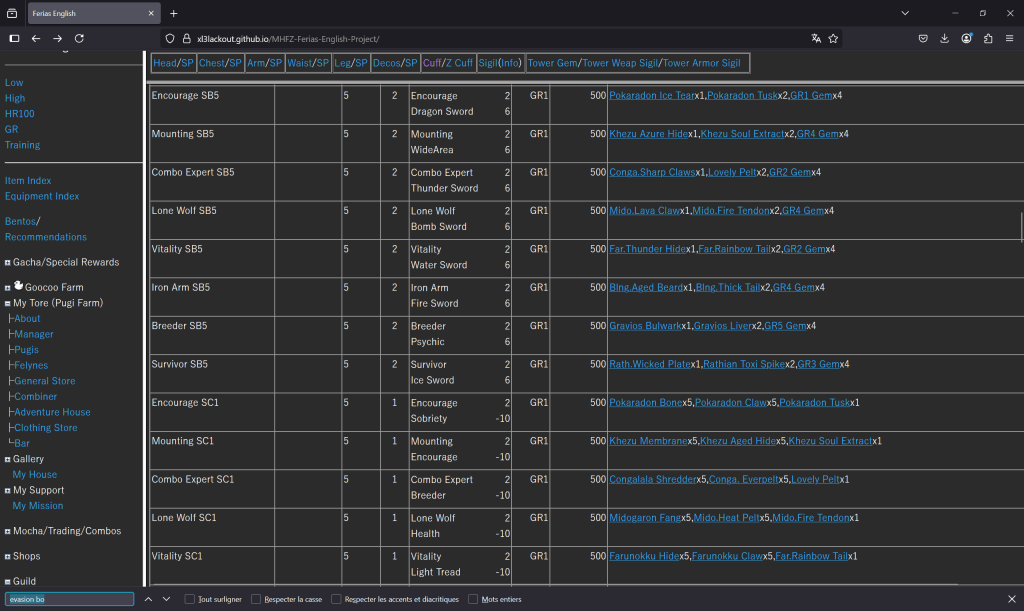
Since you need a way to spend time before reaching Zenith monsters at GR200 and most set guides on Frontier server are dedicated to ultra endgame sets, you can try making your very own G rank set. You’ll find here a detailed on how to use the set searcher: https://lescarnetsdelawycademie.fr/frontier-set-searcher
Fashion Hunter on the Square
You might have seen everyone on the Mezeporta Square looking all cool and fancy while you’re walking around with your ugly mix. So let’s talk about fashion hunting in Frontier. First you have the Town Set. You can trigger the Town Set at the equipement chest by selecting Change Equipement then Toggle Town Set.
The Town Set is an equipement set that’s only shown in town. When you’ll launch a quest, the game will equip the Quest Set and you’ll get your ugly mix back. You can craft a set purely for its esthetic value and equip it as a Town Set. But be careful as the Town Set is really equiped while in Town. So if you register a new set with the Town Set active, the Town Set will be registered, not your true set. So do not forget to desactivate the Town Set when you adjust your equipement.
For the Quest Set, a Transmog option exist in the Workshop armor menu but it’s quite limited: not all sets are available and some sets are simply impossible to craft as they require drops that were linked to lost paid or event quests. And it costs a lot to transmog. Exotic armors Transmogs for instance will cost 5 G rank gems… For one armor piece.
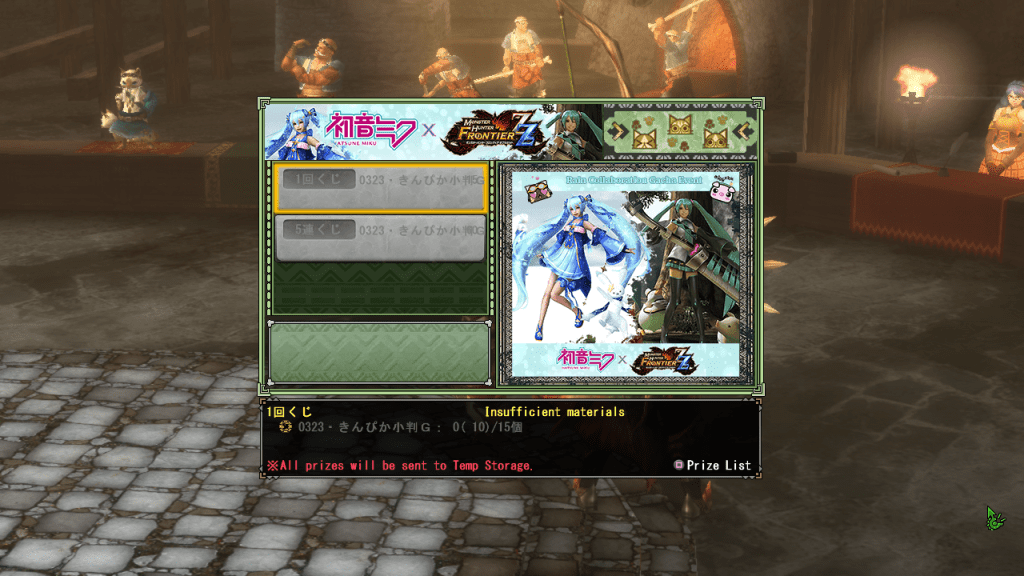
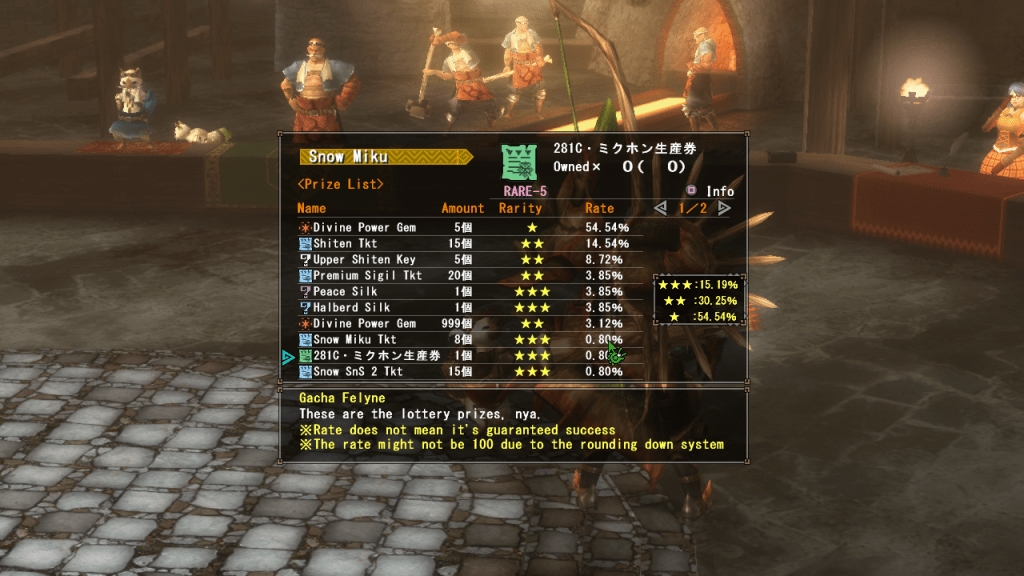
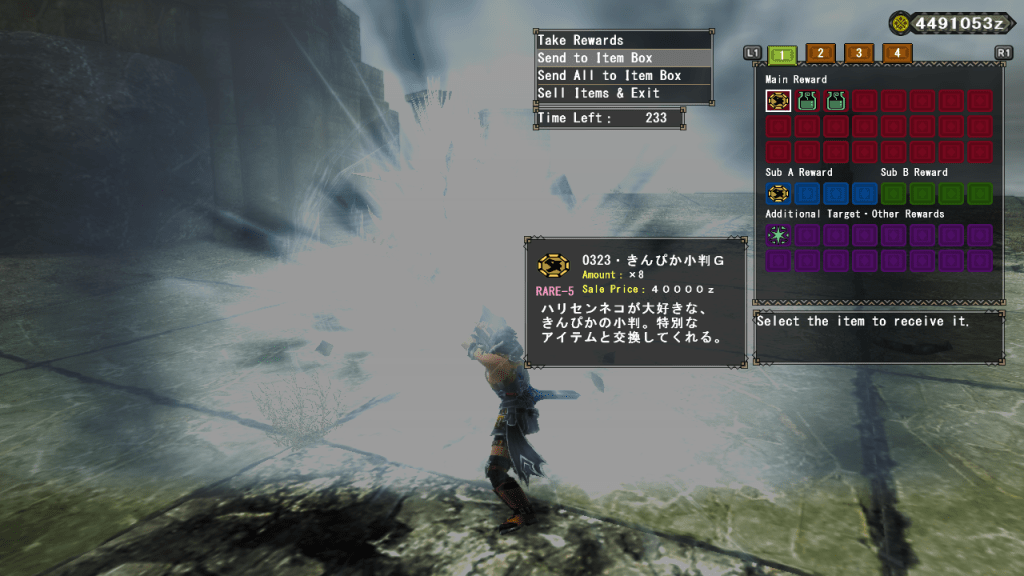
[rain] Gacha for weebs
Yep, Frontier had its own gacha system, years before the current mobile gaming epidemic. For those who want to look like 2B from Nier:Automata, Artoria from Fate/UBW, or even Hatsune Miku, complete with their weapons (including an adorable HH with Hatsune Miku singing “Proof of a Hero”), you’ll need to play the Normal Gacha with the Harisen Felyne. You can then choose a banner to pull using tickets common to all banners (with the option to do 1 pull or 5 for the price of 4).
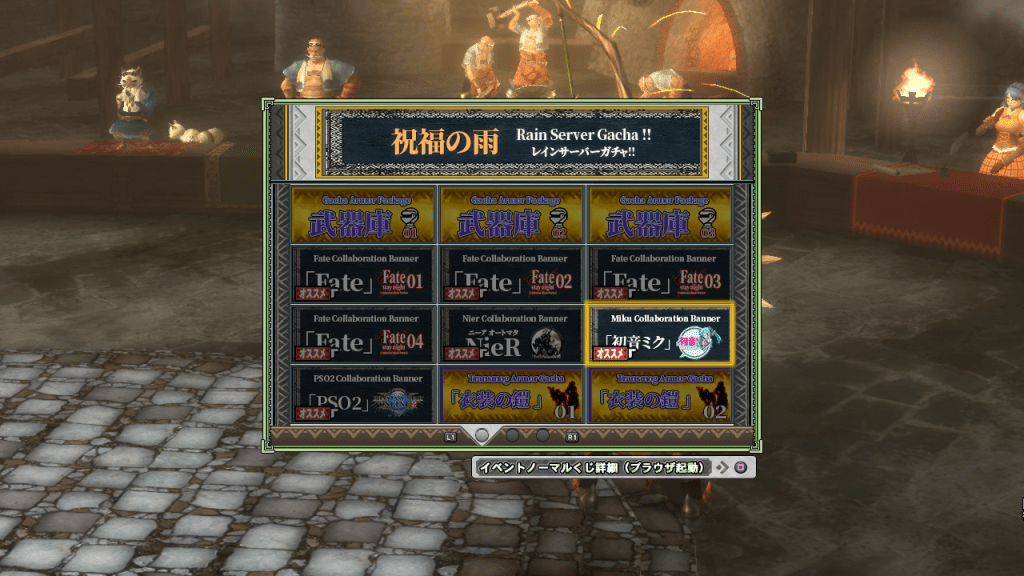
But obviously, this is just like a real gacha with terrible odds.
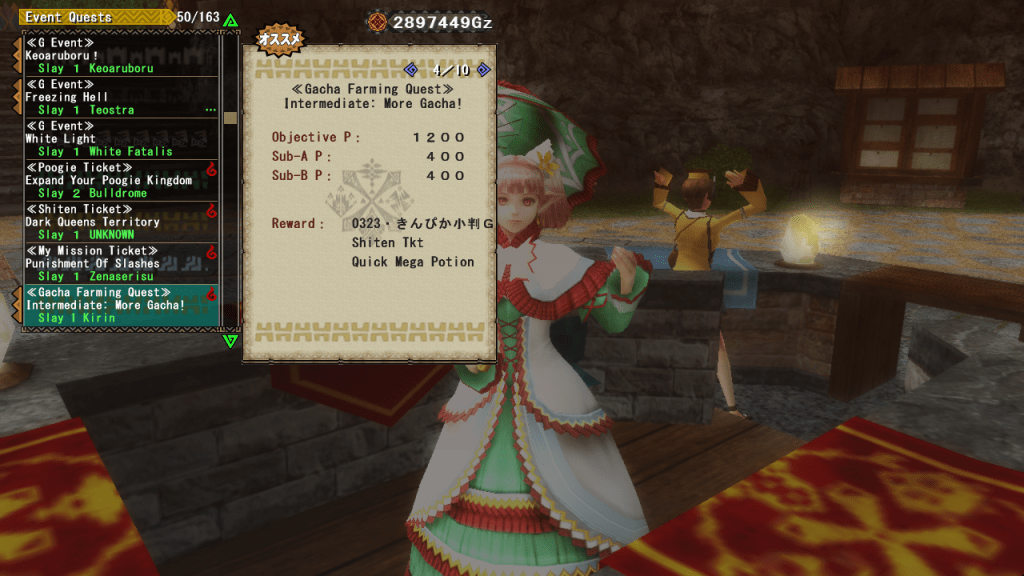
To get tickets to do pulls, you’ll need to do dedicated event quests called “Gacha Farming Quest”. You can identify the quests with their name and the fourth page with the quest rewards, gacha tickets being the kanji items starting with 0323.
Collab weapons can be found under Premium Weapons > Kit Weapons in the Workshop while armors are under Premium Armor > Kit Armor.
Note that most of these weapons can upgraded up to the beginning of Zenith rank (GR200) and are viable in endgame (without being ultra top meta of the dead obviously).
GSR: your SR Skills but overpowered
Reaching G rank unlocks GSR on all of your weapons. This is a system specific to each weapon type who gets improved at the end of each quest where you use a weapon of said time. Every 10 GSR levels, the SR Attack bonus increase (up to a maximum of 100) along side your defensive SR Skills.
You’ll also unlock 2 additional skills starting from GSR 30 and 40, Conq Def and Conq Atk who increase your defense and attack on Conquest Quests. The effects of these skills also get stronger with your GSR.
Also, from GSR100 and onward, you can use 2 SR Skills on your weapon. This is really useful notably for Zenith fights where you’ll want to raise your elemental defense above 55 to be immune to their dangerous blights.
Reaching GSR999 on a weapon unlock the SR Skill Secret Technic. This a special attack only usable once per day by pressing the kick button (Select generally) who will simply delete a huge chuck of the monster health while making you invincible during its execution. The more GSR999 you’ve reached on various weapons, the higher the Technic damage. It also grants you a 150 attack buff until the end of the quest.
Last effect you’ll unlock if you get that far, having 11 GSR999 grants you an effect that cancel a cart on all GSR999 weapons, healing you back to full health once per quest (unless using the Determination skill). But you need to get that far obviously.
Max your Caravan Jewel
Farm Carvan Points: Route Quests
For one of the following operations, you’re going to need a lot of Carvan Points CP. To do so, you can do Road Quests at Route Quests Counter.
The princip is simple, you can on a bunch of predetermined quests, your health, items and carts being shared between all these quests. Completing all the quests granting you a generous CP reward. You could do these quests in HR but they weren’t as good. Here in GR, even the easiest quest grants you no less than 20 000 CP as a basis (fighting Bulldrome, Hypnocatrice Subspecies and Pokaradon). Only issue is most quests are in japanese here so you have to translate on your own the quest target (or keep the surprise).
Aside from the base reward, every carvings and gathering items get turned on CP based on the value of the item collected. If you chain gatherings, you get a temporary multiplicative buff, increasing the points you get for some time.
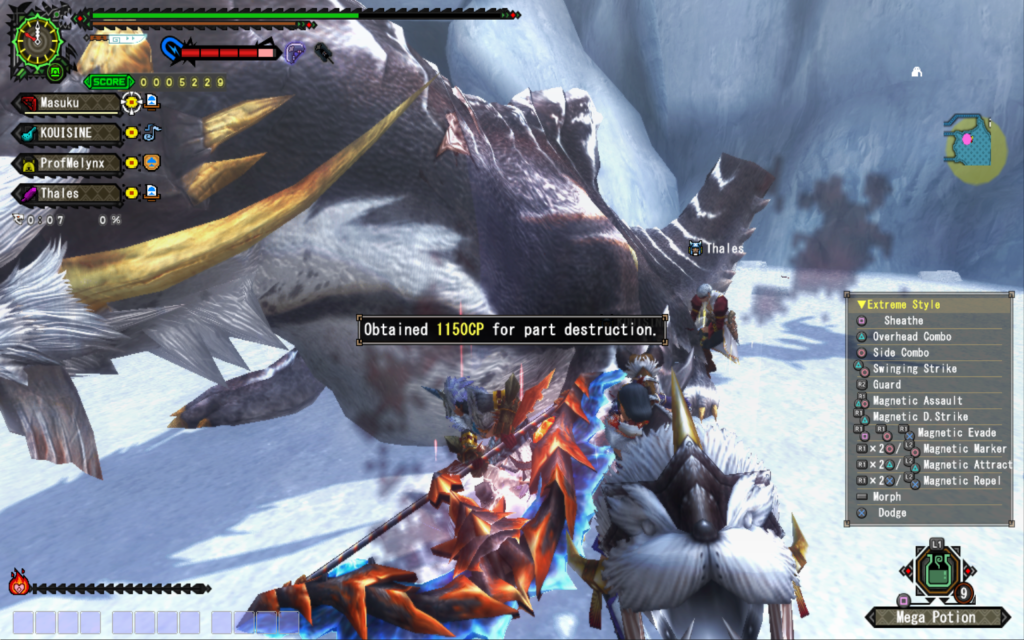
Partbreaks also grant you 1000 CP for the first, 1100 for the second and 1150 for the following parts, making them a great source of points during these quests.
The game also sometimes throws you a urgent mission to do in the middle of the fight. These are weird little challenges to complete under a set period of time. Completing them usually grants 500 CP (but also items sometimes).

Once the Route quest is done, you get the base reward plus the points you’ve got through urgent missions, carving, gathering, killing big monsters… For a total who will easily surpass 30 000 CP usually.
Adding a lot of buffs for some optimal farming
We’ve talked quickly about the Caravan Jewel in the HR Guide but now that you’re in G rank, you can optimize its level grinding. The strategy to improve a Caravan Jewel is to stack various Color buffs then to farm a lot of quests as fast as possible. As a basis, most private servers have some buffs actives through the Course, who were paid formulas back in the day. Having the Assist and Premium Course active applies a 4 times multiplier on your color points gain.
rain server special mention
Premium and Assist Courses are only active during the week-end with various rythm. When I was writting these lines, you couldn’t have both at the same time.
You can also make a Sigil for your weapon with the Hunter Soul effect. One of the best recipe for this is the Garuga ★ with a 10% chance of getting the skill. You can also try the White Monoblos B with a 5% chance.
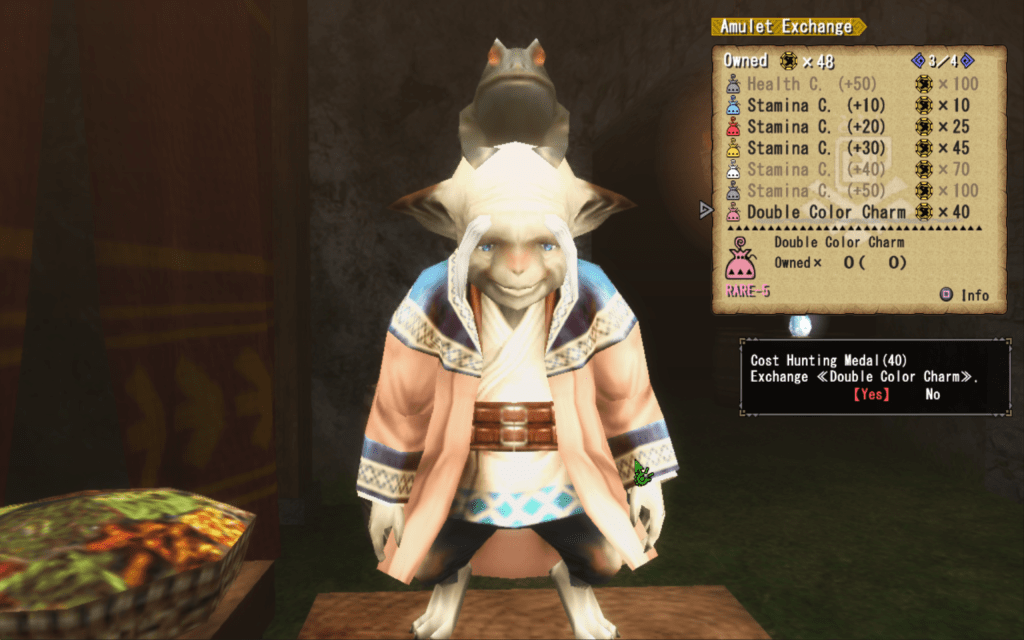
Another color point source, for 40 Koryo medals you get from the Guild Master and traded at the Combo Shop under Amulets, is the Double Color Charm (also +1 color point).
Next step, change your Jewel color to Multicolor. This allows you to receive 2 points of each color at the end of each quest. You can do this at the Guest House from Pallone Caravan, talking at the Special Workshop.
And finally, if you have some huge CP stocks, you can go to the second floor of the Guest House. By paying 100 000 CP to the Head of Technology, you can change a special passive buff. Under the Great Bead Period or Great Gem Period effects, you’ll get one more color point at the end of each quest. But the buff is random so it can cost a lot of CP to get the right one. And it only lasts 2h.

And with all these buffs combined, you will receive no less than 8 points of each color at the end of each quest, vastly improving your farming speed (16 if both Premium and Active Courses are active together).
For some optimized farming without thinking too much, you can do the HR1 Hunting Basics, Mining! quest. It only requires you to deliver 3 Iron Ores that you can already have in your item pouch at the start of the quest. Trade some points for the ores or gather a ton of them, trigger all the buffs then spend the next 2h with a podcast or some music delivering tons of iron ore.
For the laziest on the rain server, there is a script you can setup available on Discord which automatize this quest spamming: https://discord.com/channels/937230168223789066/952792925325127690/1215654852512849920
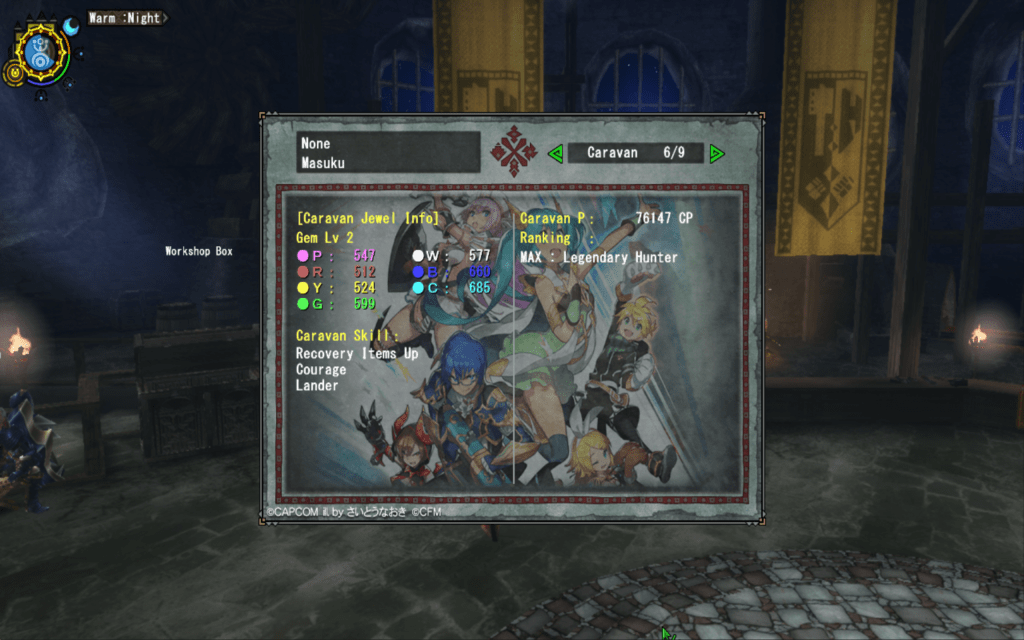
Improving the Caravan Jewel
You can improve the Jewel once you reach the required points ceilings by paying CP at the Special Workshop of the Guest House. You can check your points on page 6 of your personal datas.
Hiden decos: the ultimate grind
Why farming Hiden decos?
Hiden is a term referring to the armors and decorations granting the Weapon Tech skills. These skills are overpowered, granting you at max level (30 points) at least 20% more damage for the corresponding weapon type and High-Grade Earplugs. Blademaster weapons also usually get Fencing +1 (but the level 2 is better for the additional 20% second hit). The other effects change based on the weapon type.
| Weapon | Specific effects with a Hiden skill maxxed |
|---|---|
| SnS | +30% attack (instead of 20%) All the element and status crystals sword skills +2 (replaced by the +3 version if you have it in your set) Increased movement speed with the weapon unsheathed |
| DS | Regenerate 3 stamina points per hit when attacking in any Demon Mode Demon Modes activate faster |
| GS | Faster charge (can be cumulated with Focus +2), stays longer at charge 4 before downgrading to charge 2 (Storm Style) Perfect blocks have no knockback, can be chained with a dodge, don’t use any stamina and restore half the sharpness that would have been lost (can be cumulated with Razor Sharp and can even regenerate sharpness at +2) |
| LS | Spirit gauge consumption halved Razor Sharp +2 with full spirit gauge Attack +25% once the gauge is active (instead of 15%) |
| Hammer | Attack +30% on the whole combo following a perfect charged strike |
| HH | Notes played 34% faster in Performance mode |
| Lance | No knockback damage when blocking Can chained 4 dodge jumps instead of 3 MV +10 on all combo finishers |
| GL | Wyvern fire and thermal blade cooldown halved Thermal blade activation reduced to 3s Normal shots +2, long and wide shots +1 (can be cumulated with Load Up) |
| SA-F | Some moves grants +5% attack temporarely (Morph in Earth Style, sword attacks in Heaven Style, guard in Storm Style) Stamina consumption halved during Savage axe Attacking while in axe mode regenerate phial gauge Attacking while in sword mode uses less phial gauge |
| Tonfa | +1 segment for the combo and EX gauges |
| MS | Attack +3% and gauge regeneration +50% for 30s after a perfect dodge Movement speed +20% Magnetic marker is permanent |
| LBG | +30% attack (instead of 20%) Less risk that the shots bounce off the monster Ability to use items with the weapon unsheathed like a SnS Can do a Perfect shot for additional damage using the Just shot gauge |
| HBG | +30% attack (instead of 20%) Element / status shot damage + 20% Evade Distance Up Crag, Cluster shots and melee attacks deal 15 KO +20% damage from the Heat beam Compressed shots deal more damage |
| Bow | +30% attack (instead of 20%) Arrows don’t bounce off Power Coating damage buff is 1,6 for normal bows and 1,7 for Gou bows (instead of 1,5) Arc shots can be performed at charge 2 for G rank and Raviente bows |
As you’ve understood, these skills are quite powerful.
Grinding the old way
Since this strategy is slow and quite heavy but can help you better understand Hiden decos infernal reputation, I’m giving this its own page to avoid overloading that one. You’ll find all the explanations here, explaining notably what are the Souls, Ribbons and Merits you might have already met in your drops: https://lescarnetsdelawycademie.fr/hiden-farming-the-old-way/
Grinding the modern way
You can buy Hiden decos using the Road Shop from the Hunting Road. But you need first to have completed 45 floors of the Road, a challenge reserved for the strongest hunters. So what is Hunting Road? Let’s talk about it!
Hunting Road
Base concept
You can access the Hunting Road from the dedicated Counter starting GR1. This is a rogule like system and one of Frontier biggest challenge. The princip is pretty simple: you hunt monsters back to back with your 3 carts and a limited item supply, each killed monsters granting you points you can trade for items (notably G rank Permits).
You must have an empty item pouch to start a Road Quest. When the quest starts, you appear in a hub area where you can talk with an Explorer Felyne. You have a base capital of 2000 Gm that can be traded with this Felyne for Road dedicated items using the Buy Items option.
The other 2 options allow you to choose what monster you’ll face on the current floor. Once you’ve selected an option, you have 10s to prepare then the fight starts.
This is a regular fight aside from the fight that you are stuck in an arena type zone. Breaking a part will grant you bonus RdP.
Once the fight is done, you’ll be sent back to the hub 10s later with your point reward and no carve. Depending on the monster’s strenght, you get some Gm to buy items between 2 floors and RdP you’ll be able to trade once you’re done with the quest.
Note that the damage endured are kept for the next one, you’re not healed in between. Also if you cart, you’ll lose your Bento effects for the current Road.
You just have to chain fights until the inevitable triple cart or your forfeit using the Retreat option (obviously you keep the RdP already acquired). In multiplayer, a triple cart will put you in spectator mode, allowing you to admire your friends fighting.
Floor specificities
Every 10 floors, option 1 will allow you to face White Fatalis (the Frontier edition obviously), for a massive RdP rewards. You can also skip the fight choosing the second option.
You can’t skip the Zenith monsters on some floors though.
| Zenith monster rank | First apparition floor | Second apparition floor |
|---|---|---|
| Z1 | 12 | 26 |
| Z2 | 14 | 28 |
| Z3 | 16 | 34 |
| Z4 | 18 | 38 |
After this they appear every 20 floors approximately.
Moving through the floors increase the fight difficulty progressively, increasing the monster’s HP and damage.
| Floors | Attack | Health |
|---|---|---|
| 1-10 | / | / |
| 11-20 | +50% | +11% |
| 21-30 | +100% | +25% |
| 30+ | +150% | +33% |
Every monster benefit from these buffs aside from Zenith monsters (yep including White Fatalis).
Once you’ve cleared 30 floors, you get the right to face the Elder Dragon Duremudira in a dedicated urgent quest at the Hunting Road Counter. No matter if you win or fail the quest, you’ll have to clear 30 other floors to get a chance to face it again.
The Hunting Road Shop
The Shop allows you to use the acquired RdP to buy various items. One of the important nuance compared to your regular shop is that you can only buy some items after having chained a certain number of floors (and defeat a certain number of White Fatalis for specific items). Also some items can only be purchased a limited number of time per week.
Road skills
The Road has its own unlockable skills system. You’ll find Road skills under Status > Road Status. You’ll first see your RdP, which should actually be your RdR, your Road Rank.
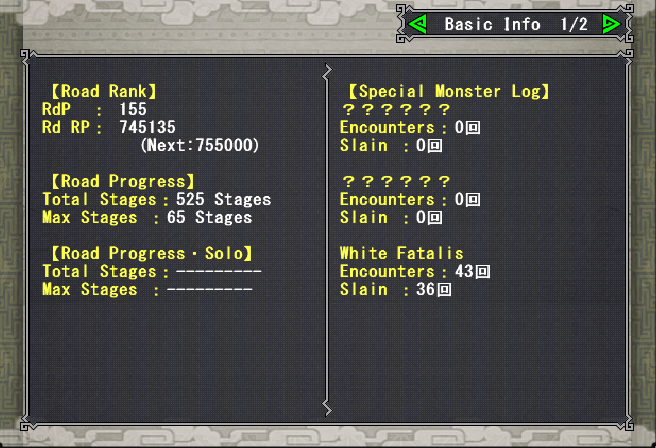
The Road Rank is a level system. The higher your level and the more skills you’ll get on the second page.
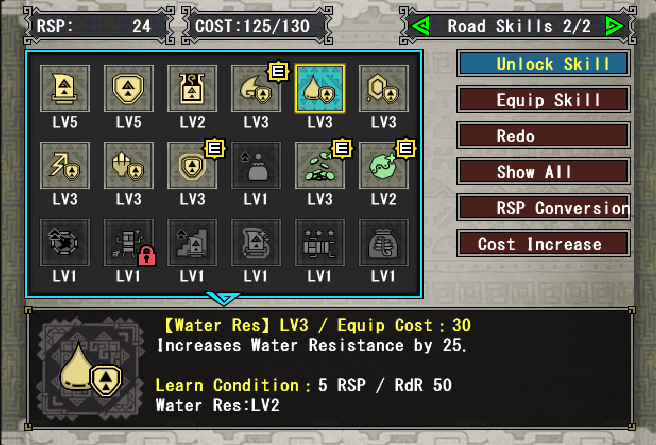
In the top left corner you have Road Skill Points acquired with your levels (24 here). Each skill to unlock has a RdR requirement (for instance Water Res 3 here require a 50 Road Rank and 5 Road Skill Points). Each skill unlocked has an Equip Cost and you can only equip up to a 100 Equip Cost at base. This can be increased with items you can buy in the Road Shop using the Cost Increase function.
The most notable skills here are the elemental resistances skills to prevent Zenith monsters extreme blights. Another one is the skill unlocking bonuses floors. These are special floors replacing the second option, having you fight a gang of Shakalala. This allows you to essentially skip a floor and avoid a hard fight (including Zenith monsters if you’re lucky).
The last skills are dedicated to the Duremudira fight (called Guardian in the description).
Systems unlocked with GR
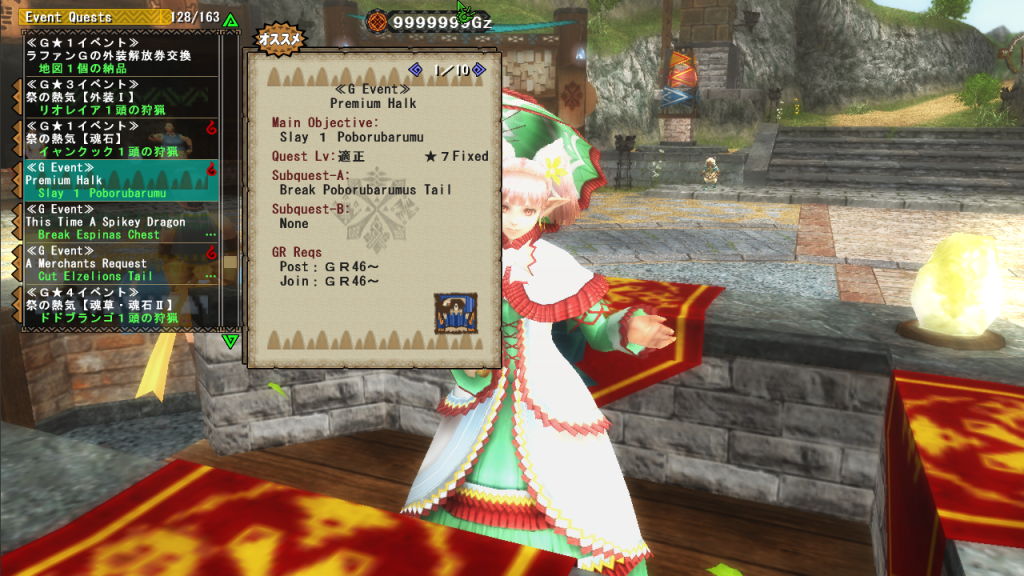
[rain] GR46: Your perfect Halk
To be honest, I don’t know if this quest exists on Mezelounge so do not hesitate to check. If it exists, it should be available at the beginning of GR.
The event quest Premium Halk against Poborubarumu grants you some Yase Yase Food as a subquest reward, the item allowsing you to reduce your Halk fullness when you feed it. A good occasion to quickly swap its element or status according to your desire, especially since G rank drops grant you 9 element points and 15 fullness, allowing you to swap your element in 2 meals. Be careful though as the beast has a ton of HP and can increase his defense and heal himself using its songs.
GR 50: Poogie and G Cuffs
Reaching GR50 allows you to buy a G Cuff Licence by talking to your Manager, allowing you to equip G rank Cuffs to your Poogie. But what are Skill Cuffs then?
Cuffs are Frontier equivalent of mainline charms and talismans. But instead of submitting yourself to the whims of RNGesus praying to get the right combinaison of skills with the right amount of points, Frontier allows you to immediately craft your charms with a set amount of points, kinda like in World and Wilds nowadays.
Your Poogie clothes have 1 or 2 Cuff slots, allowing you to set your Cuffs and get bonus skills points in your set.
You can craft Skill Cuffs in the Workshop under Skills Cuff > G Skill Cuff. S serie Cuffs are Standard Cuffs while P series ones are Premium ones and can’t be crafted as far as I know. You need to have gather the drops used to make a Cuff for it to appear in the crafting menu.
GR100: G rank exotic monsters
rain server special mention
rain uses a different system of Legend quests, lowering exotic fights access to GR75, with more getting unlocked up to GR 120. You’ll need a Legend Permit for each quest which can traded for Hunting Road points.
Exotic monsters are back in G ranks starting from GR100. The bases are still the same: these are monsters of the main licence post MHDos and you can’t use Halk Pot when doing these. Note though that these are your first GR8 quests with a 1050 defense malus tied. And obviously, this level is set and can’t be changed. Some of these monsters get new phases and states like Amatsu so do not hesitate to try these to discover new stuffs.
Defeating G rank exotic monsters grants you their G rank drops, allowing you to improve their weapons and armors to their max level, one of their main strength being only having one upgrade level.
G rank exotic armors still grant you a bonus skill outside of your skill limit. They also work like standard G rank armors, increasing said skill limit. But some of the skills they grant lose some value since you can find these in G rank composite skills. For instance, Nargacuga Evasion +2 can easily be found in the pretty popular Drawing Arts.
G rank exotic weapons still grant you the Speed Eating skill outside of your skill limit. They can freely equip decorations and Sigils.
GR150: My Tore G rank version
Tired of getting 3 My Tore points every 2 days? Good thing then a new quest becomes available at GR150 allowing you to farm 10 or 30 My Tore points tickets. You only have to fight 2 HC Bulldromes. You can find it by searching for quests with Bulldrome as a target (80/130).
GR200: Zenith monsters
rain server special mention
rain server unlocks Zenith fights starting from GR175 and require Zenith Permits to take them on. Other Zenith fights and their higher levels get unlocked at higher ranks, less brutals than those of the original Frontier.
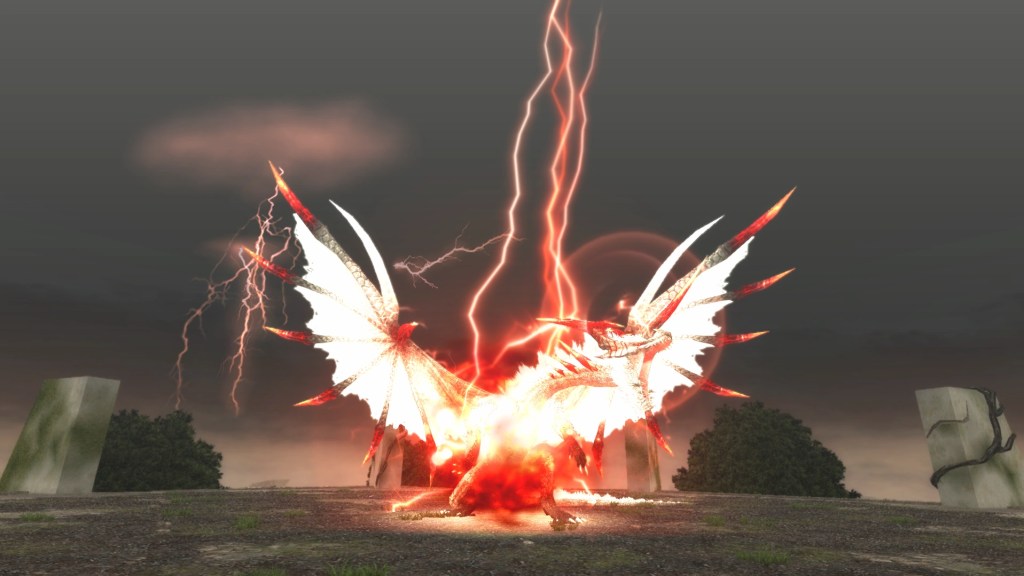
These are Frontier endgame stars, in all the bullshit overpowered AoE glory of Frontier last months. They are quite unique fights so let’s see how they work.
Quest Z rank
Each Zenith monster has 4 base quests, with a difficulty rank going from Z1 to Z4. Each rank without much of a surprise increases the Zenith monster damage and health, also unlocking new moves generally at Z2 and Z4.
Quests ranks get unlocked at GR200, 400, 600 and 800 respectively.
Fights specificities
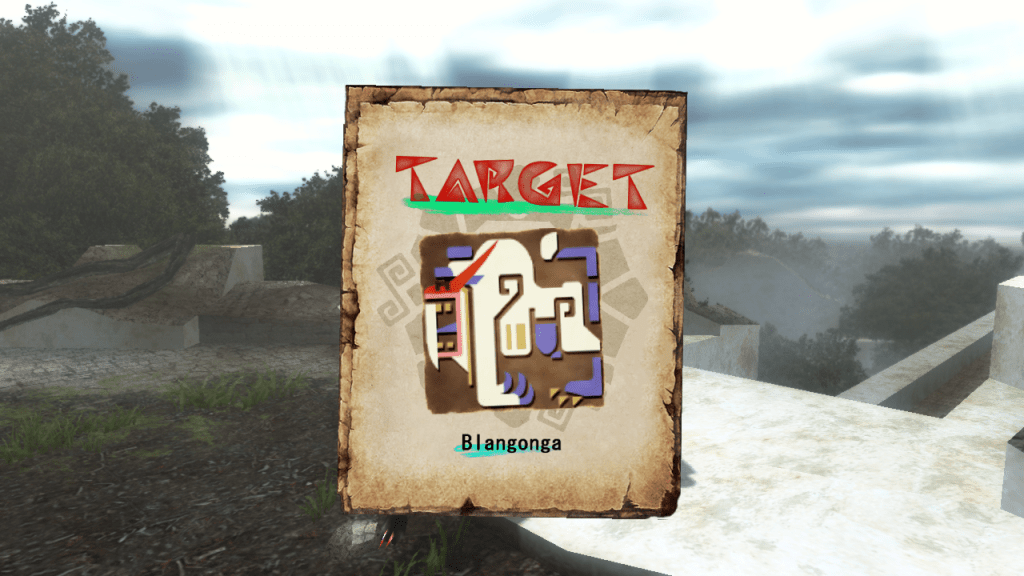
Zenith monsters have an overgrown part on their body called Zenith part. On Blangonga it’s the arms for instance, the horn for Espinas or the tail for Akura Vashimu. Destroying this part is important as it reduces the monster power once broken. A precious drop is also tied to it but we’ll talk about it later.
Zenith monster naturally use Zenith level roars, tremors and winds, above the regular versions of these effects and able to immobilize you for a few seconds. They also use Zenith statuses and elemental blights which are a huge part of their fights. These status conditions are really dangerous and you must find a way to counter or avoid them.
| Status | Effect | Counter | Monsters |
|---|---|---|---|
| Poison | Burn through your health pretty quickly and can only be healed with purple shineys you get when flinching the monster | Poison Resistance as a Z skill reduces the damage but don’t cancel them | Espinas Gasurabazura |
| Sleep | Impossible to wake up unless another player hit you… Or the monster (Z Hypnocatrice will cart you if it hits) | Sleep Resistance as a Z skill turns it into regular sleep which can be cured with an Energy Drink Getting hit by an ally while asleep | Hypnocatrice Inagami |
| Paralysis | Paralyses you then randomly interrupt your actions for a set period of time like if a small monster hit you | Paralysis Resistance as a Z skill | Akura Vashimu |
| Bleed | Deals a lot of damage and can’t be cured by crouching | Require a dedicated item | Hyujikiki Tigrex |
| Fireblight | Consume your HP while also diminishing your max health permanently | Fire res +55 Rolls | Rathalos Midogaron |
| Waterblight | Reduces your stamina regen to next to zero and cancel infinite stamina effects | Water res +55 Rolls | Plesioth Hermitaur Daimyo |
| Thunderblight | Taking a thunder attack in this state will make your hunter enter cardiac arrest. If another hunter won’t come to massage you fast enough, it’s a cart | Thunder res +55 Rolls | Khezu |
| Iceblight | Consume your stamina progressively then freeze you when it reaches 0, leaving you exposed to the monster’s attacks | Ice res +55 Button mashing Getting hit by an ally once freezed | Giaorugu Blangonga |
| Dragonblight | Invert healing items, making you take damage when using them. Cancel any form of health regen | Dragon res +55 Rolls with weapon sheathed | Rukodiora |
I’ll go in more details regarding Z skills when we’ll talk about equipements. Regarding the elemental resistances, you can start by using your SR Skills in the style menu, by pairing together the dedicated elemental res skill and the omni resistance one.
If it’s still not enough and you’re in a rank 15 Guild (a mechanic I’m not too used to so I invite you to get some intel in your server’s Discord), you can go to the Guild Kitchen and cook some Five Colored Soup using the following ingredients:
- Fire res + 30: Onion Sticks + Magma Mango + Ultra Vanilla Bean + Deep Sea Chub
- Water res + 30: Onion Sticks + Dangerous Melon + Ultra Vanilla Bean + Deep Sea Chub
- Ice res + 30: Onion Sticks + Arctic Salmon + Ultra Vanilla Bean + Deep Sea Chub
- Dragon res + 30: Onion Sticks + Mimic Vines + Ultra Vanilla Bean + Deep Sea Chub
All these ingredients can be bought in the Guild Shop from the Guild Hall. For the thunder resistance, you’ll need to excchange the second ingredient with a Demon Pepper, which can only be obtained through the Adventure Cat mechanic. Alas I don’t know how this mechanic works.
Drops
Zenith monsters drops are the same no matter the rank, aside from the Z drop. The drop rates change with each Z quest rank, with the harder quests giving you more chances to get the rarest drops.
| Drop | Z1 chances | Z4 chances |
|---|---|---|
| Vashimu Purple Shl | 65% | 1% |
| Vash. Crystal Fluid | 26% | 3% |
| Vashimu Strange Hair | 5% | 24% |
| Vash. Extreme Fluid | 3% | 65% |
| Deadly Paralysis Sac | 1% | 7% |
Zenith have specific drops tied to each partbreak, with usually a common and a rare version. Here too, the hardest the quest, the higher the chances to get the rare version of the drop.
The Z drop is a partbreak tied to the Zenith monster Zenith part. Each Z quest rank has its own dedicated Z drop. If you get the partbreak, the drop is guaranteed 100%.
| Quest rank | Z drop |
|---|---|
| Z1 | Vashimu Z Tail |
| Z2 | Vashimu Z Mid Tail |
| Z3 | Vashimu Z High Tail |
| Z4 | Vashimu Z Top Tail |
Zenith armors and Zenith skills
Zenith armor pieces count just like standard G rank armors, increasing your skill limit up to 12.
The first 2 upgrade ranks only have one level each, using every Z drop from the linked monster. You’ll improve the piece as a Z, ZF, ZY and ZX version. For ranks ZY and ZX, you have the usual 7 levels to get through.
Skill wise, they’re obviously really generous, granting you in their ZX version usually 25 skill points split amongst 5 different skills. But more importantly, they grant you a Z skill.
Zenith skills are a mechanic similar to Iceborne Secrets, allowing you to push a skill one level higher than his base level. Let’s use the Guard skill (which goes up to Guard +2 initally) as an example and let’s see what happens with one or 2 Zenith pieces.
Les talents Zenith sont une mécanique similaires aux Secrets d’Iceborne qui permettaient de pousser un talent encore plus haut avec quelques différences. Prenons l’exemple du talent Garde (qui monte sur Frontier jusqu’à Garde +2 à la base). Voici ce qui se passe avec ou sans le talent et une ou 2 pièces Zenith.
| Guard | No Zenith Guard Up piece | One Zenith Guard Up piece | Two Zenith Guard Up pieces |
|---|---|---|---|
| 0 | / | / | / |
| 1 | Garde +1 | Garde +2 | Garde +3 |
| 2 | Garde +2 | Garde +3 | Garde +3 |
For the tl;dr:
- you’ll need at least one level of the skill for the Z skill to work (without at least Guard +1, the Zenith pieces are useless)
- Each Zenith X Up increases the X skill by one full level
- The skill can reach one more level if you have it already at max power or use multiple Zenith pieces
- No point in overinvesting (Guard +3 is the max level, Guard +2 and Guard Up +2 is a waste of one Zenith skill)
Zenith skills usually also works with composite skills (for instance if I had here Fortification who’s mixing Guard and other skills, the Guard part of Fortification could have reached Guard +3 with Guard Up).
There’s also a special Zenith skill called Skill Slot Up who impacts your skill limit. Each level of this skill increase your skill limit by +1, meaning you can have up to 19 skills in a full set at max level.
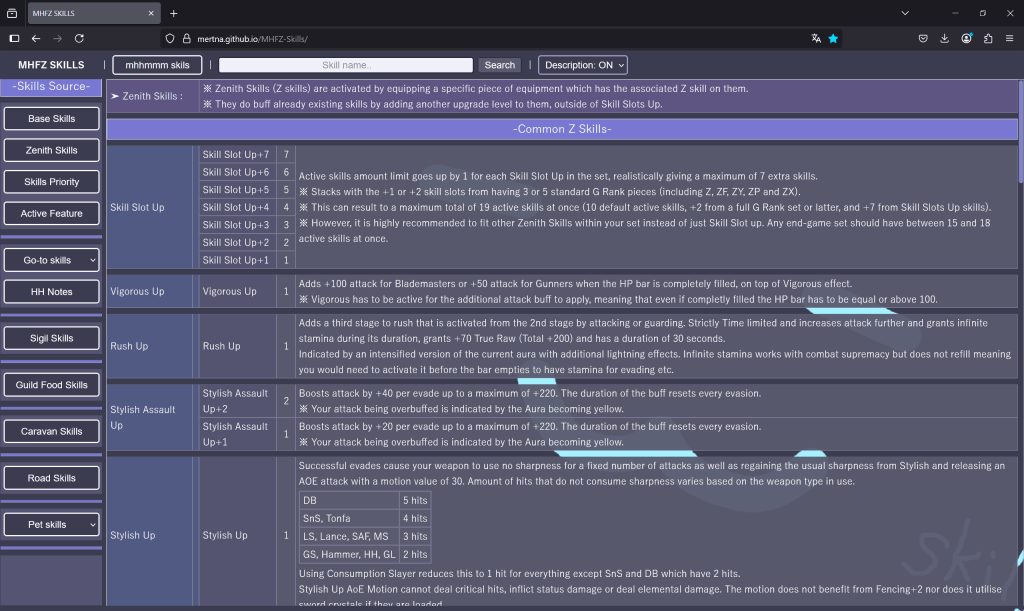
The Zenith skill list and their effects can be found on mertna under Zenith Skills.
Zenith weapons
They’re obviously amongst the strongest weapons ingame and only have 4 upgrades levels. And each level will require obviously the Z drop of the corresponding Z rank.
Like the armor, they have a Zenith skill included and have the hidden skill Zenith Partbreaker. This skill increases the damage dealt to a Zenith part by 50%, indicated by a blue visual effect when you hit the Zenith part. Obviously, this make these weapons reallly strong against Zenith monsters.
Where to begin: make a Korinyi set
Like with any difficulty change, the game basically gifts you with a perfect set to start your adventures. For Zenith monsters, this is the Korinyi set. You can farm this one by doing the dedicated Z1 Midogaron quest. If you kill the monster, you’ll get 25 event drops and you’ll get 25 more if you break both its front legs aka its Zenith part. With 10 drops required per pieces, you can get the full set in essentially one run of the quest (you’ll also need 5 Zenith Rathalos scales, which are pretty easy to get when you slay one).
The set can be found under Zenith Armor at the Workshop. The Korinyi set has a lot of qualities making it a great set to take on Zenith monsters:
- a high defense stat right from the beginning
- 5 in every elemental resistance, meaning you can easily reach the 55 elemental res required to get immune to Zenith elemental blights using a high GSR weapon
- Unaffected +2, which can be increased to +3 with your decos, paired to the 3 Zenith Up skills for winds, tremors and roars, protecting you from their Zenith versions
- Skilled if you make the gunner helm, granting you Speed Eating and True Guts for more survivability
- no need to upgrade it to ZF or higher
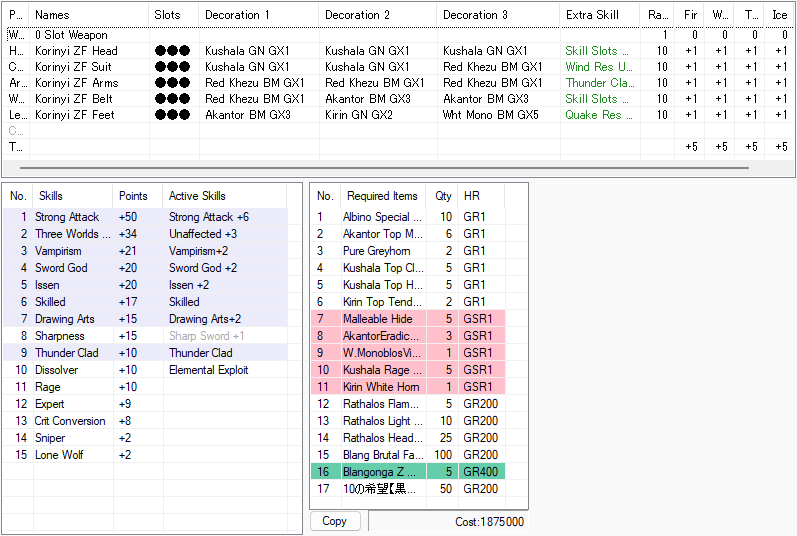
It’s a great basis to make a powerful set to fight Zenith monsters. Here is what I’ve produced using the set searcher for my SnS and Magnet Spike:
If you want to make your own Korinyi set using the set searcher, you’ll need to set it up that way:
- Equipement Types > Event Armor > Event Zenith (you can keep the standard GX decos actives)
- Other Criteria > adding a condition Armor name “contains Korinyi” with Quantity set to “5 or more 5 or less”
That way you’ll force the set searcher to only use Korinyi pieces. It will shows you the results as ZF but the difference between Z and ZF are 5 skill points so there’s not a lot of risk it ends up impacting your build. Priorize Unaffected +3 (for the Zenith interruptions immunity) and Sword God +2 (for Fencing +2), add in Drawing Arts +2 (for Evasion +2) and then add any skill your weapon needs, using mertna’s site recommendations if needed.
After all this you’re set for Frontier’s endgame. Later, you can do your own Zenith mix to take on the Hunting Road intensive marathon. Congrats, you’ve reached the end of Frontier, go forth hunter!
GR 999: UL quests
UnLimited quests are variants of HardCore quests unlocked at Frontier’s final G rank. You’ll fight the HC monster but with increased health and damage. Not much to talk about aside from the challenge, their only interest in to accelerate farming Hiden decos the old fashion way since defeating a UL monster will grant you 100 Soul, Ribbon et Merit from the monster corresponding level.

To get a set of 5 Hiden decos this way, you’ll need to defeat 5 GR1-2 UL monsters, 10 GR3-4 UL monsters and 14 GR5-6 UL monsters (and still farm 425 Soul (Extreme)).
