Like any new opus, Wilds introduces some new fighting mechanics. This article will go in depth on how each of these new systems works, allowing you to better use them.
Wounds
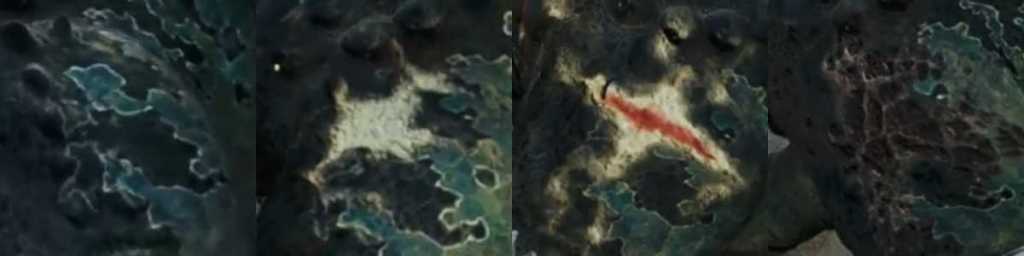
Wounds work like partbreaking in previous games: each monster part has an hidden HP gauge dedicated to wounds and separated from the main HP bar. By dealing enough damage to a part, you will first make a superficial wound, shown by white scarred tissue.
By dealing enough damage to a superficial wound, it becomes an open wound. Open wounds have a localised hitzone who’s put on top of the part hitzone, with higher HZV. Since the hitzone is localised, it’s possible to open multiple wounds on the same part without destroying them if you’re precise enough. Each open wound has its own unique HP bar and they’re destroyed when you deal enough damage or if you land a Focus Strike on them. Notable case, the SnS Focus Strike change when you connect with a superficial wound, allowing to open wounds more easily.
Each part has a predefined number of potential wounds. Once you’ve destroyed a wound, it shows dark necrotic tissues, indicating that there’s no point insisting on that hitzone.
Destroying an open wound usually grants a reward. These rewards have their own drop table for each monster et usually gives common drops. Guardians are a special case as they can gift Guardian Pelt and Guardian Scale, drops that are limited to non-tempered quests rewards and wound destructions (Doshaguma and Fulgur Anjanath for Pelts, Rathalos and Ebony Odogaron for Scales).
When you use a Focus Strike, the game uses a special unique hit I’ll call « destruction hit » who will destroy the wound, it’s not the Focus Strike itself who destroys the wound. This destruction hit doesn’t appear if you destroy the wound by dealing enough damage to it.
The destruction hit inflicts a fixed pourcententage of the total monster’s health. If you hit multiple wounds at once with your Focus Strike, each wound will get its own destruction hit and each consecutive destruction hit get amplified. Destroying 3 wounds at once can deal around 3% of the monster’s total health.
| Destruction hit on | Destruction hit damage |
|---|---|
| 1st wound | 0,6% of the monster total health |
| 2nd wound | 1% of the monster total health |
| 3rd wound | 1,4% of the monster total health |
The bow is a special case, its Focus Strike dealing only one destruction hit, dealing 1% of the monster health (like when you destroy the second wound with an attack that connects with 2 or 3 wounds at once) et no matter the amount of wounds destroyed in the Focus Strike.
The best philosophy is thus to deal a max of damage on open wounds to exploit the special hitzone then to destroy them with a Focus Strike while trying to destroy as much as possible in the same attack, a technic requiring some control over your dps and moves.
Tempered wounds
Tempered monsters have scars on 3 of their parts. This scars can be open by dealing enough damage, creating blue wounds. Destroying these wounds will grant you Wyverian Bloodstones who are used to make Artian weapons at the Melding Pot in Suja.
The destruction hit is 30% more powerful on tempered wounds than on regular wounds. Destroying all 3 alpha wounds at once can deal up to 4% of the monster’s total health.
| Destruction hit on | Dégâts du coup de destruction |
|---|---|
| 1st tempered wound | 0,78% of the monster total health |
| 2nd tempered wound | 1,3% of the monster total health |
| 3rd tempered wound | 2% of the monster total health |
If you reach non tempered wounds with the same Focus Strike, the game will still follow that logic according to the wound destruction order. If you break 2 normal wounds then one tempered, the wounds will deal 0,6%, 1% (2 normals) and then 2% (1 tempered). If the tempered wound is destroyed first, it will deal 0,78% then the normal wounds will deal 1% and 1,4% respectively.
Currently, 3 monsters don’t take increased damage from tempered wounds, those being Nerscylla, Lagiacrus and Seregios.
Guardian wounds
Guardian monsters can regenerate their wounds after 20s if you don’t destroy them. The wound regeneration doesn’t affect the predetermined number of wounds on the part. For instance, Guardian Doshaguma can get up to 3 wounds on a front leg. If you let the first wound regenerate, you’ll still be able to get up to 3 wounds on that front leg.
Destroying 3 wounds will pull them out of their rage mode, leaving them slower and vulnerable. When they change area, they will regenerate in puddles of wylk. This regeneration can’t be stopped and closes the open wounds on their body. Wylk puddle don’t regenerate already destroyed wounds. You’ll need to target parts without necrotic dark tissues to create new wounds and put the Guardian out of its rage mode.
Tempered wounds works in a special way for Guardians. While they contribute to pulling them out of rage mode, they can’t be regenerated once open, be it by time or a wylk puddle. Also, already destroyed tempered wounds get regenerated as scars when the Guardian uses a wylk puddle. The renewed tempered scars won’t give you additionnal Wyverian Bloodstone when destroyed.
Offset
Offset are triggered when some attacks hit the monsters as their own attacks connect. They can then throw the monster back.
Offset work like a status with their own hidden gauge. The inital gauge starts at 1, meaning any Offset attack will throw the monster back. After every successful Offset, the max gauge gets increased by 150 for the vast majority of monsters (151 after the first Offset, 301 after the second one…) with a cap at 601.
The exceptions are:
- Chatacabra, Quematrice, Lala Barina, Balahara et Yian Kut-Ku with a 100 max gauge increase and a cap at 401
- Nu Udra, Guardian Fulgur Anjanath, Jin Dahaad et Zoh Shia with a 201 max gauge increase and a cap at 801
Your Offset damage are based on the move you use, no matter your attack, element or affinity. The moves and their Offset power are as followed:
- GS: Offset Rising Slash (100/150/200 based on charge level)
- Marteau: Charged Upswing, Upswing (100)
- HH: Offset Melody (100)
- SA: Axe: Offset Rising Slash (80)
- IG: Strong Descending Slash (90), Strong Descending Thrust (60)
- HBG: Wyverncounter Ignition (80/100/120 based on charge level)
Unlike regular status, Offset gauge has no decrease over time.
Perfect guard
First, credits to Seymor62 on the Gathering Hub Discord who figured out how perfect guard works.
At the beginning of a guard, you get a few frames where blocking an attack will trigger a perfect guard. Landing a perfect guard is signaled with a visual effect and a special sound.
Perfect guard is different than regular guard. In Wilds, each attack has a few new parameters, one of them being « _IsTechGuardBreak ». If this parameter is set to false (as it is in most attacks), perfect guarding a move will trigger the weak knockback animation, no matter the guard thresholds (you can block a strong knockback move with a HBG who has the worst guard and a lance who has the strongest and you’ll end up in both case with a weak knockback). If the parameter is set to true, perfect guarding will trigger a medium knockback (10% of the original attack damage and 25 stamina cost).
Since TU4, perfect guard will prioritize weak knockback if your regular guard results in a weak knockback (most notably for lance and GL with the Guard 3 skill equipped).
For the following demonstration, I’ll use the Lagiacrus body press and the Seregios spinning kick. You can find the data for the body press under the video for those curious enough. Obviously the real data is way longer and I removed a lot of stuff to only show the most important parts.
{
            "name": "",
            "keyName": "BodyPress_Head",
                    "_Attack": 70.0,
                    "_GuardType": "[0]NORMAL",
                    "_VersusGuardPower": 60.0,
                    "_IsTechGuardBreak": true,
                }
            }
        },
Monsters with moves going through perfect guard
Going through the datamine, we can find a list of all monsters with moves with the _IsTechGuardBreak set to true. Some moves alas have no name and it can be hard to know what is what even with the names. This list has been established with this data and personal experience so some moves might be missing:
- Quematrice: tail spin
- Doshaguma & Guardian Doshaguma: moves where they ground pound with both paws at once, moves where they destroy the ground
- Uth Duna: double flying body press, tsunami in the dam lake, AT charge
- Rey Dau: wing downward strikes, all railguns
- Nerscylla: charge with the jaws open before a bite
- Hirabami: giant tail spin attack
- Ajarakan: meteor move, putting its legs in the ground and destroying it
- Nu Udra: body press, backside body press, grab, AT big oil explosion
- Jin Dahaad: body press, charged breath (when it inhales before breathing in a straight line), explosive breath right in front of him
- Guardian Fulgur Anjanath: AoE from the electric bite down
- Zoh Shia: ground pound with both wingarms into giant crystal explosion (both hits), charged fire ball, fire breath in front of his body, crystal bursting from the ground during phase transition, fire explosion when he digs both black legs in the ground, lightning sweeping breath
- Arkveld: dragon explosions (lines and nova), crushing attacks involving both wings at once (hammer and all chains forward), double chain sweep into crushing explosion (all 3 hits)
- Seregios: sweeping kick, kick following going airborne with a tail sweep, huge drop kick with the camera zoom out
- Lagiacrus: body press, side body slam, electric discharge (base and charged), rush into jump into huge thunder discharge (all hits)
- Omega: rampage in Pantokrator, flamethrower, 5 lasers patterns, Starboard/Larboard Cannon, Mustard Bomb, Nerscylla clone explosive shotgun laser
If you’re not familiar with guard thresolds, attack knockback power and the overall inner workings of guard in MH, this article might interest you (the perfect guard section at the end is the same as what you’ve read here).
Power Clash
Power Clash are triggered by blocking the monsters attacks. They require you to mash your Triangle button to push back the monster after an animation where you hold it back using your weapon. Only specific monsters can trigger a Clash, those being Chatacabra, Doshaguma, Uth Duna, Ajarakan, Guardian Doshaguma, Guardian Arkveld, Blangonga, Arkveld, Lagiacrus, Seregios and Omega.
Like Offset, they work like a status. The base gauge starts at 100 for every concerned monster. Unlike regular status who increase in a linear fashion with a set amount, Clash tolerance builds up progressively. After the first Clash, you’ll need to fill a 600 Clash gauge (+500), then 1600 for the third (+1000) then 3100 for the fourth (+1500). I didn’t went all the way to a fifth one. Just know that in most hunts you’ll trigger 2 or 3 at most.
Clash damage are the same for every guarding weapon and build up simply by blocking hits (including non physical hits like breaths and roars). The build up is based on the attack knockback power as follows:
| Knockback power | Regular guard | Perfect guard |
|---|---|---|
| 50 or less | 25 | 25 |
| Over 50 | 25 | 50 |
When the gauge is full, only specific monsters moves can trigger a Power Clash.
Unlike regular status, Clash gauge has no decrease over time.
